Honey Harvesting & Care
How to Store Honey: The Complete Guide to Keeping It Fresh for Years
Honey is one of the few foods that practically refuses to spoil — but only if you store it correctly. Get the moisture, the container, and the temperature right and your harvest will stay perfect for years. Here is exactly how to do it, step by step.
Every beekeeper eventually hits the same glorious problem: more honey than jars. It might happen on your very first harvest, or it might take a season or two, but at some point you will find yourself standing over a bucket of warm, golden honey wondering how to keep it exactly like this — clear, fragrant, and pourable — for as long as possible.
Here is the encouraging news. Honey is one of the most storage-friendly foods on the planet. Archaeologists have found pots of honey in ancient tombs that were still perfectly edible. It does not need refrigeration, it does not need preservatives, and it does not come with a tight deadline. What it does need is a handful of very specific conditions, and the difference between honey that stays beautiful for years and honey that ferments in a few months almost always comes down to those conditions.
The three big enemies of stored honey are moisture, heat and light, and fluctuating temperatures. Everything in this guide comes back to controlling those three. We will walk through the entire process from the moment you pull a capped frame out of the hive to the moment you tuck a labeled jar onto a shelf, and we will cover what to do when things go sideways — cloudy honey, gritty honey, bubbles in the jar, or the sour smell that means fermentation has started.
If you are still earlier in the journey and the harvest is a while off, our guide on how to start beekeeping will get you oriented, and the wider beekeeping guide covers the fundamentals of colony care. But if the honey is already in a bucket, read on.
Get Your Storage Setup Ready
Food-grade jars, buckets, and lids sized for your harvest.
Shop Honey Storage ContainersWatch: How to Store Honey Step by Step
A visual walkthrough of the full process, from capped frame to sealed jar.
Before we get into the written steps, this short visual overview will show you how the whole sequence fits together — the extraction, the settling, the straining, and the final bottling and storage. Watch it once before you start so the individual steps below make sense as a single continuous workflow.
Takeaway: honey is almost entirely hands-off once it is in a clean, sealed container. The care you put in during extraction and bottling is what earns you years of effortless storage afterward.
1. Why Storage Technique Matters More Than Most Beginners Realize
Honey forgives a lot. It does not forgive moisture.
There is a comforting idea that honey never goes bad, and in a broad sense it is true. Properly ripened honey with a low moisture content has outlasted the civilizations that made it. But that durability is conditional, and the conditions are not automatic. They are created by the bees, and then handed over to you.
What bees do is remarkable. Foragers bring in nectar that is mostly water — sometimes very watery — and house bees spread it through the comb, fanning it with their wings to drive off moisture until the nectar becomes honey at a sugar concentration high enough to resist microbial growth. Then they cap the cells with wax. When you uncap that comb, you are taking custody of a finished, stable product. Your job is not to preserve it so much as to avoid undoing what the bees already achieved.
The three ways storage goes wrong
Absorbing moisture from the air. Honey is hygroscopic, meaning it pulls water out of the atmosphere. Left in a loosely covered container in a humid room, its moisture content creeps upward until it is no longer stable — and then naturally occurring yeasts can begin to ferment it.
Excessive or fluctuating heat. Warmth makes honey thinner and more aromatic in the short term, but sustained high heat darkens it, drives off delicate aromatics, and gradually breaks down some of the qualities people prize in raw honey. Repeated hot-cold cycling is worse than a steady temperature.
Light and contamination. Direct sunlight degrades honey over time, and any container that previously held something aromatic or chemical can transfer that to honey, which is an excellent absorber of surrounding flavors.
Bottom line: the bees did the hard part. If you keep moisture out, keep the temperature moderate and steady, keep the light off, and use clean food-grade containers, honey takes care of itself.
There is one more reason to take this seriously. A first-year beekeeper who bottles honey wet often only discovers the problem months later, when a jar starts bubbling or tastes faintly alcoholic. At that point there is no fixing it. Everything that follows this section exists to prevent that moment.
Start With Clean Equipment
Spotless, bone-dry containers are the foundation of good storage.
Find Food-Grade Buckets2. The Science of Shelf-Stable Honey
Understanding why honey resists spoilage tells you exactly what to protect.
Honey is not preserved by any single trick. It is preserved by a combination of factors that work together, and each one points to a practical storage rule.
Low moisture content
Ripe honey typically has a moisture content in the high teens or lower as a percentage, and that is the single most important number in this whole subject. At that concentration, the sugar in honey exerts enough osmotic pressure to pull water out of most microorganisms, which effectively shuts them down. Honey with more water in it — from uncapped cells, from a wet harvest, or from humidity absorbed in storage — loses that advantage. If you want certainty, a honey refractometer measures moisture directly, and it is the most useful specialist instrument a hobbyist can own.
Acidity and natural chemistry
Honey is genuinely acidic, with a low pH that discourages microbial growth. It also contains small amounts of hydrogen peroxide produced by an enzyme the bees add, which provides a mild antibacterial effect. Both of these are natural properties of honey — nothing you need to add or manage — but both are undermined if the honey is diluted with moisture.
Sugar concentration
Honey is overwhelmingly sugar and water, with trace amounts of enzymes, acids, minerals, and pollen. The sugar concentration is what makes honey a hostile place for bacteria and yeasts. This is why a jar of honey that has crystallized is still perfectly fine: crystallization is simply sugar coming out of solution as the glucose forms crystals. It is a texture change, not a spoilage signal.
What this means for storage
- Seal containers tightly. The biggest risk is water vapor entering, not anything leaving.
- Bottle only ripe honey. If cells were uncapped or the honey seems thin and runny, let it evaporate further before sealing it away.
- Keep everything dry. Wet jars, damp lids, or rinsed containers that were not fully dried all introduce exactly the moisture you are trying to exclude.
- Avoid dilution. Never add water to honey intended for storage, and never mix wet and dry batches without considering the combined moisture.
Once you internalize those four points, most of the rest of honey storage becomes obvious. A good reference book on colony management will explain the biology in more depth; our roundup of the best beekeeping books points you to the ones worth reading.
Want to Measure Moisture?
A refractometer removes the guesswork from every batch.
Check Honey Refractometers3. Choosing the Right Storage Containers
The container is the only thing standing between your honey and the atmosphere. Choose well.
Not every vessel is suitable for honey, and the reasons are more interesting than they first appear. Honey’s acidity means it can react with some metals. Its hygroscopic nature means it absorbs odors from plastics and previous contents. And its thickness means whatever you store it in should be easy to fill and easy to pour from later.
Glass
Glass is the gold standard for honey that will sit on a shelf. It is completely non-reactive, it does not absorb or transmit flavors, it seals beautifully, and it lets you see what is happening inside the jar. The downsives are weight and fragility — glass is awkward for bulk storage and unpleasant to drop. For finished, ready-to-use honey in moderate quantities, though, glass is hard to beat.
Food-grade plastic
Modern food-grade plastics are excellent for honey and far more practical for bulk. They are light, cheap, shatterproof, and available in sizes from small squeeze bottles to large buckets with gasket lids. The rule is simple: it must be genuinely food-grade, it must not have held anything else, and the lid must seal. Over very long periods plastic can allow a small amount of moisture exchange and may take on faint odors, so for multi-year storage, transferring to glass is a good habit.
Stainless steel
Food-grade stainless steel is what serious beekeepers use for settling tanks and bulk holding. It is inert, durable, and easy to clean — but it is expensive, and ordinary steel, iron, aluminum, or tin will react with honey and ruin both the flavor and the vessel. If you are not sure whether a metal container is food-grade, do not use it.
| Container | Best For | Keep In Mind | Seal Quality | Check Price |
|---|---|---|---|---|
| Glass JarsBest for Long-Term Shelf Storage | Finished honey you will open, use, and display |
|
Excellent Top Pick | Check Price on Amazon |
| Food-Grade Plastic Squeeze BottlesBest for Daily Kitchen Use | Small quantities, drizzling, gifting |
|
Very good | Check Price on Amazon |
| Food-Grade Buckets with Gasket LidsBest for Bulk Storage | Large harvests held before bottling |
|
Very good | Check Price on Amazon |
| Stainless Steel TanksBest for Serious Volumes | Settling and holding honey before bottling |
|
Excellent | Check Price on Amazon |
| Ordinary Metal Tins or CansNot Recommended | Avoid for honey storage entirely |
|
Poor and risky | Check Price on Amazon |
Preparing containers before filling
Whatever you choose, the container must be clean and completely dry. Wash with hot soapy water, rinse well, and let every container air-dry fully — upside down, with plenty of time. Even a tablespoon of rinse water left in a bucket can introduce enough moisture to cause trouble later. If you are reusing jars, inspect the lids and gaskets; a lid that has absorbed an odor or lost its sealing ability is a weak point.
Habits Worth Building
- Keep a dedicated set of containers for honey only
- Air-dry containers upside down overnight before filling
- Use gasket lids on bulk containers for an airtight seal
- Store glass jars in a location where they will not be knocked over
Habits That Ruin Honey
- Reusing buckets that held chemicals, paint, or strong odors
- Filling containers that are still warm from washing and damp inside
- Leaving lids loose or unsealed between uses
- Using unlined or reactive metals for holding honey
Build Your Container Kit
Match the vessel to the volume you actually harvest.
Browse Storage Containers4. Step 1: Harvest and Uncap the Frames
Storage starts at the frame. Only capped honey is ripe honey.
The single most important rule of harvesting is to take only frames where the honey is capped — sealed under a fresh layer of wax. Capping is the bees’ way of telling you the honey is finished and its moisture has been driven down to a stable level. Uncapped cells may still contain watery nectar, and that extra moisture is the number one cause of fermentation later on.
Remove the super on a dry, warm day, use a bee escape or gentle brushing to clear the bees from the frames, and carry them straight indoors or into a closed vehicle so you do not attract robbers. Set up an uncapping tray or tub beneath your work area to catch the wax cappings and any honey that runs off — that wax is valuable and the drips are still perfectly good honey.
Uncap only fully capped cells and catch every drip — nothing here goes to waste.
Checking that the honey is ripe
Give each frame a quick shake over the tray. If nectar sprays out of cells, that frame is not ready. Honey that stays put in the comb when the frame is turned sideways is ripe. For a more precise check later, a refractometer reading will confirm moisture, and that confidence is worth having before you seal a large batch away.
Work cleanly
Uncapping is sticky, so lay down covers, keep your hands clean, and keep the frames covered when you are not working on them. Wax cappings are also worth saving — press them in a straining bag later and you will recover a surprising amount of honey from them.
Once the frames are uncapped, they go straight into the extractor. If you are still deciding on that equipment, our guide to the best honey extractors covers what to look for, and learning the parts of a bee hive and their functions helps you understand exactly which boxes hold harvest-ready honey.
Uncapping Tools Make This Easier
Forks, scratchers, and heated knives speed up a sticky job.
See Uncapping Tools5. Step 2: Extract the Honey
Getting the honey out of the comb without adding moisture, air, or debris.
Extraction is simply spinning honey out of the comb by centrifugal force. Load the uncapped frames into the extractor, either tangentially (flat against the wall, one or two at a time) or radially (angled toward the center, many at once), and spin them at a moderate speed. Turn the frames and spin again so both sides release.
Speed matters more than force. Cranking too hard can damage comb, blow honey into a froth, and introduce far more air bubbles than you want. A steady, patient spin keeps the honey clean and thick.
Spin gently, then open the honey gate and collect everything in a clean, dry bucket.
Keeping the honey warm enough to flow
Honey flows best when it is comfortably warm — around room temperature or slightly above. On a cool day, cold honey can be sluggish and slow to leave the comb. Bring supers indoors the night before extraction and let everything come up to a workable temperature. Never try to force the process with aggressive heat, which degrades flavor and quality.
Watch for debris
Extraction inevitably pulls small bits of wax along with the honey. That is expected, and the next step deals with it. What you want to avoid is anything that does not belong: dirt, leaves, dead bees, or stray comb from the yard. Work in a clean space, and keep the collection bucket covered whenever it is not being filled.
Heads-up: extraction day is when your kitchen becomes a honey factory. Protect floors and surfaces, keep a bowl of warm water and cloths nearby, and accept that everything will be slightly sticky for a few hours.
6. Step 3: Settle and Strain the Honey
Separate the wax, let the bubbles rise, and finish with a clean pour.
Freshly extracted honey contains wax fragments and a lot of trapped air. Both need to come out before bottling, and the method is pleasingly simple: strain the honey through a coarse sieve to remove the big wax pieces, then through a finer filter to catch the small ones, and finally let the honey sit undisturbed in a covered settling bucket until the air bubbles rise to the surface as foam.
Strain twice, then leave the honey to settle so trapped air can rise and be skimmed off.
How long to let honey settle
Give the honey at least a full day or two in a covered container before bottling. During that time, the wax fragments either float to the top or settle, and the air whipped in during extraction rises as a light foam. Skim that foam off before filling jars. Longer settling is fine — there is no downside to patience here, and it makes bottling dramatically cleaner.
What about filtering too much?
There is a real debate about how fine to filter. Very fine filtering removes almost everything, including some pollen, and produces the crystal-clear look many people expect from commercial honey. Coarse straining leaves more character and more of what arrived naturally in the comb. Neither is wrong. Choose based on the result you want, and be aware that ultra-fine filtration also strips out more of the tiny particles that act as crystallization seeds.
Do
- Strain into a covered food-grade container
- Use a coarse sieve first, then a finer filter
- Let the honey settle before bottling
- Skim the foam off the top first
Avoid
- Pressing or squeezing cappings bags forcefully
- Straining into a damp or recently rinsed container
- Leaving the settling bucket open to room air
- Filtering hot honey to speed things up
Straining Made Simple
Double-layer strainers and settling buckets in every size.
Shop Honey Strainers7. Step 4: Bottle at the Right Consistency
Clean, dry jars plus smooth-flowing honey equals a jar that lasts for years.
Bottling is where storage success is really decided. The honey should be settled and skimmed, the containers should be perfectly dry, and the honey should be warm enough to pour smoothly without being hot. If your storage bucket has a honey gate, this is straightforward; otherwise a bottling bucket or a clean jug and funnel will do the job.
Fill slowly into bone-dry containers in a comfortably warm room.
Getting the temperature right
Honey pours beautifully when it is at a gentle warmth — think comfortable room temperature, or a little above if the honey is thick. If you need to loosen a crystallized or very thick batch, stand the container in a warm water bath rather than applying direct heat, and never microwave honey in a bid to speed things up. Overheating darkens honey, drives off aroma, and shortens its shelf life.
Filling technique
Fill containers slowly and let the honey settle as it goes so you do not trap large air pockets. Leave a small headspace below the rim so the lid seats properly and honey is not forced out when you close it. Wipe any drips from the threads and rim before sealing — sticky rims attract pests and make lids difficult to open later.
Small jars versus large ones
Store honey in the sizes you will actually use. Every time you open a jar, you expose the remaining honey to air and humidity. One large jar opened repeatedly degrades faster than several smaller ones used one at a time. This is the same principle behind decanting bulk honey into individual containers rather than dipping into the same bucket all season.
8. Step 5: Seal, Label, and Date Every Container
The five-minute habit that saves you from mystery jars a year later.
Seal the containers while the honey is still fresh and the rims are clean. A proper airtight seal is not a formality — it is the mechanism that keeps atmospheric moisture out of honey over months and years. Screw lids down firmly, check that any gasket is seated correctly, and press pop-style lids until they seal.
Seal firmly, then write the source and date while you still remember them.
What to write on the label
- Harvest date — the single most useful piece of information later on.
- Forage source if you know it — wildflower, clover, a particular garden, a specific apiary site.
- Batch or supers identifier so you can tell one extraction from another.
- Moisture reading if you measured it — helpful for future reference.
- Any notes such as “comb honey”, “chunk honey”, or honey with added comb.
Why dating matters
Honey does not carry a use-by deadline, but you still want to rotate stock and use older jars first. Labels also turn a shelf of identical jars into a usable inventory, and they make gifting far more pleasant. If you ever sell honey, clear labelling becomes a legal and practical requirement depending on where you live — our guide to beekeeping laws by state covers the wider regulatory picture.
9. Step 6: Store Honey in the Right Conditions
Warm, dry, dark, and steady. That is the entire formula.
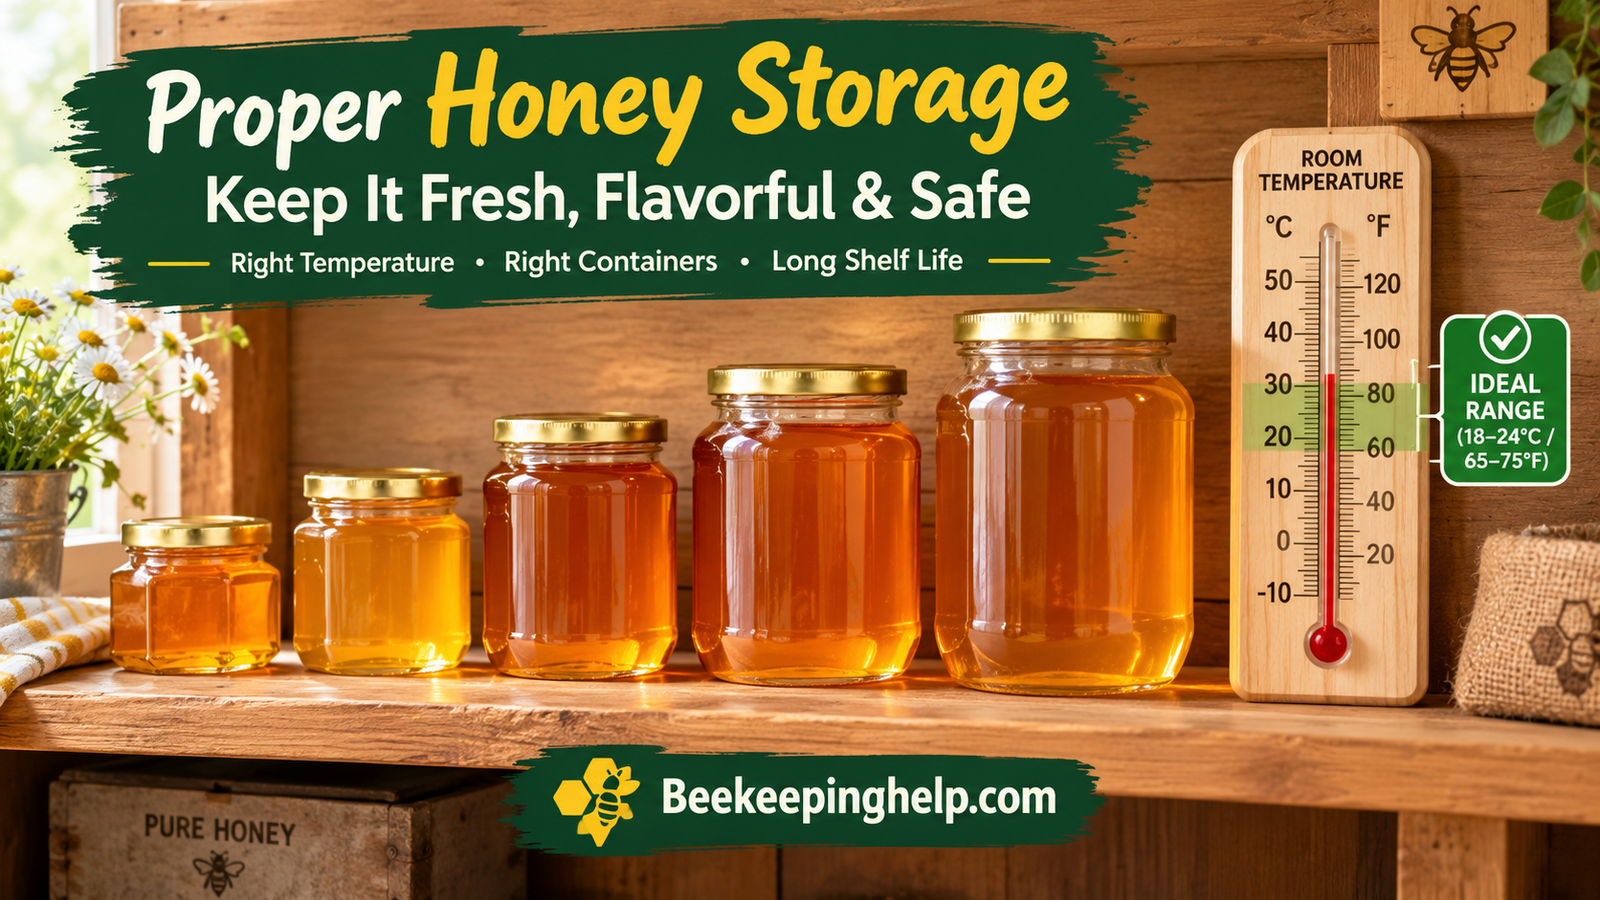
The ideal storage spot for honey is a shelf in a dry room at a steady, comfortable room temperature, away from direct sunlight and well away from any heat source. Kitchens are often surprisingly poor choices because they swing between warm and cool and tend to be humid during cooking. A pantry, cupboard, or dry utility room is usually better.
Shelves, not floors: dry air, moderate temperature, and no direct light.
Temperature: warm enough to stay liquid, cool enough to stay stable
Honey is happiest in the range most people find comfortable indoors. Stored there, it stays pourable and keeps its character for a very long time. Cooler storage is not harmful — it simply accelerates crystallization, which is a cosmetic change rather than a problem. What you want to avoid is a spot that swings from hot to cold repeatedly, or anything close to a radiator, oven, sunny window, or uninsulated attic.
| Condition | What Happens | Risk Level | What To Do |
|---|---|---|---|
| Dry, Dark, Room TemperatureBest Overall | Honey stays liquid, aromatic, and stable | Minimal Ideal | Nothing — just keep lids tight |
| Cool Pantry or Cellar | Honey gradually crystallizes | Low | Warm gently before use if preferred |
| Sunny Window or Warm Shelf | Darkening, aroma loss, faster ageing | Moderate | Move to a dark cupboard |
| Humid Room, Loose Lids | Moisture absorption, fermentation risk | High | Reseal and relocate immediately |
| Hot Attic or Near a Stove | Quality loss and possible container damage | High | Move to stable conditions at once |
Keep containers off the floor
Floors are colder, damper, and more likely to be cleaned with water or chemicals around them. Shelving is better in every respect, and it also makes rotation and inspection easy. If you are storing many jars, arrange them oldest at the front so you naturally use stock in order.
Where you keep bees can affect how your harvest behaves too, since forage and climate shape honey composition. Our guide to where to place a beehive and keeping bees in your backyard will help you think about the wider environment.
10. Managing Crystallization
Cloudy, gritty honey is not spoiled honey. It is honey doing something perfectly normal.
Almost every beekeeper gets a panicked message eventually: “My honey has gone solid — is it still good?” The answer is an unqualified yes. Crystallization happens when glucose separates from the water in honey and forms crystals. It is a natural physical process, it does not affect safety, and it is easily reversed.
How quickly honey crystallizes depends mostly on the ratio of glucose to fructose in that particular nectar source. Honeys with more glucose crystallize quickly; honeys with more fructose stay liquid much longer. This is why some jars turn grainy within weeks while others remain clear and pourable for a year or more. Temperature matters too: cool storage accelerates crystallization, while warmth slows it.
Crystallization is reversible and harmless — only heat damage is permanent.
How to return crystallized honey to liquid
Stand the jar or container in a warm water bath and let it warm slowly, stirring occasionally once the honey loosens. Keep the water warm rather than hot — the aim is to dissolve the crystals, not to cook the honey. It may take a while for a large container, and patience produces a far better result than rushing.
Embrace it instead
Many people actively prefer crystallized honey. It spreads like butter, does not drip, and has a pleasant texture on toast. If you want to encourage crystallization into a smooth, creamy consistency, seed a batch with a small amount of finely crystallized honey and store it in a cool place. That is how creamed honey is made.
Remember: crystallization is a texture change, not a sign of spoilage. Fermentation is what spoilage looks like — bubbling, foam, and a sour or yeasty smell — and we cover exactly how to spot it in the troubleshooting section below.
Warm Honey Gently
Gentle warming equipment keeps flavor intact when you liquefy.
See Honey Warming Gear11. Long-Term and Bulk Storage
When you have more honey than jars, the strategy changes.
Large harvests are best handled in two stages: hold the honey in bulk containers until you are ready to bottle, then decant into smaller containers for everyday use. Bulk storage gives you time to settle and strain thoroughly, and it means you are not handling honey repeatedly.
Sealed food-grade buckets on shelving, with freezing as a long-term option.
Bulk containers
Food-grade buckets with gasket lids are the practical choice for most beekeepers. They are inexpensive, light enough to move when full, and available with spigots or honey gates that make decanting much easier. Whatever you use, the seal is what matters most: a bulk container that breathes will slowly take on moisture and can eventually ferment, which is a far more expensive loss than a single jar.
Freezing honey
Honey freezes well and freezing is a legitimate long-term storage method, particularly for comb honey or for honey you want to protect against crystallization for a while. Leave headspace for any expansion and let containers come to room temperature before opening, so condensation does not form on cold surfaces and drip into the honey.
Comb honey and chunk honey
Comb honey needs cooler, drier storage than liquid honey and is more vulnerable to wax moth damage and to temperature swings that cause weeping. Keep it cool and protected, and if you are storing drawn comb from supers rather than finished comb honey, freezing the comb before storing it kills any wax moth eggs and larvae. Pests in stored equipment are a real issue — our article on robbing in beekeeping explains how stored honey attracts unwelcome attention from other colonies too.
Storing honey you intend to sell or gift
If you plan to sell honey or give it away, keep batches separate and well labelled, and store them so that each batch remains identifiable. Bulk storage is also the point where profitability becomes real; our look at whether beekeeping is profitable covers the wider economics.
Strengths of Bulk Storage
- Fewer containers to fill and seal
- Honey can settle fully before bottling
- Cheaper per unit of storage space
- Easy to blend batches if you want consistency
Watch Out For
- Heavy containers that are awkward to pour
- Repeated opening lets humidity in
- Harder to see what is happening inside
- One bad seal affects a large volume
12. Troubleshooting Common Storage Problems
How to tell harmless changes from genuine spoilage — and what to do about each.
Most honey “problems” turn out to be cosmetic. A few are not. Here is how to tell them apart quickly.
Foam and bubbles mean moisture and yeast. Even crystals are simply texture.
Signs that honey is fermenting
- Bubbling or a rising foam layer that keeps growing over days.
- A fizzy, yeasty, or sour smell when the jar is opened.
- An alcoholic or sharp taste rather than the honey’s usual flavor.
- Pressure or hissing when the lid is opened, indicating gas production.
Fermentation is caused by yeasts acting on honey with too much moisture. It is not dangerous in the way spoiled dairy is, but the honey is no longer the product you intended. Lightly fermented honey is sometimes repurposed for cooking or for making mead, but it should not be stored as finished honey or sold as such.
Preventing it in the first place
Measure moisture if you can, bottle only ripe honey, keep containers bone-dry and airtight, and store them away from humidity. If a batch seems thin and you are unsure, leave it to evaporate further in a warm, dry room with airflow above the surface before sealing it away.
Other issues worth knowing
| Problem | Likely Cause | Serious? | Fix |
|---|---|---|---|
| Foam and BubblesCheck First | Too much moisture, trapped air, or early fermentation | Often yes Act Now | Skim, test moisture, or use promptly |
| Solid or Grainy Honey | Natural glucose crystallization | Not at all | Warm gently to re-liquefy |
| Darkening Over Time | Heat and light exposure | Cosmetic | Move to a cooler, darker spot |
| Sticky Rim or Lid | Drips left when bottling | Minor | Wipe clean and reseal |
| Ants or Pests Nearby | Residue on containers or open storage | Manageable | Clean, seal, and elevate containers |
One related note on hygiene: never feed bees honey of unknown origin or honey bought in a shop, as it can spread disease between colonies. If you are supplementing a colony, use appropriate feed and equipment — see our guides to what to feed bees, the best bee feeders, and how to make a bee feeder.
Test Before You Store
Know your moisture content and avoid the most common failure.
Check RefractometersFrequently Asked Questions About Storing Honey
How long does honey last in storage?
Indefinitely, provided it was ripe when bottled and is kept sealed in a dry place at a moderate temperature. Honey found in ancient tombs was still edible. In practice, most beekeepers find their honey is eaten long before storage becomes an issue.
Does honey need to be refrigerated?
No, and refrigeration is actively unhelpful. Cold temperatures accelerate crystallization, making honey thick and gritty much faster. Room temperature in a dry, dark cupboard is ideal.
Why did my honey turn hard and grainy?
That is crystallization, and it is completely natural. Glucose in the honey has formed crystals. To restore it to liquid, stand the container in a warm water bath and stir occasionally as it loosens. It is perfectly safe to eat either way.
What is the best container for storing honey?
Glass jars are ideal for honey you will keep on a shelf, because glass is non-reactive and does not transmit odors. Food-grade plastic containers with airtight lids are excellent for bulk storage and everyday use. Avoid ordinary metals and any container that previously held chemicals or strong-smelling foods.
Can honey go bad or ferment?
Yes, if it contains too much moisture. When honey’s water content rises, naturally occurring yeasts can begin to ferment it, producing bubbles, foam, and a yeasty or alcoholic smell. This is prevented by bottling only ripe honey and keeping containers airtight and dry.
How do I know if my honey is ready to store?
Harvest only capped frames, since capping indicates the bees have finished ripening the honey. If you want certainty, a refractometer will measure moisture content directly. Honey that is thin, watery, or from uncapped cells should be left to evaporate further before sealing.
Should I strain or filter honey before storing it?
Most beekeepers strain at least once to remove wax particles and debris. A coarse sieve followed by a finer filter gives a clear result. How fine you filter is a matter of preference — lighter filtration leaves more of the honey’s natural character, finer filtration gives a clearer appearance.
What temperature should honey be stored at?
A comfortable room temperature is ideal — warm enough that honey stays liquid and stable, cool enough that quality is not affected. Avoid hot spots near ovens, radiators, or sunny windows, and avoid locations with large temperature swings.
Can I freeze honey for long-term storage?
Yes. Honey freezes well and freezing is a good way to store it for extended periods, especially comb honey. Leave some headspace for expansion, and let containers come to room temperature before opening so condensation does not drip into the honey.
Is it safe to eat crystallized or old honey?
Yes. Crystallization changes texture, not safety, and properly stored honey does not expire. The only concern is fermentation, which is easy to identify by bubbling, foam, and a sour or alcoholic smell.
Why is my stored honey darker than when I bottled it?
Exposure to heat and light gradually darkens honey and softens its aroma. Move jars to a cooler, darker cupboard and the change will slow considerably. The flavor remains fine, though lighter floral notes may fade over time.
More Answers for Beekeepers
Practical guides for every stage of the beekeeping season.
Browse Beekeeping BooksFinal Checklist: How to Store Honey the Right Way
Storing honey well is not complicated, and it does not require expensive equipment. It requires attention at four moments: harvesting only ripe, capped honey, straining it clean, bottling it into dry, food-grade containers, and keeping those containers sealed in a dry, dark, temperature-stable place.
Do those four things and honey will reward you with years of quality. Skip any of them — seal a damp jar, leave a lid loose in a humid room, or bottle thin, unripe honey — and no amount of care afterward will fix it. The good news is that every one of those habits takes minutes.
So set up your shelves, line up your clean jars, and label as you go. And when the next harvest comes around, you will already know exactly what to do.
Get Set Up for Your Next Harvest
Everything you need to bottle and store honey properly.
Check Prices on AmazonYou May Also Like
More from Beekeeping Help to keep your season on track.
Best Bee Smoker
Calm inspections start with reliable, cool smoke you can count on.
How Does a Bee Smoker Work?
Understand the tool so you can use it effectively at every inspection.
What to Use in a Bee Smoker
Fuels that burn cool, long, and steady without irritating the colony.
Bee Suit Review
Protection, ventilation, and fit compared across the popular options.
Do Bee Suits Protect From Wasps?
What standard beekeeping gear does and does not defend against.
How to Wash a Bee Suit
Keep protective gear clean without damaging fabric or veil.
Best Beekeeping Gloves
Balance protection and dexterity for confident hive work.
How to Clean Beekeeping Gloves
Simple care routines that make gloves last far longer.
Best Beekeeping Starter Kit
Everything a new beekeeper needs in one considered bundle.
Beehive Types With Pictures
See the common hive designs side by side before you commit.
Best Beekeeping Hives
Our picks across the main hive styles and budgets.
Flow Hive vs Langstroth
Two very different approaches to harvesting honey compared.
How to Make a Beehive
Build your own equipment with a clear, beginner-friendly process.
How Beehives Are Made
A look at construction methods and the materials that matter.
How to Paint a Beehive
Protect your woodenware properly so it lasts season after season.
Types of Beehives in Trees
How wild colonies nest, and what that teaches us about hive design.
How Does a Beehive Work?
The internal system that keeps a colony organized and productive.
What Is a Nuc in Beekeeping?
Understand this common way of starting a new colony.
What Is Swarming in Beekeeping?
Why colonies split, how to spot the signs, and what to do about it.
What Is Dearth in Beekeeping?
The quiet season when forage disappears and colonies need attention.
How to Buy Bees for Beekeeping
Packages, nucs, and colonies — choosing the right way to start.
How Much Does It Cost to Start Beekeeping?
A realistic budget for equipment, bees, and the first season.
How Hard Is It to Start Beekeeping?
What the commitment really looks like before the bees arrive.
How to Improve Your Beekeeping Skills
Habits that turn a beginner into a confident, observant beekeeper.
How to Start Beekeeping in Texas
Climate, forage, and seasonal timing specific to Texas beekeepers.
Beekeeping Insurance
What cover beekeepers need and when it becomes worth considering.
Always use food-grade containers for honey storage and never heat honey aggressively. When in doubt about moisture content or fermentation, test the batch before sealing it away.