How to Make a Beehive: A Complete Step-by-Step Building Guide
Everything you need to design, build, assemble, and paint a fully functional beehive from scratch — including Langstroth boxes, frames, and a top bar hive alternative — even if you’ve never picked up a saw for beekeeping before.
Why Build Your Own Beehive
There’s a particular kind of satisfaction that comes from watching a colony move into a box you built with your own hands. Beyond the personal pride, building your own beehive is also one of the smartest financial decisions a new beekeeper can make. A commercially manufactured Langstroth hive, complete with boxes, frames, and covers, can easily run well past a hundred dollars per box once you add in frames, foundation, and hardware. Multiply that across the two or three boxes a healthy colony needs during its first season, and the total adds up quickly. Building your own from dimensional lumber cuts that cost in half, sometimes more, depending on the wood you choose and how much you can source secondhand.
There’s also a practical, beekeeping-specific reason to build rather than buy: standard equipment is designed to be interchangeable, but there is real value in knowing exactly how your hive is put together. When you build the box yourself, you understand every joint, every screw, and every gap that could let in moisture or pests. That knowledge makes inspections, repairs, and modifications far easier down the road. If you ever want to convert a box into a nuc, add a screened bottom board, or repair storm damage, you’ll already understand the anatomy of the equipment because you built it from bare wood.
If you’re brand new to the hobby entirely, it’s worth pairing this build with a broader look at what beekeeping actually involves day to day — our guide on how to start beekeeping walks through everything from local regulations to your first colony inspection, and it’s a useful companion to read alongside this build.

Understanding Beehive Types First
Before you cut a single board, you need to decide which hive style you’re building, because the dimensions, joinery, and hardware differ significantly between them. The three styles most home builders take on are the Langstroth hive, the top bar hive, and the Warre hive. Each has a different philosophy about how bees should build comb and how the beekeeper interacts with the colony.
The Langstroth hive is the design most people picture when they think of a beehive: stacked rectangular boxes containing removable vertical frames. It was patented in the 1850s and remains the dominant hive style in commercial and hobbyist beekeeping because of its modularity, standardized part sizes, and ease of honey extraction. Because parts are standardized, a box you build yourself will be compatible with frames, queen excluders, and other equipment you buy commercially, which is a major advantage for a first build.
The top bar hive is a horizontal design where bees build comb downward from a series of bars rather than inside a full frame. It requires less lumber, less precision milling, and no foundation, which makes it a genuinely easier first build for someone without a table saw. The tradeoff is that comb is more fragile once removed and honey extraction typically means crush-and-strain rather than a centrifugal extractor.
The Warre hive sits somewhere between the two philosophically. It uses stacked boxes like a Langstroth but with top bars instead of full frames, and boxes are added underneath rather than on top as the colony grows, mimicking a more natural nesting behavior. For a full visual comparison of how these and other styles actually look side by side, our beehive types with pictures guide is a good reference to bookmark before you start cutting wood.
This guide focuses primarily on building a standard 10-frame Langstroth hive, since it’s the most versatile and beginner-friendly option for anyone planning to eventually harvest honey with standard equipment, and we’ll cover a top bar alternative later for anyone who wants a simpler first build.
| Hive Style | Build Difficulty | Lumber Needed | Best For |
|---|---|---|---|
| Langstroth | Moderate | Moderate, precise cuts | Standard equipment compatibility, honey extraction |
| Top Bar Hive | Easy | Low, forgiving cuts | First-time builders, low startup cost |
| Warre Hive | Moderate-Hard | Moderate | Naturalistic, low-intervention beekeeping |
Materials and Tools You’ll Need
Good hive lumber needs to be rot-resistant, untreated, and free of knots that could weaken joints. Pine is the most common and affordable choice, but cedar and cypress last considerably longer outdoors without paint. Whatever species you choose, never use pressure-treated lumber anywhere near the hive body — the chemical preservatives used in treated lumber are toxic to bees and can contaminate honey.
| Item | Purpose | Approx. Quantity (per box) |
|---|---|---|
| 3/4″ pine or cedar boards | Hive body walls | 1 board, ~8 ft |
| 1/4″ plywood | Bottom board and inner cover | 1 sheet section |
| Exterior wood glue | Joint reinforcement | 1 bottle |
| Galvanized box nails or screws | Fastening joints | ~40 pieces |
| Frame rest rabbet strips | Frame support ledge | 2 strips |
| Exterior wood glue + paint | Weatherproofing | as needed |
Tools
- Table saw or circular saw with a straightedge guide
- Rabbet or dado blade (or a router) for frame rest cuts
- Measuring tape and combination square
- Wood glue and clamps
- Drill/driver with countersink bit
- Sandpaper (120 and 220 grit)
- Exterior paint or linseed oil for finishing

Planning Your Hive Before You Cut
The most common mistake first-time hive builders make is skipping measurements and going straight to cutting. Standard Langstroth boxes rely on very specific internal clearances — typically a 3/8 inch “bee space” between frames and box walls — and if your cuts are off by even a quarter inch, bees will fill the gap with burr comb or propolis, making inspections messy and frame removal difficult.
Sketch your box dimensions on paper first, or print a reference diagram, and mark every cut length directly on your lumber before touching the saw. A 10-frame deep hive body measures roughly 19-7/8 inches long by 16-1/4 inches wide by 9-5/8 inches tall on the outside, though many builders choose medium boxes (6-5/8 inches tall) for the brood chamber to keep lifting weight manageable once frames are full of honey.
Decide now whether you’re building deep boxes, medium boxes, or a mix — most modern hobbyists use all-medium configurations so every box and frame is interchangeable and nothing is too heavy to lift when full.
Planning Checklist
- Confirm box depth: deep, medium, or all-medium configuration
- Decide on 8-frame or 10-frame width
- Confirm lumber thickness is consistently 3/4 inch
- Mark all cuts before starting the saw
Building the Hive Body Boxes
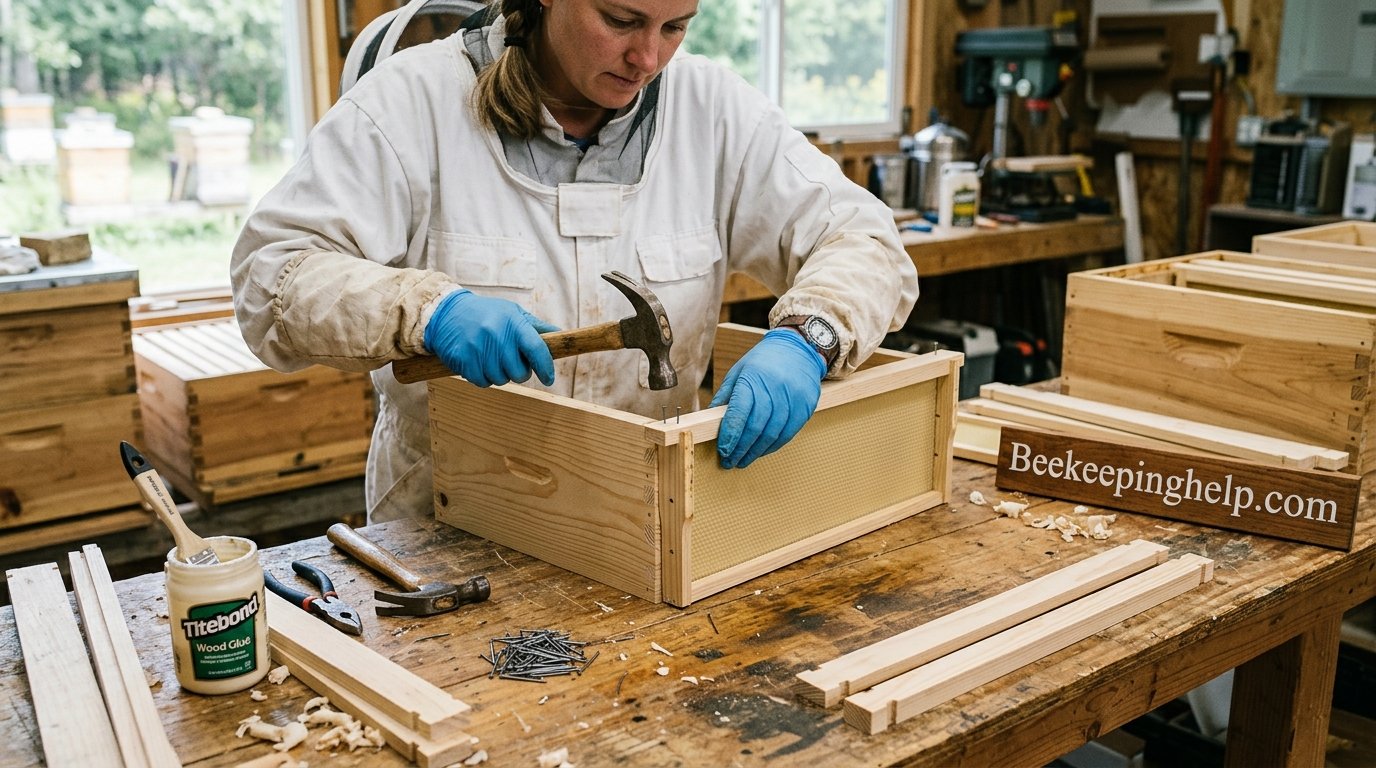
The hive body is the core rectangular box that holds your frames, and you’ll build at least two or three of these stacked on top of each other over a season. Each box uses four boards joined at the corners, with a rabbet cut along the top inside edge of the two long sides to create a ledge the frames will hang from.
Step 1: Cut Your Four Side Boards to Length
Rip your lumber to the correct width first, then cross-cut two long boards and two short boards to the exact box dimensions from your plan. Label each board’s orientation with pencil so you don’t mix them up during assembly.
Step 2: Cut the Frame Rest Rabbets
On the two long side boards, cut a rabbet 5/8 inch deep and 3/4 inch wide along the top inside edge. This creates the ledge that the frame’s top bar ears will rest on once assembled — get this measurement right, because it determines your bee space and frame spacing for the entire box.
Step 3: Join the Corners
Apply exterior wood glue to the end grain of the short boards, then nail or screw the long boards to the short boards to form a rectangle. Rabbet joints, box joints, or simple butt joints reinforced with glue and galvanized screws all work — box joints are stronger but require more precise cutting equipment.
Step 4: Cut Hand Holds and Square the Box
Cut a hand hold notch into the two short end boards, centered and about 4 inches wide, to make lifting the full box easier once it’s loaded with frames and bees. Check that the box is square by measuring both diagonals — they should be equal — and clamp it while the glue cures.
Repeat this same process for every hive body box you need. Most beekeepers start their first season with two deep or medium boxes for the brood chamber and add honey supers as the colony grows through spring and summer.
Building the Frames
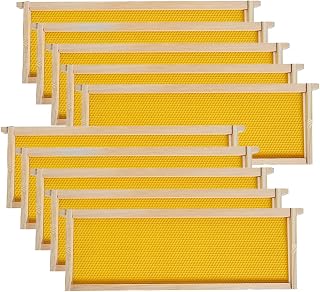
Frames are the removable wooden rectangles inside each box that hold the wax foundation where bees build comb. Each frame consists of a top bar, a bottom bar, and two side bars, assembled into a rectangle sized precisely to hang from the rabbet you cut earlier.
Step 5: Cut Frame Components
Cut your top bars slightly longer than the box’s inside width so the projecting ears rest on the rabbet ledge. Cut side bars to the box’s interior height minus a small clearance, and cut bottom bars to match the inside width. Pre-drilled frame kits are widely available if you’d rather not mill this level of detail yourself.
Step 6: Assemble and Wire the Frame
Glue and nail the side bars to the top and bottom bars to form a rectangle. Thread beeswax foundation crimp wire horizontally through the pre-drilled holes in the side bars, pulling it taut, then embed a sheet of wax or plastic foundation into the frame so bees have a guide to build straight comb.
A properly wired frame lets you use a centrifugal honey extractor without the comb collapsing under spinning force, which is the main reason Langstroth frames use wire while simpler top bar systems typically don’t.
Building the Bottom Board
The bottom board is the floor of the hive and sits beneath the lowest hive body, providing the entrance bees use to come and go. You can build a solid bottom board from a single plywood panel, or a screened bottom board that improves ventilation and helps with mite monitoring.
Step 7: Build the Bottom Board Frame and Floor
Cut two side rails and a rear rail from 3/4 inch lumber, then attach a plywood floor panel to the underside, leaving the front open as the hive entrance. If you want a screened bottom board, replace the solid plywood floor with 1/8 inch hardware cloth stapled to the underside of the frame instead.
Whichever style you choose, angle the bottom board very slightly forward — about a quarter inch of slope from back to front — so rainwater that finds its way inside drains back out the entrance instead of pooling on the floor.
Building the Inner and Outer Cover
Two covers sit on top of the hive stack. The inner cover is a thin plywood panel with a notch or hole for ventilation and for feeding, while the outer cover is a weatherproof lid, often topped with sheet metal or shingles, that keeps rain and sun off the whole assembly.
Step 8: Build the Inner Cover
Cut a 1/4 inch plywood panel to match the outside dimensions of your hive body, then frame the edges with thin strips of lumber for rigidity. Cut a small notch in one edge for a top entrance and ventilation, and drill a center hole sized to accept a round bee feeder if you plan to feed syrup.
Step 9: Build the Outer Cover
Build a shallow box shape sized to sit over the inner cover with an overhang on all sides, then cap it with a flat plywood top. Wrap the top and sides in aluminum flashing or apply exterior grade paint generously to keep moisture from ever reaching the wood beneath.
Final Assembly and Sealing
Once every component is built, dry-fit the entire stack before final fastening: bottom board, hive bodies with frames inserted, inner cover, and outer cover. Confirm frames hang evenly with consistent bee space on every side, and that no box rocks or gaps against its neighbor.
Step 10: Seal Exposed Joints
Run a bead of exterior wood glue or caulk along any exposed exterior seams, particularly on the bottom board and outer cover where standing water is most likely to collect. This single step meaningfully extends the life of an unpainted or lightly painted hive.
Wondering how the finished box compares mechanically to a modern flow-frame system? Our comparison guide on Flow Hive vs Langstroth is worth reading before you decide on frame style for your build.
Painting and Weatherproofing
Only paint the exterior surfaces of the hive — never paint anything the bees will touch on the inside, since fumes and residue can be harmful to the colony. Two coats of exterior latex paint in a light color reflect heat in summer and protect end grain from water absorption, which is the single biggest cause of hive rot.
Painting Pros
- Significantly extends hive lifespan
- Light colors reduce interior heat buildup
- Easy to personalize and number colonies
Painting Cons
- Adds drying time before use
- Must be reapplied every few years
- Interior must be carefully masked off
If you’d rather avoid paint altogether, raw linseed oil rubbed into bare wood is a popular natural alternative that still offers real water resistance, and it’s a method many builders detail in our guide on how to paint a beehive, which also covers color choices and food-safe options in more depth.
Alternative: Building a Top Bar Hive
If the precision cutting required for Langstroth boxes feels intimidating for a first project, a top bar hive is a genuinely easier entry point. Instead of stacked boxes, you build a single trough-shaped body, angled outward at roughly 30 degrees on the sides, with a series of removable top bars laid across the opening instead of full frames.
Step 11: Build the Angled Trough Body
Cut two long angled side panels and two triangular end panels, then join them into a trough shape that narrows toward the bottom. This angled shape discourages bees from attaching comb to the side walls, which keeps combs easier to lift out intact.
Step 12: Cut and Fit the Top Bars
Cut a series of top bars slightly narrower than the box’s outside width so they sit side by side across the opening with no gaps between them, sealing the top of the hive when in place. Cut a shallow guide groove or attach a wax starter strip along the center of each bar so bees build comb straight down.
Top bar hives trade extraction convenience for build simplicity — you’ll crush and strain honey rather than spin it — but for many first-time beekeepers, the lower cost of entry and forgiving construction tolerances make it worth serious consideration.
Placing and Leveling Your Hive
Where you set your finished hive matters almost as much as how well you built it. Choose a spot with morning sun and afternoon shade if you’re in a hot climate, reasonable wind protection, and a water source within a few hundred feet so bees don’t waste energy foraging for it. Face the entrance toward the east or southeast so the colony gets an early start each morning.
Set the hive on a stand at least a foot off the ground to deter ground pests like skunks, and use a level to check that the hive body is slightly tilted forward, matching the drainage angle you built into the bottom board. Cinder blocks, a purpose-built stand, or pressure-treated lumber (fine for a stand, since bees never touch it directly) all work well as a base.
For a deeper explanation of how internal hive mechanics — airflow, comb spacing, and colony movement — actually function once bees move in, our guide on how does a beehive work is a useful next read once your build is finished and populated.

Maintenance and Common Mistakes
Even a well-built hive needs seasonal attention to stay in good working condition. Check painted surfaces annually for chipping or peeling and touch up promptly, since exposed end grain absorbs water quickly and can lead to warping or rot within a couple of seasons. Inspect the bottom board each spring for accumulated debris, and confirm frames still hang freely without excess propolis gluing them in place.
Common Build Mistakes
- Cutting frame rest rabbets too shallow or too deep
- Using pressure-treated lumber near the interior
- Skipping the forward drainage slope on the bottom board
- Painting interior surfaces
- Inconsistent box dimensions across a season’s builds
Good Habits to Build In
- Label every box with its dimensions for future reference
- Keep a spare set of frames pre-built for swarm season
- Store unused boxes stacked and covered, off bare ground
If some of your finished frames feel snug or don’t hang quite evenly, it’s worth reviewing exactly how the components are supposed to interlock — our detailed breakdown of the parts of a beehive and their functions can help you troubleshoot exactly which measurement needs adjusting.
It’s also worth noting that beehives don’t only exist as manufactured boxes — wild colonies naturally nest in a variety of cavities, and comparing your build against how bees establish themselves in the wild can be genuinely instructive. Our piece on types of beehives in trees looks at exactly that.
Choosing the Right Lumber
Lumber choice is arguably the single biggest factor separating a hive that lasts five seasons from one that lasts fifteen. Beyond the pine, cedar, and cypress mentioned earlier, it’s worth understanding exactly why these species behave differently outdoors and what tradeoffs you’re accepting with each one.
Pine is the workhorse choice for a reason: it’s inexpensive, widely available at any home center, and easy to cut and drill without dulling blades quickly. Its downside is that pine has relatively low natural rot resistance, which means a pine hive absolutely needs a good coat of exterior paint to survive more than a couple of seasons outdoors. Left unpainted, pine end grain will soak up rainwater, swell, and eventually begin to rot from the bottom board upward. If you’re building on a budget and plan to paint thoroughly and maintain that paint job over time, pine remains a completely reasonable choice.
Cedar sits at the opposite end of the spectrum. Its natural oils are genuinely resistant to both rot and wood-boring insects, and many experienced beekeepers run cedar hives entirely unpainted for a decade or more, allowing the wood to weather to a soft silver-gray. The tradeoff is cost — cedar boards typically run two to three times the price of comparable pine at most lumber yards — and cedar is slightly softer, which means screws can strip more easily if you overdrive them.
Cypress, particularly old-growth cypress where it’s regionally available, offers rot resistance comparable to cedar at a somewhat lower price point in areas like the southeastern United States where it’s harvested locally. If you have a local sawmill nearby, it’s always worth calling ahead and asking what species they stock, since shipping costs on specialty lumber can quickly erase any savings versus a big box store.
Whatever species you choose, inspect every board before you buy it. Reject anything with large knots along a cut line, since knots create weak points that can split when you drive a screw nearby. Sight down the length of each board to check for warping or twisting — a board that isn’t flat will translate that unevenness directly into your finished box, making frames sit unevenly and doors fit poorly.
| Wood Species | Relative Cost | Rot Resistance | Paint Required? |
|---|---|---|---|
| Pine | Low | Low | Yes, strongly recommended |
| Cedar | High | High | Optional |
| Cypress | Moderate-High | High | Optional |
| Fir/Spruce | Low-Moderate | Low-Moderate | Yes |
Cost Breakdown: Build vs Buy
One of the most common questions new beekeepers ask before starting a build is whether the time investment is genuinely worth the money saved. The honest answer depends heavily on how many hives you’re planning to run and how much you value your own weekend hours, but the raw material math consistently favors building when you’re assembling more than two or three boxes.
A pre-assembled, painted 10-frame deep hive body with frames and foundation included typically costs noticeably more at retail than the combined cost of raw pine lumber, glue, screws, and a gallon of shared paint divided across several boxes. The gap widens further if you’re able to source lumber from a local sawmill or buy in bulk, and it narrows if you choose premium cedar over pine. Frames represent a similar story — a bundle of pre-assembled frames with foundation already installed costs meaningfully more than cutting and wiring your own from raw stock, though the time savings on frames specifically is often worth paying for if you’re building many boxes at once and want to prioritize your time on the boxes themselves.
There’s also a hidden cost worth factoring in: tool investment. If you don’t already own a table saw, circular saw, or router, the upfront cost of acquiring these tools can offset your savings on your very first hive. However, that calculus changes quickly if you plan to build multiple hives over several seasons, since the tools become a one-time cost amortized across every future box you build.
A reasonable middle path that many beekeepers land on is a hybrid approach: build your own hive bodies and bottom boards, where the savings are largest and the joinery tolerances are the most forgiving, while buying pre-assembled frames for your first season until you’re comfortable with wiring and foundation installation.
Best Time of Year to Build
Timing your build around your local bee season makes the difference between having equipment ready when you need it and scrambling to finish a hive body the week your package bees arrive. In most temperate climates, late winter — roughly six to ten weeks before your expected package or nuc delivery date — is the ideal building window.
Building in late winter gives painted surfaces plenty of time to fully cure and off-gas before bees move in, which matters because fresh paint fumes can be harmful to a newly installed colony if the hive is used too soon after painting. It also gives you a comfortable buffer to fix mistakes, order replacement lumber if a board splits, or simply take your time with careful measuring rather than rushing.
If you’re building additional honey supers for an established colony rather than a complete starter hive, timing is more flexible since you’re not racing a specific delivery date — though building supers in early spring, before the nectar flow begins, ensures they’re ready the moment your existing colony needs the extra space.
Avoid building in extremely humid or rainy conditions if you can help it, since high ambient humidity slows glue curing and can cause freshly cut lumber to absorb moisture unevenly, leading to warping before the box is even assembled.
Workshop Safety Precautions
Building hive equipment involves the same table saw, router, and power drill hazards as any woodworking project, and it’s worth taking a moment to review basic shop safety before you start cutting, especially if this is your first time working with these tools.
- Wear safety glasses any time you’re cutting, sanding, or routing — wood chips and sawdust travel farther than you’d expect.
- Use hearing protection during extended table saw or router sessions, since prolonged exposure to power tool noise contributes to hearing damage over time.
- Keep a push stick on hand for narrow rip cuts on a table saw so your fingers never approach the blade.
- Wear a dust mask or respirator when sanding treated or painted surfaces, and always when cutting outdoors near where bees may already be foraging.
- Clamp workpieces securely before drilling or routing rather than trying to hold them by hand.
- Keep your workspace free of sawdust buildup around the saw table, which can be a slipping hazard and a fire risk near motors.
If you’re working with a table saw for the first time, it’s worth practicing a few cuts on scrap lumber before cutting your actual hive components, both to build comfort with the tool and to dial in your fence measurements precisely.
Customizing Your Finished Hive
Once the core structure is built, there’s plenty of room to adapt your hive to your specific climate, apiary layout, and personal preferences. Beekeepers in especially hot regions often add extra ventilation in the form of a screened bottom board combined with a shim or ventilated inner cover, letting hot air escape during peak summer without letting the colony lose control of its internal humidity.
In colder climates, some builders add a simple insulated wrap or a moisture quilt box — a shallow box filled with wood shavings placed under the outer cover — to absorb condensation and add a layer of thermal buffering through winter. This is a particularly common addition for Warre-style hives, where moisture management is treated as a central design consideration.
Entrance reducers are another worthwhile addition: a simple notched strip of wood that fits into the hive entrance and can be flipped or rotated to open a larger or smaller gap depending on the season, helping a small spring colony defend its entrance against robbing bees or wasps while still allowing full airflow once the colony has grown.
Finally, consider adding a simple numbering or labeling system to each hive if you plan to run more than one colony. A painted number or a small brass tag on the outer cover makes it far easier to keep inspection notes straight once you’re managing several hives side by side in the same apiary.

Frequently Asked Questions
What wood is best for building a beehive?
Untreated pine is the most common and affordable choice, while cedar and cypress cost more but resist rot and insects far better without needing paint. Avoid pressure-treated lumber entirely, since its chemical preservatives can be toxic to bees.
How much does it cost to build a beehive from scratch?
A single hive body built from pine typically costs a fraction of a comparable pre-assembled box once you factor in glue, screws, and paint, though exact pricing varies by region and lumber choice.
Do I need a table saw to build a beehive?
A table saw makes precise rabbet and dado cuts far easier, but a circular saw with a straightedge guide and a router for rabbets can produce comparable results with more careful measuring.
What is bee space and why does it matter in construction?
Bee space is the roughly 3/8 inch clearance bees naturally leave between comb surfaces. Building your hive to maintain this exact spacing prevents bees from filling gaps with burr comb or excess propolis.
Can I use plywood for the entire hive body?
Plywood works well for the bottom board and inner cover, but solid dimensional lumber is preferred for the hive body walls because it holds up better to repeated screwing, weathering, and the weight of stacked boxes.
Should I paint the inside of the hive?
No. Only paint exterior surfaces. Bees regulate the interior environment with propolis, and paint fumes or residue on interior surfaces can be harmful to the colony.
How many boxes do I need for one colony?
Most beginner setups start with one or two hive bodies for the brood chamber and add honey supers as the colony grows, often reaching three to five boxes total by late summer.
Is a top bar hive easier to build than a Langstroth hive?
Generally yes. A top bar hive requires fewer precise rabbet cuts and less standardized milling, making it a more forgiving first build, though it trades away compatibility with standard frame-based equipment.
How long does it take to build a hive from scratch?
A single hive body with frames can typically be built in a weekend by someone with basic woodworking tools, though painting and drying time adds a few additional days before the hive is ready for bees.
What size screws or nails should I use for hive assembly?
Galvanized 1-1/4 to 1-1/2 inch box nails or exterior-rated wood screws are standard, since galvanized coatings resist rust from outdoor moisture exposure far better than plain steel fasteners.
Can I build a hive without any woodworking experience?
Yes, especially with a top bar design and pre-cut plans. Following measurements carefully and dry-fitting pieces before gluing goes a long way toward a successful first build, even without prior experience.
How do I know if my finished hive is properly sealed?
Check every exterior seam, especially on the bottom board and outer cover, for gaps a fingernail can catch on. Any visible gap should get a bead of exterior caulk or wood glue before the hive goes outside.
Ready to Put Your Hive to Work
Building your own beehive gives you a deeper understanding of the equipment your colony will live in for years to come, and it’s a project that pays for itself quickly compared to buying pre-assembled boxes. Once your build is complete, painted, and cured, the only thing left is choosing the right hive to fill it — our guide on best beekeeping hives is a great next stop for comparing bee packages and nucs to start your colony.
Shop Beekeeping Starter Kits on Amazon