What Is a Beehive and Why Does Construction Matter?
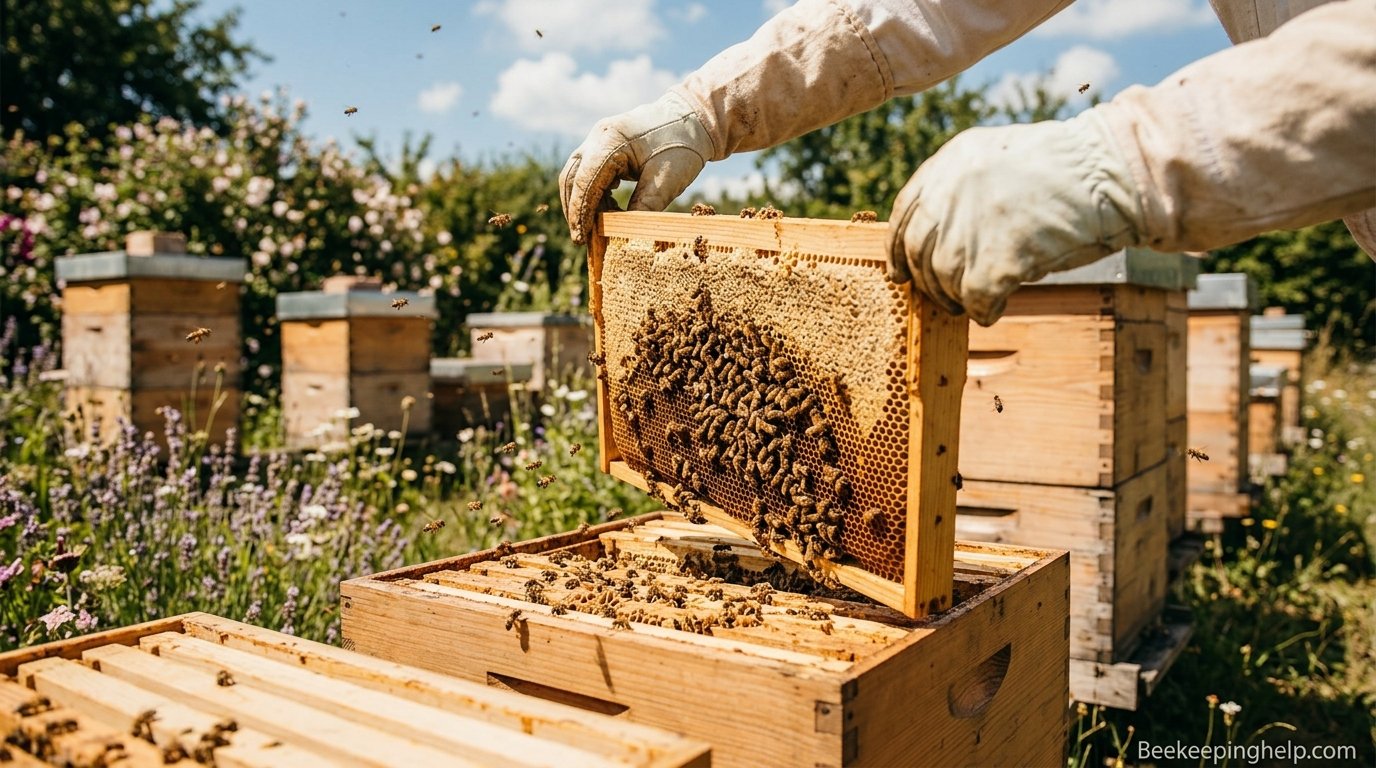
A beehive is far more than a simple wooden box sitting in a garden. It is a carefully engineered structure designed to replicate the natural nesting conditions that honey bees seek out in the wild — hollow trees, rock crevices, and sheltered cavities. The way a beehive is constructed directly affects the health of the colony, the productivity of honey harvests, and the long-term sustainability of your beekeeping operation.
Understanding how beehives are made gives you a tremendous advantage as a beekeeper. When you know the purpose behind every joint, every measurement, and every material choice, you can troubleshoot problems faster, customize your equipment for your local climate, and even build your own hives from scratch at a fraction of the retail cost. Whether you are a first-year beekeeper or someone who has managed colonies for decades, the fundamentals of hive construction remain one of the most valuable pieces of knowledge you can possess.
A properly constructed beehive must accomplish several things simultaneously. It needs to protect the colony from rain, wind, extreme temperatures, and predators. It must allow adequate ventilation to prevent moisture buildup — one of the leading causes of winter colony death. It has to provide the right amount of space for the queen to lay eggs, for workers to store honey and pollen, and for the colony to grow during nectar flows. And it must be designed so that the beekeeper can inspect the colony and harvest honey with minimal disruption to the bees.
Throughout this comprehensive guide, we will walk through every aspect of how beehives are made. You will learn about the historical evolution of hive design, the different types of hives used around the world, the specific materials and tools required, and a detailed step-by-step process for building a Langstroth hive — the most popular hive design on the planet. We will also explore how bees themselves contribute to the construction process by building wax comb, and we will cover the science behind why certain design features work better than others.
If you are just getting started with beekeeping, you may also want to read our guide on how to start beekeeping, which covers everything from choosing your location to installing your first package of bees. For those who want to understand the internal workings of a hive in more detail, our article on parts of a bee hive and their functions is an excellent companion resource.

Ready to Start Beekeeping?
Get a complete starter beehive kit with all the components you need to house your first colony. Perfect for beginners who want quality equipment without the guesswork.
View on Amazon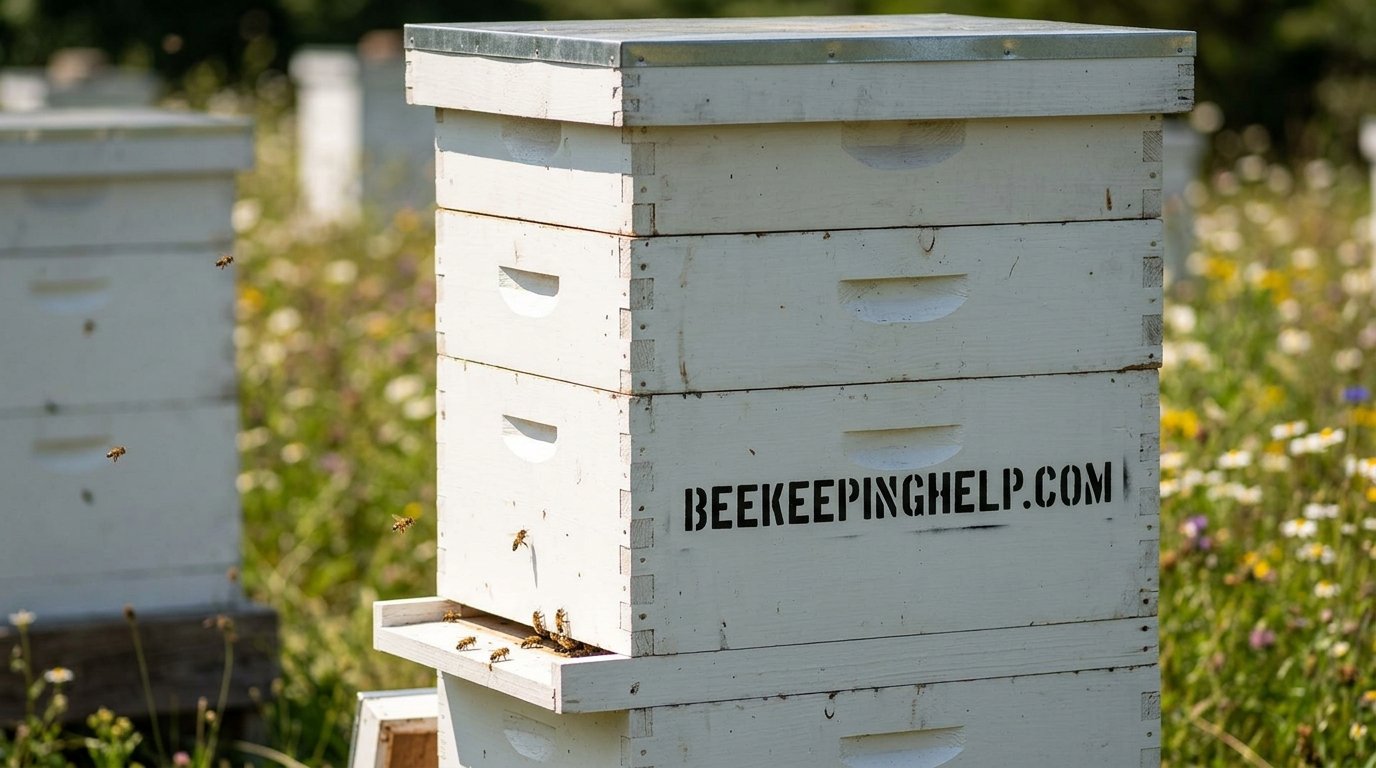
The Fascinating History of Beehive Construction
The story of how beehives are made is inseparable from the story of human civilization itself. For thousands of years, people have sought ways to house honey bees — not just to harvest their honey, but to benefit from beeswax, propolis, and the pollination services that bees provide to crops and wildflowers.
Ancient Beekeeping Structures
The earliest evidence of managed beekeeping dates back to ancient Egypt, roughly around 2400 BCE. Egyptian beekeepers used cylindrical hives made from Nile mud and straw, stacked horizontally in rows. These mud hives were remarkably effective — the clay walls provided excellent insulation against the desert heat, and the horizontal arrangement allowed beekeepers to harvest honey from one end of the row while the colony continued to thrive in the other sections. Wall paintings in the Sun Temple of Nyuserre Ini at Abu Ghurob depict beekeepers tending these hives and extracting honey into jars.
In ancient Greece and Rome, beekeepers used a variety of materials to construct their hives. Clay pots, woven baskets called skeps, and hollowed-out logs were all common. The skep — a dome-shaped basket made from coils of straw or dried grass — became the dominant hive design in Europe for centuries. Skeps were inexpensive to make, reasonably insulated, and portable. However, they had a critical limitation: to harvest honey, the beekeeper had to destroy the hive and often kill the colony. This made skep beekeeping inherently destructive and limited the ability to manage colonies sustainably.
The Skep Era and Its Limitations
Throughout the medieval period and into the early modern era, the skep remained the standard beehive across Europe. Beekeepers would place skeps on stone or wooden stands called bee boards, often under overhanging roofs or in purpose-built bee boles — recessed niches in garden walls. The construction of a skep was a skilled craft. Beekeepers would soak bundles of rye straw, then coil them tightly, binding each layer with strips of willow or bramble. A well-made skep could last several seasons, though the interior comb had to be rebuilt by the bees each time the skep was replaced.
The fundamental problem with skeps was that they offered no way to inspect the colony, no way to add or remove space, and no way to harvest honey without either driving the bees out with smoke (a process called “tanging”) or killing them outright. As understanding of bee biology grew during the Renaissance and Enlightenment, inventors began searching for a better solution.
The Revolutionary Invention of the Movable Frame
The modern era of beehive construction began in 1851, when Reverend Lorenzo Langstroth — a Congregationalist minister and passionate beekeeper from Pennsylvania — discovered what he called “bee space.” Langstroth observed that honey bees consistently left a gap of approximately 6 to 9 millimeters (about 1/4 to 3/8 inch) between parallel combs. If the space was smaller, the bees would fill it with propolis. If it was larger, they would build bridge comb. But within this narrow range, the bees left the space open as a passageway.
This insight led Langstroth to design a hive with removable frames hung at precisely this spacing. The frames could be lifted out individually for inspection, and the bees would build their comb within the frames rather than attaching it to the hive walls. This single innovation — the movable frame hive — transformed beekeeping from a destructive harvest into a sustainable management practice. Langstroth patented his design in 1852, and it remains the foundation of modern hive construction to this day.
Since Langstroth’s breakthrough, hive construction has continued to evolve. The Dadant hive, the British National hive, the Smith hive, the Warre hive, and the top bar hive all represent variations on the same fundamental principles. Today, beekeepers can choose from a wide range of hive types, each optimized for different climates, bee species, and management philosophies. If you want to explore the full range of options, our guide to beehive types with pictures provides a detailed visual overview.
Did You Know? The word “beekeeper” was once “beemaster” in English, reflecting the deep knowledge and skill required to manage colonies before the invention of movable-frame hives. Before Langstroth, a skilled beemaster might manage 50 skeps; today, a single beekeeper can manage thousands of modern hives.
Types of Beehives: Understanding the Major Designs
Before diving into the construction process, it is essential to understand the different types of beehives available. Each design has its own construction requirements, advantages, and ideal use cases. The type of hive you choose will determine the dimensions of every component, the materials you need, and the way you interact with your bees.
Langstroth Hive
The Langstroth hive is by far the most widely used beehive design in the world, particularly in North America, Australia, and much of Europe. It consists of stacked rectangular boxes — called “supers” — each containing a series of removable frames. The bottom box, known as the deep super or brood box, is where the queen lays eggs and the colony raises brood. Upper boxes, called honey supers, are where bees store surplus honey that the beekeeper can harvest.
Langstroth hives come in three standard depths: deep (9-1/8 inches), medium or “Illinois” (6-5/8 inches), and shallow (5-3/4 inches). All three use the same length and width (typically 16-1/4 by 19-7/8 inches for a 10-frame hive). The standardized dimensions mean that components from different manufacturers are interchangeable — a critical advantage for beekeepers who need to replace or expand equipment quickly.
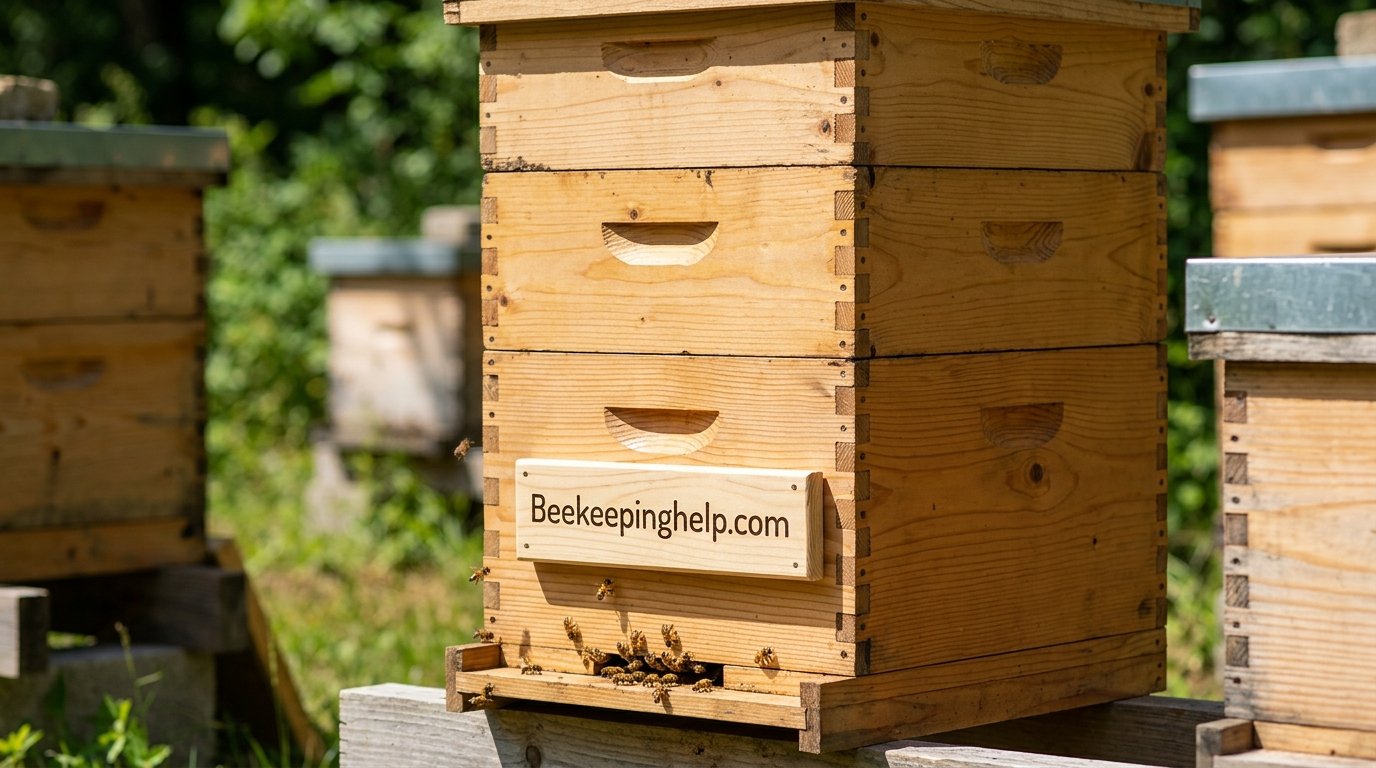
The construction of a Langstroth hive involves building box-shaped bodies with rabbeted joints to hold the frame rests, precisely spaced frame components, a bottom board with an entrance reducer, an inner cover with a notch for ventilation, and an outer telescoping cover. Each component must be built to exact specifications to maintain proper bee space throughout the hive.
Top Bar Hive
The top bar hive (TBH) represents the simplest approach to hive construction. Instead of full rectangular frames, the TBH uses bars laid across the top of a trough-shaped body. The bees build their comb downward from each bar, creating natural, free-hanging combs. This design requires no foundation sheets, no frame assembly, and minimal hardware.
Top bar hives are popular among natural beekeepers and those in developing countries because they can be built from locally available materials at very low cost. A basic TBH can be constructed from a single plank of wood, some bars, and a few simple tools. The hive body is typically trapezoidal in cross-section, wider at the top than at the bottom, which encourages the bees to build their combs within the bar width rather than attaching them to the hive walls.
While top bar hives are easy to build, they produce less honey than Langstroth hives and require more careful management to prevent comb attachments. They are an excellent choice for hobbyist beekeepers who prioritize a low-intervention approach and are willing to accept lower yields.
Warre Hive
Designed by French abbe Emile Warre after decades of experimentation with over 300 hives, the Warre hive is often described as a “people’s hive” because of its simplicity and low cost. It consists of identical, smaller boxes stacked vertically, with top bars instead of full frames. The key innovation of the Warre system is that new boxes are always added to the bottom of the stack — a process called “nadiring” — which mimics the way bees build comb downward in a natural cavity.
Warre hives use a quilt box — a layer of wood shavings or other insulating material — placed beneath the roof to absorb moisture and provide insulation. This makes the Warre hive particularly well-suited for cold climates. The construction is straightforward but requires attention to the quilt box and the specific dimensions that Warre prescribed.
Flow Hive
The Flow Hive is a relatively recent innovation that allows beekeepers to harvest honey by turning a key, which splits the cells inside specially designed frames so that honey flows out through a tube into a jar. While the hive body itself is essentially a modified Langstroth, the Flow frames are precision-molded from food-grade plastic and represent a significant departure from traditional wooden frame construction.
For beekeepers interested in comparing the Flow Hive approach with traditional Langstroth methods, our detailed Flow Hive vs Langstroth comparison covers the pros, cons, costs, and practical differences in depth.
Other Hive Types
Beyond these major designs, there are several other hive types worth mentioning. The British National hive is the standard in the United Kingdom, with slightly different dimensions from the Langstroth. The Dadant hive uses larger frames and is popular in continental Europe. The Smith hive is a compact design favored in Scotland. And in many parts of the world, traditional log hives and clay pot hives are still in use. Our article on types of beehives in trees explores the fascinating world of natural and feral hive sites.
| Hive Type | Difficulty to Build | Honey Yield | Best For | Cost |
|---|---|---|---|---|
| Langstroth | Moderate | High | Commercial & hobbyist | $$ |
| Top Bar | Easy | Low–Medium | Natural beekeeping | $ |
| Warre | Easy–Moderate | Medium | Cold climates | $ |
| Flow Hive | Pre-made | High | Convenience-focused | $$$ |
| British National | Moderate | High | UK beekeepers | $$ |
| Dadant | Moderate | Very High | Continental Europe | $$ |
For a comprehensive overview of every hive type available, including photographs and detailed specifications, see our complete guide to beehive types with pictures.

Best-Selling Langstroth Beehive Kit
This 10-frame Langstroth hive kit comes with a deep brood box, medium super, frames, foundation, bottom board, inner cover, and telescoping top. Everything you need to get started.
Check Price on AmazonMaterials Used in Beehive Construction
The materials you choose for building a beehive have a profound impact on the hive’s durability, insulation properties, weight, cost, and safety for the bees. While wood remains the traditional and most popular choice, modern beekeepers have several options available, each with distinct trade-offs.
Wood: The Gold Standard
Wood has been the primary material for beehive construction for centuries, and for good reason. It is a natural insulator, readily available, easy to work with basic tools, and — most importantly — bees are naturally adapted to living in wooden cavities. The vast majority of commercial beehives are made from wood, and if you are building your own hive, wood is almost certainly the best choice.
Eastern White Pine
The most commonly used wood for beehives in North America. It is lightweight, easy to cut and nail, relatively inexpensive, and has good insulating properties. White pine is soft enough to work with hand tools but durable enough to last 15–20 years with proper maintenance.
Cypress
Popular in the southeastern United States, cypress contains natural oils (thujaplicin) that resist rot and insect damage. Cypress hives can last 25+ years without treatment. The wood is slightly heavier than pine but requires no paint or preservative.
Cedar
Western red cedar is naturally rot-resistant and has excellent insulating properties. It is more expensive than pine but lighter and more durable. Cedar hives are particularly popular in wet climates where moisture resistance is critical.
Douglas Fir
A strong, dense wood that resists warping. Douglas fir is heavier than pine but extremely durable. It is a good choice for hive bodies that will bear the weight of multiple full honey supers.
Wood Thickness and Grade
For Langstroth hive bodies, the standard lumber thickness is 3/4 inch (19mm) for the box walls. This provides adequate insulation and structural strength while keeping the weight manageable. Some commercial manufacturers use thinner stock (11/16 inch or even 5/8 inch) to reduce cost and weight, but thinner walls provide less insulation and are more prone to warping.
When selecting lumber for hive construction, choose boards that are straight, free of large knots, and have minimal sapwood. Grade #2 common or better is suitable for hive bodies. Clear-grade lumber is unnecessary and expensive — small, tight knots are acceptable and do not affect the hive’s performance.
Other Materials
While wood dominates hive construction, other materials have their place:
- Polystyrene (Styrofoam) hives — Excellent insulation, very lightweight, but less durable and not aesthetically pleasing. Popular in northern European countries for winter protection.
- Plastic hive bodies — Injection-molded plastic hives are available from several manufacturers. They are durable and require no painting, but they offer poor insulation and can trap moisture.
- Straw skeps — Still made by traditional craft beekeepers for demonstration and educational purposes. Not suitable for modern management practices.
- Concrete and stone — Used in some traditional beekeeping cultures, particularly in Mediterranean regions. Heavy and permanent, but excellent for hot climates.
Hardware and Fasteners
Beyond the wood itself, you will need several hardware components to complete a beehive:
- Galvanized nails or stainless steel screws — Use 6d or 8d galvanized nails, or 1-5/8 inch exterior-grade screws. Avoid treated-wood fasteners, as the chemicals can be harmful to bees.
- Frame nails — Small, thin nails (1-1/4 inch) for assembling frames.
- Frame wire — Stainless steel or coated wire for reinforcing foundation sheets.
- Foundation sheets — Beeswax or plastic foundation that fits inside frames to guide comb construction.
- Metal entrance reducer — A small metal or wooden piece that narrows the hive entrance to help the colony defend against robbing and cold drafts.
- Hive staples or straps — For securing the hive during transport or high winds.
Pro Tip: Never use pressure-treated lumber, plywood with formaldehyde-based adhesives, or wood that has been painted with lead-based paint for beehive construction. The chemicals in these materials can leach into the wax comb and harm the bees. If you want to protect your hives from the elements, use a non-toxic exterior latex paint or a natural linseed oil finish. Our guide on how to paint a beehive covers safe finishing techniques in detail.
Essential Tools for Building a Beehive
Building a beehive does not require a fully equipped woodworking shop. With a handful of basic tools, you can construct a professional-quality hive in your garage or backyard. Here is a comprehensive list of the tools you will need, organized by priority.
Must-Have Tools
- Tape measure — Precision is critical in hive construction. A standard 25-foot tape measure is sufficient.
- Pencil — For marking cut lines and drill points.
- Combination square — Essential for ensuring 90-degree angles on all cuts and assemblies.
- Hand saw or circular saw — A circular saw with a fine-tooth blade makes quick work of ripping boards to width. A hand saw works fine for crosscuts.
- Drill/driver — A cordless drill with both drill bits and driver bits. You will use this for pilot holes and driving screws.
- Hammer — For driving nails, especially when assembling frames.
- Clamps — Two or more bar clamps (12-inch minimum) for holding box joints tight while fastening.
- Sandpaper (120 and 220 grit) — For smoothing cut edges and removing splinters.
Nice-to-Have Tools
- Table saw — Makes ripping boards to precise widths much faster and more accurate than a circular saw.
- Miter saw — Excellent for making precise crosscuts, especially for frame components.
- Router with rabbeting bit — The fastest way to cut the rabbet (frame rest) in hive body walls.
- Nail gun — Speeds up assembly dramatically, especially for box construction.
- Frame jig — A simple wooden jig that holds frame components in alignment during assembly. You can build one from scrap wood.
- Paint brush or roller — For applying exterior finish to the completed hive.
Understanding Measurements and Bee Space
The single most important measurement in beehive construction is bee space — the 6 to 9 millimeter gap that bees leave open between parallel surfaces. Every dimension in a Langstroth hive is calculated to maintain this spacing. If you get the measurements wrong, the bees will either fill gaps with propolis (too small) or build bridge comb (too large), making the frames impossible to remove without damaging the comb.
Standard Langstroth hive dimensions are as follows:
| Component | Outside Dimensions | Notes |
|---|---|---|
| 10-Frame Deep Body | 16-1/4″ x 19-7/8″ x 9-5/8″ | Brood box |
| 10-Frame Medium Super | 16-1/4″ x 19-7/8″ x 6-5/8″ | Most common honey super |
| 10-Frame Shallow Super | 16-1/4″ x 19-7/8″ x 5-11/16″ | Used for comb honey |
| Bottom Board | 16-1/4″ x 20″ (approx) | Includes landing board |
| Inner Cover | 16-1/4″ x 19-7/8″ | With ventilation notch |
| Outer Cover (Telescoping) | 18-3/4″ x 22″ (approx) | Overhangs the hive body |
| Frame (Deep) | 9-1/8″ top bar, 17-3/4″ total length | End bars 1-3/8″ wide |
| Frame (Medium) | 6-1/4″ top bar, 17-3/4″ total length | Same top bar length as deep |
These dimensions are not arbitrary — they have been refined over more than 150 years of beekeeping practice. Deviating from them by even a quarter inch can cause problems with frame spacing, box stacking, and cover fit. If you are building your first hive, we strongly recommend following these standard dimensions exactly.
For a complete breakdown of every part and its purpose, refer to our detailed article on parts of a bee hive and their functions.
How Beehives Are Made: Step-by-Step Construction Guide
Now we arrive at the heart of this guide — the actual process of building a beehive from raw lumber. We will focus on constructing a standard 10-frame Langstroth hive, since it is the most widely used design and the skills you learn here transfer directly to other hive types. Each step includes a visual diagram to help you understand the construction process.
1 Selecting and Preparing Your Lumber
The first step in building a beehive is selecting the right lumber and preparing it for construction. This step sets the foundation for everything that follows — poorly prepared lumber leads to warped boxes, uneven joints, and a hive that does not stack properly.
Start by purchasing kiln-dried lumber with a moisture content below 19%. Green or air-dried lumber will warp as it dries, causing gaps in your joints and misaligned frames. The most common species for hive construction are Eastern white pine, cypress, and cedar. Purchase boards that are at least 3/4 inch thick and 6 inches or wider — you will rip them to the exact widths needed for each component.
Before cutting anything, let the lumber acclimate to your workshop environment for at least 48 hours. Stack the boards with stickers (thin strips of wood) between each layer to allow air circulation. This prevents the boards from cupping or twisting after you have cut them to size.
Inspect each board for defects. Reject boards with large, loose knots (small, tight knots are acceptable), splits, checks, or signs of insect damage. Sight down the length of each board to check for bowing, cupping, or twisting. A slightly bowed board can be flattened during jointing, but a severely twisted board should be set aside for non-critical uses.
2 Cutting the Hive Body Panels
With your lumber selected and acclimated, the next step is cutting the individual panels that will form the hive body boxes. For a standard 10-frame Langstroth deep super, you need four panels: two long sides (front and back) and two short sides (ends).
The long panels for a 10-frame deep super measure 19-7/8 inches long by 9-5/8 inches tall. The short (end) panels measure 14-3/4 inches long by 9-5/8 inches tall. The 14-3/4-inch dimension for the end panels is calculated so that when the two 3/4-inch-thick long panels are attached to the outside of the end panels, the overall outside width is 16-1/4 inches — the standard Langstroth dimension.
After cutting the panels to size, you need to cut a rabbet (a rectangular notch) along the top inside edge of each panel. This rabbet creates the frame rest — the ledge where the frame ears sit. The standard rabbet is 3/8 inch deep and 5/8 inch wide. You can cut this rabbet with a table saw (making multiple passes), a router with a rabbeting bit, or a dado blade.
The rabbet is critical because it sets the frame spacing. If the rabbet is too deep, the frames will hang too low and the bees will build comb below the frame bottom bars. If it is too shallow, the frames will sit too high and the bees will build comb above the frame top bars. In both cases, you lose the bee space that makes the Langstroth system work.
3 Assembling the Hive Body Box
With all four panels cut and rabbeted, you are ready to assemble the box. The assembly method you choose will affect the strength and longevity of the hive body.
The simplest and most common assembly method is the butt joint. The long panels overlap the end panels, with the end panels fitting between the long panels. Apply a thin bead of waterproof wood glue (Titebond III is the industry standard for outdoor wood projects) to the mating surfaces, then clamp the assembly square and drive fasteners through the long panels into the end grain of the end panels.
Use at least two fasteners per corner — either 2-inch galvanized nails or 1-5/8-inch exterior-grade screws. Screws provide a stronger joint and are easier to disassemble if you need to make adjustments. Pre-drill pilot holes to prevent the wood from splitting, especially near the ends of the boards.
After assembling the box, check it for square by measuring both diagonals. If the diagonals are equal, the box is square. If they differ, gently rack the box until the diagonals match, then tighten the fasteners. A box that is out of square will not stack properly with other boxes and will leave gaps that the bees will fill with propolis or comb.
Some beekeepers reinforce the corners with metal corner brackets or wooden cleats for added strength. This is especially useful for deep brood boxes, which can weigh 60 pounds or more when full of honey and brood.
4 Building the Frames
Frames are the heart of the Langstroth system. Each frame consists of four pieces: a top bar, a bottom bar, and two end bars (also called side bars). The top bar has “ears” — short extensions on each end that rest on the rabbet you cut in the hive body walls. The end bars have pre-drilled holes for running horizontal wire, which supports the foundation sheet.
You can purchase pre-cut frame components from beekeeping suppliers, or you can mill them yourself. If you are building frames from scratch, the top bar is typically 19 inches long (for a 10-frame hive) with 3/8-inch ears on each end, 1-3/8 inches wide, and 3/8 inch thick. The end bars are 9-1/8 inches long (for deep frames), 1-3/8 inches wide, and 3/8 inch thick. The bottom bar is 17-3/4 inches long, 1-1/4 inches wide, and 1/4 inch thick.
Assembly begins by laying out all the components on a flat surface. If you have a frame jig — a simple wooden fixture that holds the pieces in alignment — use it. Without a jig, you can assemble frames on a flat workbench, using a combination square to keep everything aligned.
Attach the end bars to the top bar first, using two small nails (1-1/4 inch) driven through the top bar into the end of each end bar. Then attach the bottom bar the same way. After assembly, run frame wire through the pre-drilled holes in the end bars, tensioning it enough to support the foundation sheet without sagging. Thread the wire in a zigzag pattern, securing it with a nail or wire anchor at each end.
Finally, embed the foundation sheet onto the wire. Beeswax foundation is warmed slightly to make it pliable, then pressed onto the tensioned wire so the wire melts into the wax. Plastic foundation can be installed dry, with the wire passing through pre-formed grooves. The foundation gives the bees a template to build their comb on, ensuring straight, uniform combs that fit the frame dimensions.
5 Constructing the Bottom Board
The bottom board serves as the floor of the hive. It supports the weight of the entire hive stack, provides the entrance for the bees, and — in screened bottom board designs — allows for ventilation and varroa mite monitoring.
A basic solid bottom board consists of a flat platform made from tongue-and-groove boards or a single piece of plywood, framed by side rails and a back rim. The front of the bottom board is left open to create the hive entrance. A landing board — a flat extension that protrudes 2 inches beyond the front of the hive body — gives bees a place to land before entering the hive.
The entrance height should be approximately 3/8 inch — this is the bee space measurement that prevents bees from building comb across the entrance. Many bottom boards include an entrance reducer — a small wooden or metal strip that can be inserted to narrow the entrance during winter or when the colony is small.
A screened bottom board replaces the solid floor with a piece of #8 hardware cloth (a wire mesh with 1/8-inch openings). This allows air to circulate up through the hive, reducing moisture buildup. It also allows varroa mites that fall off the bees to drop through the screen and out of the hive, rather than climbing back up. A removable sticky board or tray can be placed below the screen to catch and count fallen mites for monitoring purposes.
The bottom board is the only hive component that sits directly on the ground or hive stand, so it is the most vulnerable to moisture damage. Apply a generous coat of exterior-grade paint or linseed oil to the bottom and sides of the board. Some beekeepers elevate their hives on cinder blocks, pallets, or purpose-built hive stands to keep the bottom board off the wet ground.
6 Building the Inner Cover and Outer Cover
The top of the hive consists of two covers: an inner cover and an outer (telescoping) cover. Together, they provide insulation, ventilation, and weather protection.
The inner cover is a flat panel with a rim around the edges. The rim creates the bee space between the top bars of the uppermost frame and the inner cover surface. The inner cover has two features: an oval hole in the center (which bees use to access the upper parts of the hive and which provides ventilation) and a notch cut into one edge (which serves as an upper entrance and an additional ventilation port).
The inner cover dimensions match the hive body — 16-1/4 by 19-7/8 inches for a 10-frame hive. The rim is typically 3/4 inch deep on three sides and flush on the fourth (the notched side). You can build the rim from strips of wood glued and nailed to a flat panel, or you can use a single piece of lumber with a rabbeted edge.
The outer cover, also called the telescoping cover, is the hive’s first line of defense against rain and snow. It is larger than the hive body, overhanging by about 1-1/4 inches on all four sides. This overhang is what gives it the “telescoping” name — it slides down over the top of the hive body like a telescope.
The outer cover is built from a flat panel (often plywood or tongue-and-groove boards) with a frame of side rails around the edges to create the overhang. The top surface is covered with galvanized sheet metal or heavy-duty roofing material to make it completely waterproof. Without metal flashing, the plywood top will delaminate within a few seasons.
Some beekeepers add a layer of rigid foam insulation between the inner cover and outer cover for additional thermal protection during winter. This is a simple modification that can significantly improve winter survival rates in cold climates.
7 Finishing, Painting, and Weatherproofing
The final construction step is applying a protective finish to the exterior of the hive. This step is often overlooked by beginning beekeepers, but it is one of the most important for ensuring the longevity of your equipment.
Apply two coats of high-quality exterior latex paint to all exterior surfaces of the hive — the hive bodies, bottom board, inner cover, and outer cover. Choose light colors (white, pale yellow, light green, or sky blue) because they reflect sunlight and keep the hive cooler in summer. Dark colors absorb heat and can cause the hive to overheat, especially in southern climates.
Never paint the interior surfaces of the hive. Bees will chew at any painted surfaces inside the hive, and ingesting paint chips can be harmful. The interior of the hive should remain bare wood. If you want to protect the interior from moisture, you can apply a thin coat of food-grade beeswax, but this is generally unnecessary.
Pay special attention to the bottom board, which is the most exposed component. Apply an extra coat of paint to the bottom and all end grain surfaces. End grain absorbs moisture much faster than face grain, so it needs additional protection. Some beekeepers dip the end grain in melted paraffin wax for extra water resistance.
The outer cover’s metal flashing should be sealed at the edges with a bead of silicone caulk to prevent water from wicking between the metal and the wood. Check this seal annually and reapply as needed.
Allow the paint to cure for at least 48 hours before introducing bees. Fresh paint fumes can irritate the bees and may cause them to abscond (leave the hive). If possible, paint your hives well in advance of bee installation day — a week or more is ideal.
For a detailed guide on safe painting techniques, color choices, and recommended paint brands, see our article on how to paint a beehive.

Non-Toxic Beehive Paint Kit
This bee-safe exterior latex paint kit includes primer and two topcoat colors. Specially formulated to be non-toxic to bees while providing maximum weather protection for your hives.
Check Price on AmazonHow Bees Build Their Own Comb Inside the Hive
While the beekeeper constructs the wooden hive structure, the bees themselves are responsible for building the interior — the intricate wax comb that serves as the colony’s nursery, food storage, and communication center. Understanding how bees build comb is essential for managing your hive effectively and knowing when to add additional space.
Wax Production
Worker bees produce beeswax from eight wax glands located on the underside of their abdomen. These glands are most active when the worker is between 12 and 18 days old. To produce wax, the bee must consume large quantities of honey — it takes approximately 6 to 8 pounds of honey to produce 1 pound of beeswax. This is one reason why a strong nectar flow stimulates comb building: the incoming nectar provides the energy the bees need to produce wax.
The wax emerges as thin, translucent scales from the wax glands. The bee then chews the wax scales, mixing them with saliva to soften and shape them. The chewed wax is passed to other workers, who further shape and mold it into the hexagonal cells that make up the comb.
The Hexagonal Structure
The hexagonal shape of honeycomb cells is one of nature’s most elegant engineering solutions. A hexagon is the most efficient shape for dividing a flat surface into equal areas with the minimum total perimeter. This means hexagonal cells use the least amount of wax to create the maximum amount of storage space. The mathematician Thomas Hales proved this formally in 1999, confirming what bees have known for millions of years.
The cells are not perfectly flat-bottomed — they are slightly angled (about 13 degrees from horizontal) so that honey does not run out of the open cells. The cell walls are incredibly thin — about 0.05 to 0.08 millimeters — yet the comb structure is remarkably strong. A single frame of fully drawn comb can support 5 to 7 pounds of honey.
Comb Building Behavior
When bees build comb, they work in chains. A group of bees will cluster together, with each bee hanging onto the legs of the bee above. The bees at the top of the chain produce wax and shape it into the initial cell walls. As the comb grows, more bees join the chain, and the construction progresses downward.
Bees build comb from the top down, starting at the top bar or the upper edge of the foundation sheet. They work outward from the center of the frame toward the edges. This is why it is important to center your frames in the hive body — if the frames are off-center, the bees may build comb unevenly or attach comb to the hive walls.
The bees maintain bee space between adjacent combs with remarkable precision. If two combs are too close together, the bees will scrape away the excess wax. If they are too far apart, the bees will build bridge comb or brace comb to fill the gap. This self-regulating behavior is what makes the Langstroth frame system work — the frames constrain the comb placement, and the bees adjust their building to fit the available space.
Foundation vs. Foundationless Frames
Traditionally, beekeepers install beeswax or plastic foundation sheets in their frames to guide comb construction. Foundation ensures that the bees build straight, uniform combs that are easy to inspect and extract honey from. However, some beekeepers prefer to let the bees build natural, foundationless comb. This approach avoids the potential for pesticide residues in commercial foundation wax and allows the bees to build cells of varying sizes — which some research suggests may improve colony health.
Foundationless beekeeping requires more careful management, as the bees may build cross-comb (comb that spans across multiple frames) if the hive is not kept level. It also produces comb honey that is more fragile and harder to extract mechanically. For most beekeepers, especially beginners, using foundation is the more practical choice.
To learn more about how the internal structure of a hive supports the colony, read our article on how a beehive works.
The Science Behind Beehive Design
Beehive design is not just tradition — it is applied science. Every dimension, every material choice, and every ventilation feature in a well-designed hive is based on principles of thermodynamics, fluid dynamics, and insect biology. Understanding the science behind hive design will help you make better decisions about construction and modifications.
Thermal Regulation
Honey bees are remarkable thermoregulators. A healthy colony maintains the brood nest temperature at approximately 35°C (95°F), regardless of outside conditions. In winter, the bees form a tight cluster and vibrate their flight muscles to generate heat. In summer, bees fan their wings at the hive entrance to create airflow and cool the hive through evaporative cooling.
The hive walls play a critical role in thermal regulation. Wood’s natural insulating properties (R-value of approximately 1.0 per inch for pine) help buffer the colony against temperature swings. A 3/4-inch pine wall provides about R-0.75 of insulation — modest, but significant when combined with the bees’ own thermoregulatory efforts. This is why thicker-walled hives perform better in extreme climates, and why some northern beekeepers add foam insulation wraps during winter.
The hive entrance size also affects thermal regulation. A large entrance allows more airflow, which is beneficial in hot climates but can be disastrous in winter. The entrance reducer allows beekeepers to adjust the entrance size seasonally — fully open in summer for maximum ventilation, partially closed in winter to conserve heat while still allowing enough airflow to prevent moisture buildup.
Ventilation and Moisture Control
Moisture is one of the biggest threats to a bee colony, particularly in winter. A colony of 20,000 bees generates a surprising amount of moisture through respiration — approximately 1 gallon of water vapor over the course of a winter. If this moisture cannot escape the hive, it condenses on the cold inner cover and drips back down onto the bee cluster, chilling the bees and promoting mold growth.
Good hive design addresses moisture in several ways. The inner cover’s ventilation notch and oval hole allow moist air to escape upward and out of the hive. Screened bottom boards provide additional ventilation from below. Some beekeepers add moisture quilts — boxes filled with absorbent wood shavings — above the inner cover to absorb excess moisture.
The Warre hive’s quilt box is specifically designed for moisture management. The layer of dry wood shavings absorbs moisture from the rising warm air, preventing condensation on the inner cover surface. This is one of the Warre hive’s greatest advantages in cold, damp climates.
Structural Engineering
A full deep super of honey can weigh 60 to 70 pounds. A two-story hive with two deep brood boxes and two honey supers can weigh over 200 pounds. The hive structure must support this weight without warping, sagging, or collapsing. This is why 3/4-inch lumber is the minimum recommended thickness for hive bodies, and why the joints must be securely fastened.
The frame design also reflects structural engineering principles. The frame’s four-sided structure distributes the weight of the comb evenly across the top bar ears, which rest on the rabbeted ledge in the hive body walls. The frame wire reinforces the comb against the forces of centrifugal extraction — without wire, the comb would fly apart inside a honey extractor.
Acoustic and Chemical Communication
Recent research has revealed that hive construction affects the colony’s acoustic and chemical communication systems. Bees use vibrations transmitted through the comb to communicate — the famous waggle dance, for example, produces both visual and vibrational signals. The rigid wooden frame structure transmits these vibrations efficiently, while the wax comb acts as a resonating medium.
The hive also serves as a repository for the colony’s chemical signals. Queen pheromone, alarm pheromone, and Nasonov pheromone (the “come home” signal) all permeate the beeswax comb and the wooden hive walls. This is why old comb has a distinctive smell — it is saturated with years of accumulated pheromones. It is also why beekeepers are advised to replace old, dark comb every 3 to 5 years, as accumulated pesticide residues and disease spores can build up in the wax over time.
Thermal Performance by Material
Pine (3/4″): R-0.75 — Good for temperate climates. Cedar (3/4″): R-0.85 — Slightly better insulation. Polystyrene (1″): R-3.5 to R-5.0 — Excellent for extreme cold. Straw skep: R-1.5 to R-2.0 — Surprisingly good natural insulation.
DIY vs. Pre-Made Beehives: Which Should You Choose?
One of the first decisions every new beekeeper faces is whether to build their own hives or purchase pre-made equipment. Both approaches have clear advantages and disadvantages, and the right choice depends on your budget, your woodworking skills, and how much time you want to invest before your bees arrive.
Pros of Building Your Own
- Significant cost savings — raw lumber costs 40–60% less than assembled hives
- Complete control over materials and quality
- Ability to customize dimensions for your specific needs
- Deep understanding of hive mechanics
- Satisfaction of using equipment you built yourself
- Can build replacement parts on demand
Cons of Building Your Own
- Requires basic woodworking tools and skills
- Time investment — a full hive takes 4–8 hours to build
- Precision is critical — small errors cause big problems
- Lumber quality varies — finding straight, clear boards can be challenging
- Initial tool investment if you don’t already own them
Pros of Pre-Made Hives
- Ready to use out of the box — no construction needed
- Factory-precision dimensions ensure proper fit
- Available in assembled or flat-pack (kit) form
- Consistent quality from reputable manufacturers
- Time savings — focus on beekeeping, not woodworking
Cons of Pre-Made Hives
- Higher cost — assembled hives can cost 2–3x the lumber price
- Less control over wood quality and species
- Some kits use thinner stock to reduce shipping weight
- Replacement parts must be purchased, not made
- Shipping damage is possible with assembled hives
The Middle Ground: Flat-Pack Kits
For many beekeepers, the best compromise is a flat-pack kit — pre-cut lumber pieces that you assemble yourself. These kits offer factory-precision cuts without the cost of fully assembled hives. You still get the satisfaction of building your own equipment, but you skip the most challenging step (ripping boards to precise widths) and go straight to assembly.
Flat-pack kits typically include all the wood pieces, nails or screws, frame components, and foundation sheets. Assembly takes 1 to 2 hours per hive body, compared to 4 to 8 hours for building from raw lumber. The cost is usually 20 to 30% less than fully assembled hives and 20 to 30% more than raw lumber.
Cost Comparison
| Option | Cost per Hive (10-frame, 2 deeps + 1 super) | Time Investment | Skill Required |
|---|---|---|---|
| Raw Lumber (DIY) | $50 – $80 | 6 – 10 hours | Intermediate woodworking |
| Flat-Pack Kit | $90 – $140 | 2 – 4 hours | Basic assembly |
| Assembled Hive | $150 – $250 | 0 hours | None |
| Premium/Branded | $250 – $400+ | 0 hours | None |
Regardless of which option you choose, make sure your hive components are built to standard Langstroth dimensions. Non-standard equipment creates headaches when you need to add boxes, share equipment between hives, or collaborate with other beekeepers. Our guide to the best beekeeping hives reviews the top options across all price ranges.
For those who want to build their own, our detailed tutorial on how to make a beehive provides complete plans and step-by-step instructions.

Beehive Building Plans Book
This comprehensive book includes detailed plans for Langstroth, Top Bar, and Warre hives with full-size templates, material lists, and step-by-step photos for every component.
View on AmazonCommon Mistakes in Beehive Construction (And How to Avoid Them)
Even experienced woodworkers can make mistakes when building beehives, because hive construction has unique requirements that differ from standard furniture or cabinetry. Here are the most common mistakes and how to avoid them.
Mistake #1: Incorrect Dimensions
This is by far the most common and most consequential mistake. A hive body that is even 1/4 inch too wide or too narrow will cause cascading problems with frame spacing, box stacking, and cover fit. Always double-check your measurements before cutting, and use a combination square to verify 90-degree angles. If you are building multiple hives, make a set of templates from thin plywood that you can trace onto your lumber.
Mistake #2: Skipping the Rabbet
Some beginning builders skip the rabbet cut, thinking that the frames can simply rest on a strip of wood glued to the inside of the hive body. While this can work in a pinch, it is not ideal. The rabbet provides a precise, consistent frame rest that is flush with the inside wall of the hive body. A glued-on strip adds bulk, can come loose over time, and may not provide the correct bee space above and below the frame ears.
Mistake #3: Using the Wrong Wood
Plywood, particle board, and pressure-treated lumber are all unsuitable for beehive construction. Plywood delaminates when exposed to moisture, particle board disintegrates, and pressure-treated lumber contains chemicals (copper azole or alkaline copper quaternary) that can leach into the wax comb and harm the bees. Stick with solid, untreated lumber — pine, cypress, cedar, or fir.
Mistake #4: Poor Ventilation Design
A hive with inadequate ventilation will suffer from moisture buildup, especially in winter. Make sure your inner cover has a functional ventilation notch, and consider using a screened bottom board in humid climates. Do not seal the hive too tightly — bees need airflow to regulate temperature and humidity.
Mistake #5: Not Painting or Sealing the Exterior
Unpainted wood will absorb moisture, swell, warp, and rot within a few seasons. Always apply at least two coats of exterior-grade paint or a natural wood preservative to the outside surfaces of your hive. The investment of a few dollars in paint will extend the life of your hive by years.
Mistake #6: Building Frames Too Loose or Too Tight
Frames that are too loose will shift and tilt when you move the hive, causing the bees to build cross-comb between frames. Frames that are too tight will be difficult to remove for inspection and may crush bees when you try to pry them apart. The correct frame spacing is 1-3/8 inches from center to center (for 10-frame equipment). Use a frame spacer or follow the standard frame ear dimensions to get this right.
Mistake #7: Ignoring Wood Grain Direction
When cutting hive body panels, orient the wood grain vertically (running from top to bottom of the panel). Vertical grain sheds water more effectively than horizontal grain, reducing moisture absorption and extending the life of the paint. If the grain runs horizontally, water will pool in the grain valleys and accelerate rot.
Mistake #8: Not Leveling the Hive Stand
This is not strictly a construction mistake, but it is closely related. If the hive is not level (side to side), the bees will build comb at an angle within the frames, making inspection difficult and increasing the risk of cross-comb. Always place your hive on a level stand, and check it with a spirit level after installation.
Expert Advice: Build one hive first as a practice piece before committing to a full set. Use the first hive to identify any measurement errors, refine your technique, and test the fit of all components. Your second and third hives will be significantly better than your first.
Maintaining and Repairing Your Beehive
Building a beehive is just the beginning. To keep your hive in good condition and your bees healthy, you need to perform regular maintenance throughout the year. A well-maintained hive can last 20 years or more; a neglected one may need to be replaced in 5.
Annual Maintenance Checklist
- Spring: Inspect all hive components for winter damage. Replace any cracked, warped, or rotted boards. Check the bottom board for signs of rot and replace if necessary. Touch up paint on any areas where it has peeled or worn away.
- Summer: Monitor for signs of overcrowding and add supers as needed. Ensure the entrance is fully open for maximum ventilation. Check for signs of wax moth damage in stored equipment.
- Fall: Reduce the entrance to help the colony defend against robbing. Install mouse guards to prevent mice from entering the hive for winter shelter. Apply a final coat of paint to any worn areas before winter.
- Winter: Check the hive periodically (without opening it) to ensure the outer cover is secure and the entrance is not blocked by snow or ice. Listen for the hum of the cluster on warm days — a silent hive in winter is a bad sign.
Replacing Old Comb
Beeswax comb accumulates pesticide residues, disease spores (particularly American foulbrood), and cocoons over time. As cocoons build up inside the cells, the cell diameter shrinks, producing progressively smaller worker bees. Most beekeeping experts recommend replacing approximately one-third of your frames each year, cycling out the oldest, darkest comb and replacing it with fresh foundation.
A simple rotation system works well: mark the year on each frame’s end bar with a paint marker. Each spring, remove all frames that are 3 years old or older and replace them with new frames. This ensures that no frame in your hive is more than 3 years old, keeping the comb fresh and the cell size consistent.
Repairing Damaged Hive Bodies
Minor damage to hive bodies — small cracks, chipped corners, or surface rot — can often be repaired rather than replaced. Fill cracks with waterproof wood glue and clamp until dry. Sand and repaint any areas where the paint has failed. If a corner has rotted, you can cut out the damaged section and glue in a new piece of matching wood.
However, if the damage is extensive — if the walls are soft and spongy, if the rabbet has deteriorated, or if the box no longer stacks squarely — it is time to replace the component entirely. A compromised hive body will not protect the colony adequately and will make inspection difficult.
Storing Unused Equipment
Unused hive bodies, frames, and supers should be stored in a dry, well-ventilated location. Stack hive bodies with the open ends facing up to allow air circulation. Frames with drawn comb should be frozen for 48 hours to kill wax moth eggs, then stored in sealed plastic bags or tight-fitting containers. Add a moth crystal (para-dichlorobenzene) to each container — do not use naphthalene mothballs, as they are toxic to bees.
Never store wet or damp equipment without drying it first. Moisture promotes mold growth, which can contaminate the wax comb and introduce disease to your colonies when the equipment is reused.

Professional Hive Maintenance Tool Set
This 3-piece stainless steel hive tool set includes a standard hive tool, a J-hook tool for frame lifting, and a frame grip. Essential for regular hive inspections and maintenance.
View on AmazonAdvanced Beehive Modifications and Innovations
Once you have mastered the basics of hive construction, you may want to explore modifications that improve hive performance, reduce labor, or adapt your equipment to specific conditions. Here are some of the most popular and effective modifications.
Insulated Hive Wraps
In cold climates, wrapping your hive with insulation can significantly improve winter survival rates. Commercial hive wraps are available, or you can make your own from 1-inch rigid foam insulation board. Cut the foam to fit around the hive body, leaving the entrance open, and secure it with straps or tape. Remove the wrap in spring when temperatures consistently stay above 50°F.
Research from several northern beekeeping programs has shown that insulated hives consume 15 to 25% less honey over winter, which means the colony enters spring with more food reserves and builds up faster. The insulation also reduces temperature fluctuations inside the hive, which reduces the bees’ need to generate heat and conserves their energy.
Screened Bottom Boards with Sliding Trays
While we discussed screened bottom boards earlier, an advanced version includes a sliding tray that can be inserted below the screen for varroa mite monitoring. The tray is coated with a sticky substance (petroleum jelly or cooking spray) so that mites falling through the screen adhere to it. By counting the mites on the tray over a 24-hour period, you can estimate the mite load in the colony and decide whether treatment is needed.
Queen Excluders
A queen excluder is a grid of wires or plastic bars spaced 0.163 inches apart — narrow enough to prevent the queen from passing through but wide enough for worker bees. Placed between the brood boxes and the honey supers, the excluder ensures that the queen lays eggs only in the brood boxes, keeping the honey supers free of brood. Some beekeepers build the excluder into the frame of a shallow super, creating an “excluder super” that replaces the separate excluder.
Entrance Reducers and Robbing Screens
A simple but effective modification is to build a custom entrance reducer that can be adjusted to multiple widths. A sliding wooden or metal plate with several notch positions allows you to set the entrance to fully open, 3/4 inch, 3/8 inch, or closed (for moving the hive). During nectar dearths, a robbing screen — a screen that creates a maze-like entrance that resident bees can navigate but intruders cannot — can prevent robbing behavior from devastating a weak colony.
Integrated Feeders
Rather than using a separate feeder that sits on top of the hive, some beekeepers build feeding systems directly into the hive body. A division board feeder replaces one or two frames in the brood box with a trough-shaped reservoir that holds sugar syrup. The bees access the syrup through a screened opening. This design is more space-efficient than top feeders and reduces the risk of drowning.
Horizontal Hive Designs (Long Langstroth)
For beekeepers who have difficulty lifting heavy boxes, a horizontal Langstroth — sometimes called a “long Lang” — offers all the benefits of the Langstroth frame system in a single, waist-height box. The frames hang side by side in a long, shallow box, similar to a top bar hive but using standard Langstroth frames. This design eliminates the need to lift heavy supers and makes inspection easier for beekeepers with back or shoulder problems.
Observation Windows
Adding a glass or acrylic window to one side of the hive body allows you to observe the colony without opening the hive and disrupting the bees. The window is covered with a wooden shutter to keep it dark inside the hive. This is an excellent modification for educational hives and for beekeepers who want to minimize disturbance during inspections.
Automated Monitoring Systems
Modern technology has introduced electronic hive monitoring systems that track temperature, humidity, weight, and even sound inside the hive. These systems use sensors mounted on or inside the hive body, transmitting data to a smartphone app or web dashboard. While not strictly a construction modification, designing your hive with sensor mounting points in mind can make installation much easier.
Weight monitoring is particularly valuable — a hive that is gaining weight during a nectar flow is healthy and productive, while a hive that is losing weight may need supplemental feeding. Temperature sensors in the brood nest can alert you to queen loss (the brood nest temperature drops when the queen is gone) or disease (fever-like temperature spikes can indicate American foulbrood).
For a comprehensive comparison of different hive designs and their modification potential, explore our guide to the best beekeeping hives available today.
Frequently Asked Questions About How Beehives Are Made
Eastern white pine is the most popular choice for beehive construction in North America due to its light weight, ease of working, good insulation, and low cost. Cypress is an excellent alternative in humid climates because of its natural rot resistance. Cedar offers the best insulation and durability but is more expensive. The key requirement is that the wood must be untreated — never use pressure-treated lumber, as the chemicals can harm bees and contaminate honey.
Building a complete 10-frame Langstroth hive from raw lumber typically costs between $50 and $80, depending on the wood species and local lumber prices. This includes the deep brood box, one medium honey super, 20 assembled frames with foundation, a bottom board, inner cover, and outer cover. If you need to purchase tools, add $100 to $200 for a basic set. Compared to $150 to $250 for a pre-assembled hive, building your own offers significant savings, especially if you plan to run multiple hives.
Yes, but start with a flat-pack kit rather than raw lumber. Flat-pack kits come with pre-cut pieces that you assemble using basic tools — a hammer, drill, and screwdriver. This eliminates the most challenging step (precision cutting) while still giving you the experience of building your own equipment. After building one or two kits, you will have the confidence and knowledge to try building from raw lumber.
A standard 10-frame Langstroth hive body measures 16-1/4 inches wide by 19-7/8 inches long on the outside. Deep (brood) boxes are 9-5/8 inches tall, medium supers are 6-5/8 inches tall, and shallow supers are 5-3/4 inches tall. The bottom board is approximately 16-1/4 by 20 inches, and the telescoping outer cover is approximately 18-3/4 by 22 inches. These dimensions must be followed precisely to maintain proper bee space and ensure interchangeability of components.
A well-built beehive made from quality lumber and properly maintained can last 15 to 25 years. Pine hives typically last 15 to 20 years, while cypress and cedar hives can last 25 years or more. The key factors affecting longevity are wood species, paint quality, climate exposure, and maintenance frequency. The bottom board usually needs replacement first, as it is closest to the ground and most exposed to moisture. Regular painting and prompt repair of any damage will maximize the lifespan of your hive.
Foundation is recommended for beginners because it guides the bees to build straight, uniform comb that is easy to inspect and extract honey from. Without foundation, bees may build cross-comb (comb that spans multiple frames) or uneven comb that is difficult to manage. However, experienced beekeepers sometimes use foundationless frames to allow bees to build natural comb with varying cell sizes. If you choose to go foundationless, keep the hive perfectly level and use a comb guide (a strip of wood or wax along the top bar) to encourage straight comb building.
Standard construction plywood is not recommended for beehive bodies because the layers delaminate when exposed to repeated moisture cycles. However, marine-grade or exterior-grade plywood (such as BCX or ACX) can be used for hive lids and bottom boards where it is protected by paint or metal flashing. For the hive body itself, solid lumber is always the better choice. If you must use plywood for budget reasons, seal all edges thoroughly with paint or wood sealer to prevent moisture intrusion.
Bee space is the gap of approximately 6 to 9 millimeters (1/4 to 3/8 inch) that honey bees naturally leave open between parallel surfaces. If the gap is smaller than 6mm, bees fill it with propolis. If it is larger than 9mm, they build bridge comb. Every dimension in a Langstroth hive is calculated to maintain bee space — the frame rest depth, the frame dimensions, the spacing between frames, and the clearance between the top bars and the inner cover. Getting bee space wrong is the most common cause of frames being glued shut with propolis or encrusted with bridge comb.
Most beekeeping experts recommend starting with two hives. Having two colonies allows you to compare their progress — if one colony is significantly weaker than the other, it may indicate a problem such as a failing queen or disease. Two hives also give you management flexibility: you can transfer frames of brood from a strong colony to boost a weak one, or combine colonies if one fails. The incremental cost of building or buying a second hive is small compared to the management advantages it provides.
For most beginners, a Langstroth hive is the better choice. It is the industry standard, which means equipment, advice, and replacement parts are readily available. It produces more honey than a top bar hive and is compatible with standard extraction equipment. A top bar hive is a good choice if you want a simpler, lower-cost design, prefer a more hands-off management style, or have physical limitations that make lifting heavy boxes difficult. Top bar hives are also excellent for educational settings because the comb is easily visible from above.
Moisture protection starts with good construction and finishes. Apply two coats of exterior latex paint to all outside surfaces. Use a telescoping cover with metal flashing to prevent rain from entering the hive. Elevate the hive on a stand to keep the bottom board off the ground. In winter, add a moisture quilt or use a screened bottom board to allow moisture to escape. Ensure the inner cover ventilation notch is open year-round. In extremely humid climates, consider adding small ventilation holes near the top of the hive body, covered with #8 hardware cloth to prevent bee escape.
Yes, reclaimed wood can be used for beehive construction, but with important precautions. Never use wood that was previously painted with lead-based paint (common in pre-1978 buildings), wood from treated pallets, or wood that has been exposed to chemical spills. Old barn wood, shipping crates made from untreated pine, and salvaged cedar siding are generally safe choices. Inspect all reclaimed wood for nails, staples, and other metal objects that could damage your saw blades. Sand the surfaces thoroughly to remove any surface contamination.
Start Building Your Beehive Today
Understanding how beehives are made gives you a profound appreciation for both the craft of woodworking and the remarkable biology of honey bees. From the ancient Egyptian mud hives to the precision-engineered Langstroth system, the evolution of beehive construction reflects humanity’s growing understanding of what bees need to thrive.
Whether you choose to build your hives from raw lumber, assemble a flat-pack kit, or purchase pre-made equipment, the knowledge you have gained from this guide will serve you well throughout your beekeeping journey. You now understand the purpose behind every component, the importance of precise measurements, the science of thermal regulation and moisture control, and the common mistakes to avoid.
The best time to start building is now. Beekeeping season waits for no one, and the bees will need a home ready when they arrive. Gather your materials, set up your workshop, and take it one step at a time. Your first hive may not be perfect, but it will be functional, and you will learn more from building it than from any guide or textbook.
If you are ready to take the next step, explore our complete guide on how to start beekeeping, or browse our recommendations for the best beekeeping hives available today. Happy building, and welcome to the wonderful world of beekeeping.