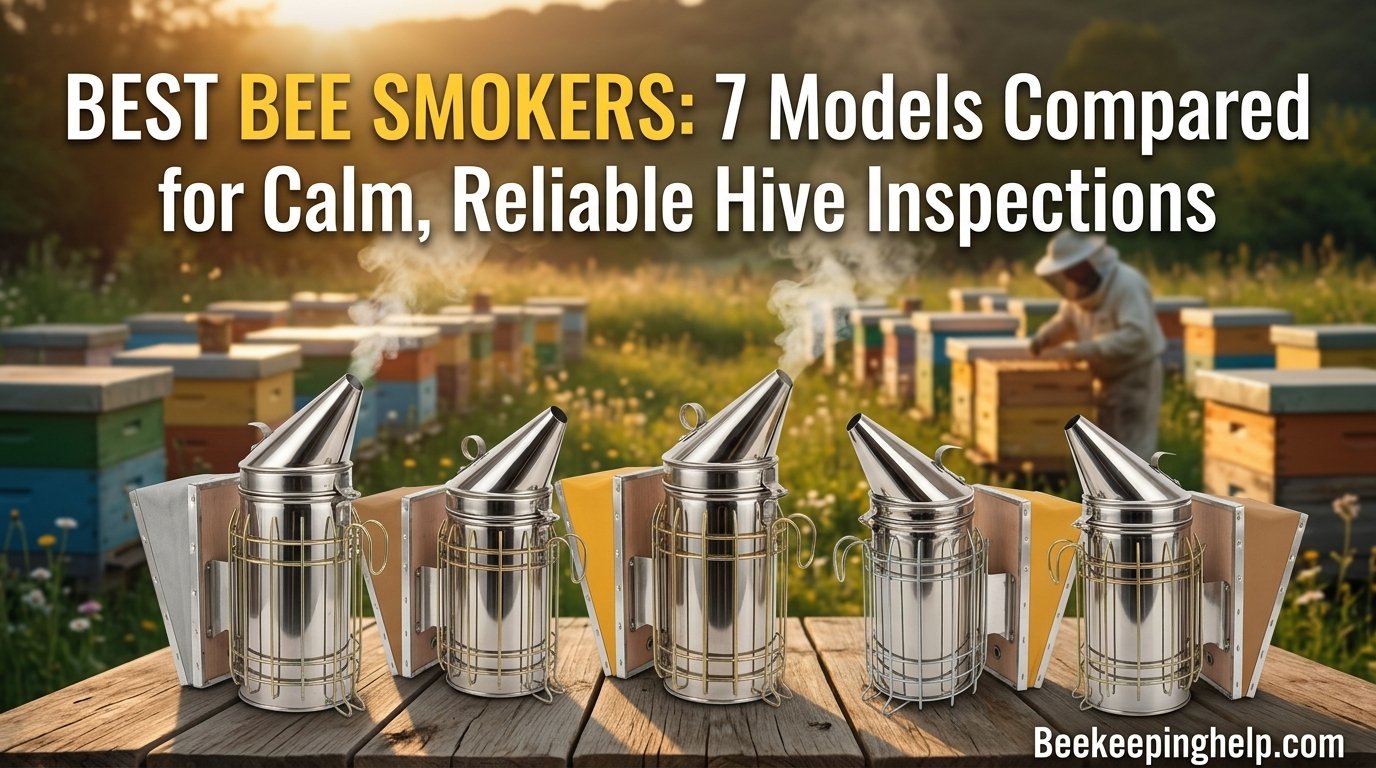
Best Bee Smokers: 7 Models Compared for Calm, Reliable Hive Inspections
Every beekeeper eventually learns the same lesson the hard way: the inspection goes the way the smoker goes. If it stays lit, the frames come out smoothly, the bees stay busy, and you close up in twenty minutes. If it sputters out halfway through the second box, everything changes — the guard bees find you, the propolis seems stickier, and what should have been a calm morning turns into a wrestling match.
Quick Picks at a Glance
If you want the short version before the long version, here it is. Seven smokers made this list, and each one earns its place for a different kind of beekeeper. There is no universal “best” here — a sideliner running thirty colonies through a July nectar flow needs something entirely different from a retiree with two hives behind the garage.
| Model | Best For | Bellows | Standout Trait |
|---|---|---|---|
| Foxhound Bee Company Professional | Multi-hive inspections | Oversized synthetic | Most air per squeeze |
| Mann Lake HD540 | Commercial & sideline use | Heavy leather | Longest service life |
| VIVO Large Stainless | Budget-conscious beginners | Synthetic | Removable airflow plate |
| Little Giant BSMOKE | Mid-range all-rounder | Genuine leather | Fast ember start-up |
| Goodland Bee Supply 11″ | Rough field conditions | Vinyl composite | Welded heat cage |
| Blisstime Smoker Kit | First-time beekeepers | Synthetic leather | Includes 54 fuel pellets |
| GLOGLOW Electric Motorized | Limited hand strength | None (electric fan) | Continuous push-button smoke |

Why a Smoker Matters More Than You Think
Ask a room full of new beekeepers what the smoker does and most will say it calms the bees. That is true in effect but not in mechanism, and the difference matters when you are deciding how much to spend. Smoke works on two fronts at once. First, it interrupts the alarm pheromone chain — when a guard bee stings or raises the alarm, she releases isopentyl acetate, a banana-scented volatile that recruits her sisters to the same spot. Cool smoke masks that signal, so the recruitment never builds. Second, smoke triggers an ancient wildfire response: workers move down into the combs and begin gorging on honey, and a bee with a full crop is physically less able to flex her abdomen into a sting posture.
What this means practically is that smoke is a communication tool, not a weapon. It has to arrive cool, thin, and steady. A smoker that belches hot sparks singes wings and irritates the colony. A smoker that produces a weak wisp for ninety seconds and then dies leaves you exposed at exactly the moment you are lifting the second brood box. If you want the full physiological breakdown, our guide on how a bee smoker works walks through the pheromone science step by step.
This is also why the cheapest possible smoker is rarely the cheapest decision. Thin sheet metal warps after a season of thermal cycling, the lid stops sealing, and a lid that does not seal cannot hold a slow smolder. You end up buying twice. The models on this list were chosen because their metal gauge, hinge design, and bellows construction hold up under actual field use rather than looking good in a product photo.

The 7 Best Bee Smokers Reviewed
Each smoker below is assessed on the four things that actually decide whether you enjoy an inspection: how easily it lights, how long it stays lit, how comfortable the bellows are after fifty squeezes, and how well the heat shield keeps the hot canister off your forearm.
Pros
- Oversized bellows push higher air volume per squeeze with minimal wrist exertion.
- Heavy-duty build quality designed for frequent, multi-hive inspections.
- Integrated bracket holds your hive tool while working.
Cons
- Bellows are synthetic rather than genuine leather.
- Slightly pricier than generic starter models.
The hive tool holder sounds like a gimmick until you have set a hive tool down on a frame top bar and lost it in the grass. It is one of those small ergonomic wins that shows the product was designed by people who keep bees rather than people who source hardware. The synthetic bellows are the main compromise — they will not develop the supple feel of broken-in leather, but they also will not dry out and crack if you leave the smoker in a hot truck bed for a month.
Pros
- Industry standard among commercial beekeepers for durability and long service life.
- Generous firebox holds enough fuel for hours of continuous smoldering.
- High-grade leather bellows provide smooth, responsive pumping.
Cons
- Higher price point ($60–$80 range).
- Bulkier and heavier to transport for hobbyists with only 1–2 hives.
The leather bellows are the part you notice first. There is a responsiveness to good leather that synthetic sheeting never quite matches — it springs back faster, which lets you fall into a rhythm of short puffs rather than forcing each stroke. Over a full day of splits or mite treatments, that difference compounds. The trade-off is weight and price. If you are managing two hives in a suburban backyard, this is more smoker than you need, and that is a perfectly valid reason to buy something smaller.

Pros
- Excellent budget option with strong value for money.
- Perforated removable floor plate maximizes bottom-up airflow for easy lighting.
- Heat shield encircles the canister to prevent contact burn hazards.
Cons
- Thinner metal gauge than commercial models; base can run extremely hot.
- Bellows material can feel stiff out of the box.
That floor plate matters more than the price suggests. Lighting a smoker is fundamentally an airflow problem, and a raised perforated base lets air enter beneath the fuel bed rather than fighting its way through packed material from the side. New beekeepers who struggle to keep a smoker lit often discover the problem was never their fuel — it was the absence of bottom-up draft. The trade-off is a thinner gauge that gets hot fast, so treat the base as untouchable and always set it on soil or a hive stand rather than dry grass.

Pros
- Genuine leather bellows age well and resist cracking if properly maintained.
- Rapid airflow design gets embers burning quickly.
- Solid mid-range construction widely supported by local supply networks.
Cons
- Heat shield clearance is narrow; can transfer heat if squeezed tightly.
- Canister lid hinge requires occasional re-alignment.
Two things worth knowing before you buy. The narrow shield clearance means you should hold the smoker by the bellows frame, not by gripping the cage — a habit worth building anyway. And the lid hinge benefits from a gentle re-seat once or twice a season; a lid that does not close square lets in side air and burns your fuel faster than it should. Neither is a dealbreaker, but both reward an owner who pays attention.

Pros
- Welded heat cage provides extra rigidity if dropped.
- Deep fuel chamber reduces the need for mid-inspection refills.
- Reliable smoke output under varying weather conditions.
Cons
- Heavier overall frame.
- Bellows material is sensitive to direct sparks during refueling.
The weather consistency is worth highlighting. Smokers behave differently on a damp, still morning than they do on a dry, breezy afternoon, and a deep chamber with a well-fitted lid is far more forgiving of humidity than a shallow one. The vinyl bellows do demand care during refueling — open the lid away from the bellows and let sparks settle before you reach across, or you will eventually find a pinhole.

Pros
- Great starter bundle for beginners with included fuel pellets.
- Compact footprint and lightweight frame.
- Budget-friendly option for single-hive hobbyists.
Cons
- Lightweight sheet metal can dent under rough usage.
- Smaller fuel capacity requires topping off during longer sessions.
Be realistic about what this is: a well-priced entry point, not a lifetime tool. The light frame is a genuine advantage if you are carrying gear across a yard, and the compact size is easy to store. But the smaller chamber means a shorter burn window, so plan on a mid-inspection top-up if you are working more than a couple of boxes. Once you know what you like, our roundup of what to use in a bee smoker will get you off pellets and onto cheaper, longer-burning fuel.

Pros
- Eliminates hand fatigue from manual bellows pumping.
- Delivers a steady, continuous stream of cool smoke at a button press.
- Ideal for beekeepers with arthritis or hand mobility limits.
Cons
- Battery and motor components add weight and potential fail points.
- Internal fan can clog with heavy creosote/resin buildup if not cleaned frequently.
There is also an underrated workflow benefit: because output is continuous and even, you can hold the smoker in one hand and work a frame with the other without breaking rhythm to pump. The honest caveat is mechanical complexity. A bellows smoker has no parts that can fail electronically; this one does. Charge it before yard days, keep the fan housing clean, and consider keeping a manual smoker in the truck as a backup.
Head-to-Head Comparison Table
Reading seven reviews back to back can blur the differences, so here is the same information laid out where the trade-offs are easier to see. Scan the “best for” column first — it usually narrows the field to two candidates before you start comparing specs.
| Model | Chamber | Bellows | Heat Shield | Weight Class | Price Tier |
|---|---|---|---|---|---|
| Foxhound Professional | Heavy-gauge stainless | Oversized synthetic | Wire shield | Medium-heavy | Upper mid |
| Mann Lake HD540 | 28-gauge, 4″×7″ | Heavy leather | Full wire grid | Heavy | Premium ($60–$80) |
| VIVO Large | 11″ × 4″ stainless | Synthetic | Encircling guard | Light-medium | Budget |
| Little Giant BSMOKE | Stainless, 4″×7″ | Genuine leather | Cage + hook | Medium | Mid |
| Goodland 11″ | 11″ stainless | Vinyl composite | Welded cage | Heavy | Mid |
| Blisstime Kit | Compact stainless | Synthetic leather | Wire guard | Light | Budget |
| GLOGLOW Electric | Stainless | None — fan motor | Heat guard handle | Medium | Mid |
Anatomy of a Bee Smoker
A smoker looks simple, and mechanically it is — but each component solves a specific problem, and knowing which is which makes buying decisions much clearer.
The firebox or canister
This is the combustion chamber where fuel smolders. Its volume determines how long you can work without refueling, and its metal gauge determines how many seasons it survives. Stainless steel is standard; galvanized versions exist but are best avoided because heated galvanizing can release unpleasant fumes.
The lid and nozzle
The hinged conical lid concentrates smoke into a directed stream and, just as importantly, restricts oxygen so fuel smolders rather than flames. A lid that seats poorly is the single most common cause of a smoker that will not stay lit.
The bellows
Two wooden or plastic paddles with a flexible gusset between them, plus a one-way inlet valve. Squeezing pushes air through a port into the base of the fuel bed; releasing draws fresh air in through the valve rather than back down the nozzle.
The heat shield
A wire cage standing off the canister wall. It does not make the smoker cool — the metal underneath still reaches temperatures that will blister skin — but it prevents accidental contact and gives you somewhere safe to grip.
The hook and grate
The hook lets you hang the smoker on the edge of an open hive body instead of setting it in dry grass. Inside, a raised grate or perforated plate keeps fuel off the floor so air can enter underneath.
Choosing the Right Size and Gauge
Smokers are usually sold as 4″ × 7″ or 4″ × 10″/11″, referring to canister diameter and height. The larger format is the commercial default because it holds more fuel and therefore burns longer, and because a taller column of fuel produces cooler smoke by the time it reaches the nozzle. The smaller format lights faster, weighs less, and suits a beekeeper doing a twenty-minute check on one or two colonies.
Here is the practical rule: match capacity to your longest realistic session, not your typical one. If you have four hives but occasionally spend a Saturday doing mite treatments across all of them, buy for the Saturday. Running out of smoke at hive three is far more annoying than carrying a slightly heavier canister.
Metal gauge is the specification nobody reads and everybody eventually regrets ignoring. Lower gauge numbers mean thicker steel. Thicker steel resists warping through repeated heating and cooling cycles, keeps the lid seating true, and survives being dropped. The difference between a budget smoker and a commercial one is rarely a clever feature — it is usually just thickness.
| Colony Count | Recommended Size | Why |
|---|---|---|
| 1–2 hives | 4″ × 7″ compact | Fast to light, easy to store, plenty of burn time |
| 3–8 hives | 4″ × 7″ heavy gauge | Full-session capacity without commercial bulk |
| 9–25 hives | 4″ × 10″/11″ | Fewer refuels, cooler smoke, durable under daily use |
| 25+ hives | Commercial 4″ × 11″ + backup | All-day burn plus redundancy if one fails |
If you are still building out your setup, it is worth reading our guide to the best beekeeping hives alongside this one, since hive configuration affects how many boxes you will be opening per inspection.
Bellows Material: Leather vs Synthetic
This is the debate that comes up in every beekeeping club meeting, and both sides have a real case.
The case for genuine leather
Leather has a springiness that synthetic sheeting does not replicate. It rebounds quickly, which lets you produce short, controlled puffs instead of long, laboured strokes. It also ages gracefully — a well-maintained leather bellows develops a suppleness that makes pumping almost effortless, and if it does tear, leather is straightforward to patch or replace.
The case for synthetic
Synthetic and vinyl bellows do not dry out. Leather left in a hot truck, or stored through a dry winter without conditioning, eventually cracks along the fold lines. Synthetic material is essentially maintenance-free and is far less bothered by damp storage or humidity. It is also cheaper, which is why it dominates the budget tier.
| Factor | Genuine Leather | Synthetic / Vinyl |
|---|---|---|
| Rebound feel | Excellent, springy | Adequate, can feel stiff at first |
| Maintenance | Needs occasional conditioning | Essentially none |
| Failure mode | Cracks along folds if neglected | Pinholes from sparks |
| Cold weather | Stays flexible | Can stiffen noticeably |
| Cost | Higher | Lower |
The honest verdict: if you will actually condition your leather once a season, buy leather. If you know yourself well enough to admit you will not, buy synthetic and save the money. Both will serve you well; only one punishes neglect.
Heat Shields and Burn Safety
A lit smoker is a small furnace. The canister wall routinely exceeds temperatures that cause instant contact burns, and the base can be hotter still because that is where combustion is most active. The wire shield is there to keep you from learning this personally.
Shields come in two broad styles. Clipped-on wire guards are lighter and cheaper but can loosen over time. Welded cages, like the one on the Goodland, are heavier but far more rigid and will not shift if the smoker takes a knock. Either way, clearance matters: a shield that sits very close to the canister transfers heat by conduction if you grip it tightly, which is why the Little Giant’s narrow clearance is worth noting.
Field safety habits worth building
- Never set a lit smoker directly on dry grass, pine straw, or mulch. Use bare soil, a paving slab, or the hive-body hook.
- Keep a spray bottle of water in your kit, especially during dry months.
- Carry the smoker by the bellows frame, not the cage.
- Open the lid away from your face — trapped gases can flare when oxygen rushes in.
- Never transport a smoldering smoker in a closed vehicle. Extinguish it fully first.
Fuel Choices and How They Burn
Fuel does more to determine your smoker experience than the smoker itself. The goal is material that smolders slowly, produces cool white smoke, and contains nothing you would not want drifting over a food-producing colony. That rules out anything treated, painted, glued, or synthetic.
Reliable fuels
- Pine needles: free, abundant, light instantly, burn hot and fast. Excellent as a starter layer.
- Burlap (untreated): the classic long-burner. Cut into strips, roll loosely, and it will smolder for a long time.
- Wood pellets: dense, extremely long-burning, and consistent. Slightly slower to light.
- Dry punk wood / rotten wood: traditional and superb once you find a source.
- Cotton or untreated wood shavings: clean burning and easy to source.
- Dried grass clippings and leaves: free, but burn fast and need frequent topping.
What to avoid
- Treated, painted, or pressure-treated wood
- Cardboard with printed inks or glue seams
- Synthetic fabrics, plastics, or dryer lint from synthetic clothing
- Anything damp enough to steam rather than smolder
| Fuel | Lighting Ease | Burn Duration | Smoke Quality | Cost |
|---|---|---|---|---|
| Pine needles | Very easy | Short | Good, can run warm | Free |
| Burlap strips | Easy | Long | Excellent, cool | Very low |
| Wood pellets | Moderate | Very long | Excellent, consistent | Low |
| Punk wood | Moderate | Very long | Excellent, cool | Free if sourced |
| Dried leaves | Very easy | Very short | Variable | Free |
Our dedicated guide on what to use in a bee smoker goes deeper on regional fuel sourcing and layering strategies if you want to experiment.
Lighting a Smoker That Actually Stays Lit
Most smoker failures trace back to one of three things: packing fuel too tightly, skipping the ember stage, or closing the lid before the fire has established a proper coal bed. The fix is a layered approach.
Start with a small handful of fast-igniting tinder — pine needles, a crumpled sheet of newspaper, or a piece of dry grass — dropped loosely onto the grate. Light it and give two or three gentle puffs until you see real flame. Resist the urge to pump hard; aggressive early pumping blows the tinder out before it establishes.
Once flames are visible, add a second layer of slightly denser material — small twigs, a loose roll of burlap, or a few pellets. Puff steadily and watch for the tinder to collapse into glowing orange embers. That coal bed is the engine of the whole system. A smoker without a coal bed will go out the moment you stop pumping, no matter how much fuel is in the canister.
Now fill the chamber with your main fuel, loosely — you should be able to see gaps between pieces. Packed fuel chokes airflow. Close the lid, give five or six firm pumps, and check the nozzle: you want thick, cool, white smoke, not thin blue wisps or visible flame. Hold your hand a foot from the nozzle; if the smoke feels hot, it is not ready.
Smoke Technique at the Hive
More smoke is not better smoke. Over-smoking floods the colony with alarm-suppressing signal to the point that bees run, cluster oddly, and sometimes abandon the frames you are trying to inspect. It can also taint honey if applied heavily near open supers. The skilled approach is minimal and well-timed.
At the entrance
Two or three puffs into the entrance, then wait a full minute. This is the step beginners skip. The smoke needs time to circulate and trigger the gorging response before you disturb anything.
Under the cover
Lift the outer cover slightly and give one or two puffs beneath it before removing the inner cover. This moves bees down off the top bars so you are not crushing them when you set the cover aside.
Across the top bars
A light, sweeping puff across the top bars clears the working surface. One pass is usually enough. Repeat only if bees begin boiling up between frames.
During the inspection
Keep the smoker within reach and use it reactively rather than on a schedule. If you notice bees lining up along a frame edge in a defensive posture, or you hear the pitch of the colony rise, a single puff usually resets things. If you have stung your glove, smoke the spot immediately to mask the alarm pheromone left behind.
Understanding hive layout helps here too — knowing where brood, stores, and traffic corridors sit tells you where smoke will actually do something. Our breakdown of the parts of a bee hive and their functions is a useful companion read, and how a beehive works covers the colony behaviour behind it.
Electric Smokers: Who Should Buy One
Electric smokers occupy a narrow but important niche. They are not simply a modern upgrade to bellows — they are an accessibility tool, and evaluating them on general convenience misses the point.
Strong reasons to choose electric
- Arthritis, carpal tunnel, tendonitis, or any condition that makes repeated gripping painful
- Reduced grip strength from injury, age, or neurological conditions
- Single-handed operation needs — if you can only use one hand, an electric smoker keeps the other free entirely
- Very large operations where a full day of pumping causes genuine cumulative strain
Reasons to stay with bellows
- Remote yards where charging is inconvenient
- A preference for equipment with nothing to fail electronically
- Budget — a good manual smoker plus spare fuel usually costs less
- Heavy propolis environments that clog fan housings quickly
| Consideration | Manual Bellows | Electric Motorized |
|---|---|---|
| Hand strain | Moderate over long sessions | Essentially none |
| Output consistency | Depends on operator rhythm | Steady and even |
| Failure points | Bellows gusset only | Battery, motor, fan, switch |
| Field repairability | High | Low |
| Cleaning needs | Occasional scraping | Frequent fan housing cleaning |
Cleaning, Creosote and Long-Term Care
Creosote is the tarry residue that condenses inside the nozzle and lid as smoke cools. Left alone it narrows the outlet until your smoker produces a feeble trickle no matter how hard you pump, and eventually glues the lid shut. A ten-minute clean two or three times a season prevents all of it.
Routine cleaning
- Let the smoker cool completely, then scrape the nozzle interior with a hive tool or stiff wire brush.
- Empty the chamber fully and knock out accumulated ash — ash smothers airflow from the base.
- Wipe the lid’s inner cone where creosote collects thickest.
- Check the hinge alignment and bend it gently back to square if the lid no longer seats flat.
Deep cleaning
Once a year, burn the smoker empty and hot for ten to fifteen minutes. The heat carbonises soft creosote into brittle flakes that scrape away easily. For stubborn buildup, a soak in hot water with washing soda loosens residue without damaging stainless steel. Avoid harsh solvents — residue can taint smoke.
Bellows care
Leather benefits from a light coat of neatsfoot oil or a leather conditioner once a season, worked into the fold lines where cracking starts. Synthetic bellows need nothing beyond keeping sparks off them. Check the inlet valve flap on any smoker: if it sticks or has torn, the smoker will feel weak even though nothing else is wrong.
Storage
Store fully cold, fully emptied, and with the lid propped slightly open so residual moisture can escape. A closed damp smoker rusts at the seams over winter. Keep it indoors rather than in an unheated shed if you have leather bellows.
Common Mistakes to Avoid
Packing the fuel tight
It feels efficient and it is the fastest way to kill a smoker. Fuel needs air gaps. Load loosely and let the draft do the work.
Skipping the one-minute wait at the entrance
Smoke needs time to work. Puffing and immediately cracking the lid gives you the disturbance without the benefit.
Over-smoking
Heavy smoke drives bees into disorganised running and can flavour honey. If you cannot see the frames through the haze, you have used far too much.
Using hot smoke
If you see sparks or feel heat at the nozzle, your fuel is flaming rather than smoldering. Add more dense fuel to damp it down and stop pumping so hard.
Setting the smoker in dry vegetation
This causes apiary fires every year. Use the hook, a slab, or bare soil, and carry water.
Not extinguishing before transport
A smoldering smoker in a closed vehicle is genuinely dangerous — both a fire risk and a carbon monoxide risk. Plug the nozzle and confirm it is cold before it goes in the truck.
Buying the cheapest available model
Thin metal warps, lids stop sealing, and you replace it within a season or two. Spending a little more once is usually the cheaper path.
If you are still in your first season, our how to start beekeeping guide covers the broader setup mistakes that tend to travel alongside these.
Using a Smoker Through the Seasons
A smoker is not a static tool you use the same way every month. The colony changes dramatically across the year — population, temperament, stores, and defensiveness all shift — and your smoke technique should shift with them. Beekeepers who use identical technique in April and September usually find September unpleasant.
Early spring: light touch, fast work
In early spring the colony is small, still partly clustered, and extremely vulnerable to chilling. Brood left uncovered for even a few minutes on a cool morning can suffer. This is the season for the least smoke you can get away with and the fastest inspection you can manage. Two puffs at the entrance, one under the cover, and then work quickly with the boxes closed again as soon as possible.
There is a practical smoker problem specific to spring: everything is damp. Pine needles that lit instantly in August will smoulder resentfully in March, and burlap stored in a shed through winter absorbs enough moisture to steam rather than smoke. Keep a sealed container of dry fuel indoors specifically for spring use. A gallon zip bag of pellets stored in the house will save you fifteen minutes of frustration on the first warm Saturday of the year.
Spring colonies are also generally good-tempered. They have brood to protect but not much honey, the population is modest, and forage is coming in. If your spring colony is aggressive, that is information — it usually signals queenlessness, disease stress, or robbing pressure rather than genetics.
Late spring and early summer: the busy season
This is peak inspection season. You are checking for swarm cells, adding supers, doing splits, and possibly requeening. Inspections are longer and more frequent, which means smoker capacity starts to matter in a way it did not in March. A compact smoker that comfortably handled a fifteen-minute spring check will need refuelling partway through a swarm-control session across four colonies.
Colonies at this stage are large and confident but usually still even-tempered, because a strong nectar flow keeps foragers occupied and reduces defensive behaviour. Take advantage of it. This is the season to practise minimal-smoke technique, because the bees will forgive small errors.
One seasonal habit worth adopting: load more fuel than you think you need at the start of a yard day. Refuelling a hot smoker in the middle of a yard, with gloves on and bees in the air, is one of the more awkward manoeuvres in beekeeping. A full chamber at the start avoids it entirely.
Mid to late summer: dearth and defensiveness
When the nectar flow ends, temperament changes noticeably. Foragers with nothing to forage turn their attention to defence and to robbing other colonies. Dearth colonies are meaningfully more defensive than the same colonies were six weeks earlier, and beekeepers who do not adjust their approach get stung.
In dearth you want a smoker that is reliably, continuously producing. This is the season where a thin smoker that needs constant pumping becomes a real liability, because you cannot afford a gap in smoke coverage while you are holding a frame. Load dense long-burning fuel, keep the smoker hooked on the hive body within reach, and use it more freely than you would in spring.
Dearth also brings robbing risk, and smoke plays a role here. Robbing starts when exposed honey scent drifts on the air. Keeping inspections short, covering exposed supers with a cloth, and using smoke to move robbers away from cracks all help. If you see a robbing frenzy beginning, close up and heavily smoke the entrance area to disrupt the scent trail before it becomes a full-scale attack.
Autumn: short checks, high stakes
Autumn inspections are about stores, mite loads, and queen status. The colony is defensive because it is defending a winter’s worth of honey, and it has fewer forage distractions. Expect the temperament you had in dearth, possibly sharper.
Autumn is also when your smoker will be lit longest per session, because you are often weighing hives, doing final treatments, and consolidating boxes. Full loads, dense fuel, and a chamber with real capacity all pay off here. Extinguish carefully: autumn is dry-vegetation season in much of the world, and this is when apiary fires most commonly start.
Winter: minimal intervention
You should rarely be opening hives in winter. When you do — checking stores by hefting, adding emergency feed, clearing a blocked entrance — keep the smoker lit but barely use it. A clustered colony is not going to mount much of a defence, and a blast of smoke in cold weather simply disrupts the cluster and costs the bees energy they cannot spare.
Do keep the smoker lit rather than going without, though. A single puff to move bees off a feeder rim is far gentler than brushing them, and a lit smoker gives you the option. Winter also brings a practical annoyance: cold synthetic bellows stiffen noticeably, which is one of the quieter arguments in favour of leather if you keep bees in a cold climate.
| Season | Colony Temperament | Smoke Volume | Fuel Strategy | Main Risk |
|---|---|---|---|---|
| Early spring | Calm, fragile | Minimal | Dry indoor-stored fuel | Chilling brood |
| Late spring | Busy, tolerant | Light | Full chamber for long sessions | Running out mid-yard |
| Summer dearth | Defensive, robbing | Moderate to generous | Dense, long-burning | Robbing cascade |
| Autumn | Sharply defensive | Moderate | Full load, long burn | Dry-grass fire |
| Winter | Clustered, passive | Almost none | Small load, keep lit | Disrupting cluster |
Weather, Humidity and Smoke Behaviour
Two beekeepers with identical smokers and identical fuel can have completely different experiences on the same day simply because one is working a shaded, humid yard and the other is on a dry, breezy hillside. Understanding how conditions affect combustion turns a frustrating, unpredictable tool into a predictable one.
Humidity
Moisture in the air and in the fuel both work against you. Damp fuel spends its first minutes driving off water rather than producing smoke, which cools the coal bed and often kills it outright. On a humid morning you will need more tinder, a longer establishment phase, and more patience before loading the main charge.
The practical countermeasure is storage discipline. Keep fuel in a sealed container — a five-gallon bucket with a gasket lid is the classic solution — and keep a smaller “starter kit” of very dry material separate from your bulk fuel. Some beekeepers keep a handful of cotton makeup rounds or a few compressed fire-starter tablets in the smoker box purely as insurance for bad mornings.
Counterintuitively, high humidity makes the smoke itself behave better once you have it. Cool, moist air holds the smoke column together and lets it drift where you point it, rather than dissipating instantly.
Wind
Wind is the single most disruptive condition for smoker work. It strips the smoke away before it reaches the bees, forcing you to use far more than you should, and it accelerates combustion inside the chamber so your fuel burns down faster. A smoker that lasts three hours on a still day may last ninety minutes in a stiff breeze.
Practical adaptations: work from the upwind side so smoke drifts into the hive rather than into your face, keep the lid closed between uses rather than leaving it open, and consider positioning your body as a windbreak when applying smoke at the entrance. If wind is persistent in your yard, a heavier smoker with a well-seating lid is genuinely worth the money, because lid seal is what limits wind-driven overdraft.
Heat
On very hot days the colony is already stressed by temperature and may be bearding on the front of the hive. Smoke applied to a bearded cluster does very little except annoy them. Work early in the morning or late in the evening, and remember that a hot smoker in hot weather is a burn risk to you long before it is a problem for the bees — the metal reaches working temperature faster and stays there.
Cold
Cold air makes fuel harder to ignite and makes bellows — especially synthetic ones — stiffer and less responsive. It also means you should be doing less, faster. The one advantage of cold is that smoke is highly visible, which makes it easy to judge exactly how much you are applying.
Rain
Do not inspect in rain if you can avoid it. If you must — an emergency, a queen introduction that cannot wait — keep the smoker under cover between uses, because a few drops down the nozzle will end your session. Some beekeepers carry a short length of foil or a simple tin lid to cap the smoker when setting it down in wet conditions.
Working Hot and Defensive Colonies
Sooner or later every beekeeper meets a colony that does not want to be inspected. It may be genetics, it may be queenlessness, it may be a bad day in a dearth — but the experience is the same: bees pinging your veil before the cover is fully off, and a rising hum that you learn to recognise as a warning.
Read the colony before you open it
Stand at the side of the hive and watch the entrance for thirty seconds. Orderly traffic with returning foragers carrying pollen is a good sign. Bees flying tight defensive arcs in front of the entrance, or a cluster of guards patrolling the landing board, tells you to take the hive seriously before you touch it.
Front-load your smoke
With a defensive colony, the single most effective change is to smoke earlier and wait longer. Three or four puffs at the entrance, then a genuine two-minute wait — not the token thirty seconds most people give it — makes a dramatic difference. The gorging response takes time. Opening too early means you get the disturbance of the smoke without the behavioural payoff.
Keep the smoker in your hand, not on the ground
With a hot colony, put the smoker where you can reach it in half a second. Hooked on the hive body, hanging from the super rim, or held between your forearm and side — whatever works. The moment you have to bend down and search for it, you have lost control of the situation.
Smoke the sting site immediately
If you take a sting through a glove or on a suit seam, smoke that exact spot straight away. The alarm pheromone deposited there is a beacon, and without masking it you will receive a steady stream of follow-up stings in the same place. This is the single highest-value use of a smoker in the entire inspection.
Know when to close up
There is no prize for finishing an inspection. If the colony has escalated past what you can manage — bees in numbers on the veil, a loud sustained roar, stings landing repeatedly — close the hive, walk away, and come back another day or at a different time. Fighting a defensive colony almost always makes it worse and teaches the colony nothing except that disturbance means escalation.
Consider the root cause
Persistent defensiveness across multiple calm-weather inspections is usually a queen issue. A colony that has gone queenless, or one headed by a poorly mated or aggressively bred queen, will not improve with better smoke technique. Requeening from gentle stock is the real fix; the smoker just makes the interim tolerable.
| Signal | Likely Meaning | Smoker Response |
|---|---|---|
| Pinging the veil before opening | High alert state | Heavier entrance smoke, longer wait |
| Rising hum as you work | Escalating agitation | Single puff across top bars, pause |
| Bees lining frame edges, abdomens up | Defensive posture | Light puff, slow your movements |
| Sting received | Alarm pheromone deposited | Immediate smoke on the exact spot |
| Sustained roar, mass flight | Full defensive response | Close up and leave |
Building an Efficient Apiary Workflow
As colony counts grow, the smoker stops being a tool you use and becomes a tool you manage. Beekeepers with twenty hives think about fuel logistics the way a carpenter thinks about battery charge. Here is how to build a routine that scales.
Light before you gear up
The most common time sink in a yard day is standing in a bee suit, sweating, trying to coax a reluctant smoker to life. Light the smoker first, get a genuine coal bed established, load it full, then put on your suit and gloves. By the time you are dressed the smoker is settled and producing properly.
Carry a fuel pouch
A small canvas bag or bucket with pre-portioned fuel — rolled burlap bundles, or a scoop of pellets in a tin — turns refuelling from a two-minute fumble into a ten-second action. Pre-rolling burlap at home in winter is the kind of low-effort preparation that pays back all season.
Standardise your hive order
Work the calmest colonies first and the most defensive last. Alarm pheromone lingers in a yard, and starting with a hot hive puts every subsequent colony on alert. Ending with it means you can simply leave afterwards.
Use the hook properly
The hook on the side of the smoker exists so the smoker can hang on the rim of an open hive body. Using it consistently solves three problems at once: the smoker is never in dry grass, it is always within arm’s reach, and it is never knocked over by a moving super.
Keep a backup
Anyone running more than about ten colonies should own two smokers. Not because the first will fail often, but because when it does — a torn bellows gusset, a hinge that finally gives out, a battery that did not charge — you lose the entire day. A cheap second smoker in the truck is inexpensive insurance.
Build an extinguish routine
Decide on one method and use it every single time: plug the nozzle with a cork, set the smoker somewhere non-flammable, and do not load the truck until you have physically touched the canister and confirmed it is cool. Routines survive tired afternoons in a way that intentions do not.
If you are scaling up and rethinking equipment generally, our guides on how beehives are made and how to make a beehive are worth reading alongside this — building your own woodware is one of the more effective ways to keep per-colony costs down as numbers grow.
Troubleshooting Chart
Almost every smoker complaint reduces to airflow, fuel, or seal. This chart maps the symptom to the usual culprit so you can diagnose in the field rather than guessing.
| Symptom | Most Likely Cause | Fix |
|---|---|---|
| Goes out within minutes of loading | No coal bed established | Restart; build embers before adding main fuel |
| Thin, weak smoke despite hard pumping | Creosote narrowing the nozzle | Scrape the nozzle interior once cool |
| Bellows feel soft, little air moves | Torn gusset or stuck inlet valve | Inspect valve flap; patch or replace bellows |
| Smoke is hot, sparks visible | Fuel flaming, not smouldering | Add dense fuel, stop pumping, close lid |
| Burns through fuel very fast | Lid not seating, or wind overdraft | Re-align hinge; shield from wind |
| Hard to light on damp days | Fuel absorbed moisture | Use sealed dry starter fuel |
| Dies when set down but revives when pumped | Ash blocking base airflow | Empty ash; check grate is clear |
| Lid sticks or will not close flush | Creosote buildup on rim | Burn out hot, then scrape rim |
| Electric model output dropping | Fan housing clogged or battery low | Clean housing; recharge fully |
| Smoker tips over repeatedly | Light base, uneven ground | Use the hook or a flat slab |
If you are unsure whether a symptom is the smoker or your technique, the fastest diagnostic is to light it with known-dry fuel on a still day. If it behaves perfectly then, the tool is fine and the variable is your fuel or conditions.
Accessories That Actually Help
The accessory market around smokers contains a lot of things you do not need and a handful that genuinely improve the experience. Here is the honest sort.
Worth buying
- A sealed fuel container. A gasketed bucket keeps burlap and pellets bone dry through a wet spring. This is the single highest-value accessory on the list and it costs almost nothing.
- A smoker stand or hanging hook. If your smoker did not come with a hook, an add-on bracket that holds it on the hive body eliminates both the fire risk and the reaching problem.
- A cork or purpose-made plug. Grass works, but a cork that lives permanently in your kit means you never skip the extinguish step because you could not find green vegetation.
- Spare bellows. Cheap, small, and the one part that actually fails. Keeping a spare turns a season-ending failure into a five-minute repair.
- A stiff wire brush. Specifically for nozzle creosote. A hive tool works but a brush is faster and reaches further.
Marginal
- Smoker carrying cases. Useful if you transport frequently in a passenger vehicle, unnecessary if you have a truck bed. Never store a warm smoker in one.
- Commercial fuel pellets. Convenient and consistent, but expensive compared to burlap if you use a lot. Good for beginners, less compelling once you have a fuel source sorted.
- Long-neck butane lighters. Nice, but a standard lighter plus decent tinder achieves the same thing.
Skip
- Novelty fuel blends with added scents. You want clean, neutral smoke. Adding aromatics to a food-producing colony is a solution to a problem nobody has.
- Very small “mini” smokers. They look convenient and they run out of smoke before you have finished one box.
Alternatives and Supplements to Smoke
Smoke is the standard, not the only option. A number of beekeepers use alternatives either exclusively or as supplements, and it is worth understanding what each actually does.
Sugar water spray
A light 1:1 sugar syrup misted over the top bars gives bees something to clean off themselves and each other, which occupies them and reduces flight. It works genuinely well on calm colonies and small nucs, and it produces no fire risk at all, which makes it popular in urban apiaries and dry-climate regions with burn restrictions.
Its limitation is that it does not mask alarm pheromone. If a colony escalates, sugar spray will not bring it back down the way smoke will. It also adds moisture to the hive, which is undesirable in cool weather, and it can stimulate robbing behaviour if overused during a dearth.
Plain water mist
A fine water mist weighs down flight and slows bees somewhat. It is the gentlest intervention available and is useful for brief tasks like adding a feeder. It does very little for a genuinely defensive colony.
Essential oil sprays
Various proprietary sprays are sold as smoke alternatives. Results are mixed and highly colony-dependent, and some beekeepers are uneasy about introducing aromatics near honey production. Treat these as experimental rather than a core tool.
Simply working gently
Experienced beekeepers with docile stock often do quick inspections with no intervention at all — slow movements, no shadows across the entrance, minimal jarring of the boxes. This is a real skill and it works, but it requires gentle genetics and it removes your safety margin entirely. Keep a lit smoker nearby even if you plan not to use it.
| Method | Masks Alarm Pheromone | Fire Risk | Best Use |
|---|---|---|---|
| Smoke | Yes | Yes — manage carefully | All inspections, especially defensive colonies |
| Sugar spray | No | None | Nucs, calm colonies, urban or burn-ban sites |
| Water mist | No | None | Very brief tasks, feeder changes |
| Essential oil spray | Partially claimed | None | Experimental |
| Gentle handling only | No | None | Docile stock, experienced handlers |
For a fuller picture of how colony behaviour drives all of this, how a bee smoker works covers the pheromone mechanism in detail.
The Complete Buying Checklist
If you want to evaluate any smoker — including ones not on this list — run it through these points in order. They are arranged roughly by how much they affect daily experience.
1. Metal gauge and material
Stainless steel, as thick as your budget allows. Avoid galvanised. Thin metal warps, and a warped canister means a lid that never seals properly again.
2. Chamber capacity
Match it to your longest realistic session, not your average one. 4″ × 7″ for small apiaries, 10″ or 11″ heights once you are running many colonies or long treatment days.
3. Lid fit and hinge quality
This is the specification nobody lists and everybody feels. Look at photos of the closed lid: does it sit flush, or is there a visible gap? A sloppy lid burns fuel fast and lets wind kill your smoulder. A hinge that can be re-seated is better than one riveted permanently out of alignment.
4. Bellows size and material
Larger bellows move more air per stroke and reduce fatigue. Leather for feel and cold-weather flexibility; synthetic for zero maintenance. Check whether replacement bellows are available for the model — some budget smokers are effectively disposable because no spares exist.
5. Heat shield design
Welded beats clipped. Adequate standoff clearance beats tight. A shield that wraps the full height of the canister beats a partial guard.
6. Base airflow
A raised grate or removable perforated plate is a real functional advantage, not marketing. Bottom-up draft is what makes lighting easy and keeps a smoker alive when set down.
7. Hook and accessories
An integrated hook should be considered essential, not a bonus. A hive tool holder is a genuine convenience if you work alone.
8. Weight and balance
Heavier is more stable and holds heat better; lighter is easier to carry across a yard. Decide which matters more for your situation before you compare prices.
9. Parts availability
Can you buy replacement bellows, a new grate, or a lid? Models stocked by mainstream suppliers are far easier to keep running for a decade.
10. Total cost over five years
A sixty-dollar smoker that lasts ten years costs less than a twenty-dollar smoker replaced every two. Run that arithmetic before you optimise for the lowest sticker price.
| Priority | Look For | Red Flag |
|---|---|---|
| Material | Heavy-gauge stainless | Galvanised or unspecified metal |
| Capacity | Stated chamber dimensions | No size listed at all |
| Lid | Flush seat, adjustable hinge | Visible gap in product photos |
| Bellows | Oversized, replaceable | No spares available |
| Shield | Welded, full height | Partial clip-on guard |
| Airflow | Raised or removable grate | Flat bare floor |
Beekeeper’s Smoker Glossary
A quick reference for the terms used throughout this guide and in product listings.
| Term | Meaning |
|---|---|
| Alarm pheromone | A volatile compound released when a bee stings or feels threatened, recruiting other bees to the same target. Smoke masks it. |
| Bellows | The hand-operated air pump attached to the smoker, consisting of two paddles, a flexible gusset, and a one-way inlet valve. |
| Coal bed | The layer of glowing embers at the base of the fuel. Without it, a smoker cannot sustain itself between pumps. |
| Creosote | Tarry residue that condenses inside the nozzle and lid as smoke cools, eventually restricting output. |
| Dearth | A period when no nectar is available. Colonies become markedly more defensive and prone to robbing. |
| Firebox / canister | The metal combustion chamber that holds the fuel. |
| Gauge | Metal thickness. Lower numbers mean thicker, more durable steel. |
| Gorging response | The behaviour where smoked bees fill their crops with honey, reducing their ability to sting. |
| Grate | The raised plate inside the chamber that keeps fuel off the floor so air can enter from below. |
| Heat shield | The wire cage standing off the canister to prevent accidental contact burns. |
| Punk wood | Soft, partially decayed dry wood. A traditional, excellent long-burning smoker fuel. |
| Robbing | Bees from one colony raiding another’s stores, often triggered during dearth by exposed honey scent. |
| Smoulder | Combustion without flame — the desired state inside a smoker, producing cool white smoke. |
| Top bars | The upper edges of the frames, where smoke is typically applied to clear the working surface. |
If any of the hive-anatomy terms here are new, our illustrated guide to beehive types with pictures gives you the visual reference to go with them.
Frequently Asked Questions
How long should a bee smoker stay lit?
A properly loaded full-size smoker with dense fuel like burlap or pellets should hold a usable smolder for two to four hours with occasional pumping. Compact smokers with light fuel may need topping up after thirty to sixty minutes.
Does smoke hurt the bees?
Cool smoke used sparingly does not harm bees. Hot smoke and sparks can singe wings and antennae, and excessive smoke causes unnecessary stress. The goal is thin, cool, white smoke in small quantities.
Can I inspect a hive without a smoker?
Some beekeepers use sugar-water sprays or work very gentle colonies without smoke. It is possible, but a smoker remains the most reliable tool for masking alarm pheromone, and most beekeepers keep one lit even if they rarely need it.
Why does my smoker keep going out?
Almost always airflow. Fuel packed too tightly, ash blocking the base grate, creosote narrowing the nozzle, a lid that no longer seats flat, or skipping the coal-bed stage before loading main fuel. Work through those five in order and you will find it.
What size smoker should a beginner buy?
For one to three hives, a 4″ × 7″ stainless model is ideal — fast to light, easy to store, and with plenty of capacity for a normal inspection. Move up to a 10″ or 11″ chamber once you exceed about eight colonies.
Is a leather bellows worth the extra cost?
If you will condition it once a season, yes — the rebound feel is noticeably better and it lasts for years. If you tend to leave gear in a hot truck and forget about maintenance, synthetic is the smarter buy.
How do I put a bee smoker out safely?
Plug the nozzle with a cork or a tight wad of green grass so the fire suffocates from lack of oxygen. Leave it plugged until completely cold. Never dump embers on the ground at the apiary.
Can I use newspaper as smoker fuel?
Plain newsprint works fine as tinder to establish flame, but it burns away fast and modern glossy or heavily inked pages are best avoided. Use it to start, then switch to burlap, pellets, or punk wood for the actual burn.
Are electric bee smokers reliable?
They work well when maintained, but they introduce failure points a bellows smoker does not have. Keep the fan housing clean, charge before yard days, and consider carrying a manual smoker as backup if you have many colonies.
How often should I clean my smoker?
Scrape the nozzle and empty the ash every few uses, do a thorough clean two or three times per season, and burn it out hot once a year to carbonise stubborn creosote.
Will smoke get into my honey?
Light, correctly applied smoke does not measurably affect honey. Heavy smoking directly into open supers can impart a flavour, which is one more reason to keep applications minimal and aimed at the entrance and top bars rather than into exposed comb.
Do I need a smoker in cold weather?
You should rarely open a hive in genuinely cold weather at all. When you do brief winter checks, keep the smoker lit but use it minimally — the colony is clustered and less defensive, and you want the box closed again quickly.
Final Verdict: Which Bee Smoker Should You Buy?
After working through build quality, bellows feel, chamber capacity, and real-world safety, the field sorts itself cleanly.
For most beekeepers who plan to stay in the hobby, the Mann Lake HD540 is the smoker to buy. It costs more, it weighs more, and you will not regret either. Commercial stainless, a firebox that genuinely holds fuel for hours, and leather bellows that get better with age make it the last smoker many people ever purchase.
If you are managing several hives and your wrists are the bottleneck, the Foxhound Professional and its oversized bellows will change how a long inspection day feels. If you want leather and a full-size chamber without the premium price, the Little Giant BSMOKE is the value sweet spot. On a tight budget, the VIVO Large gives you the most capacity per dollar and an airflow plate that makes lighting genuinely easier. The Goodland 11-inch is the one to pick if your gear takes a beating, and the Blisstime kit is a sensible, low-commitment entry point with fuel in the box. And if hand strength is a limiting factor, the GLOGLOW electric is not a novelty — it is what keeps some people beekeeping.
Whichever you choose, buy the one you will actually keep lit. A calm inspection is the goal, and everything else on this page is just the route there.