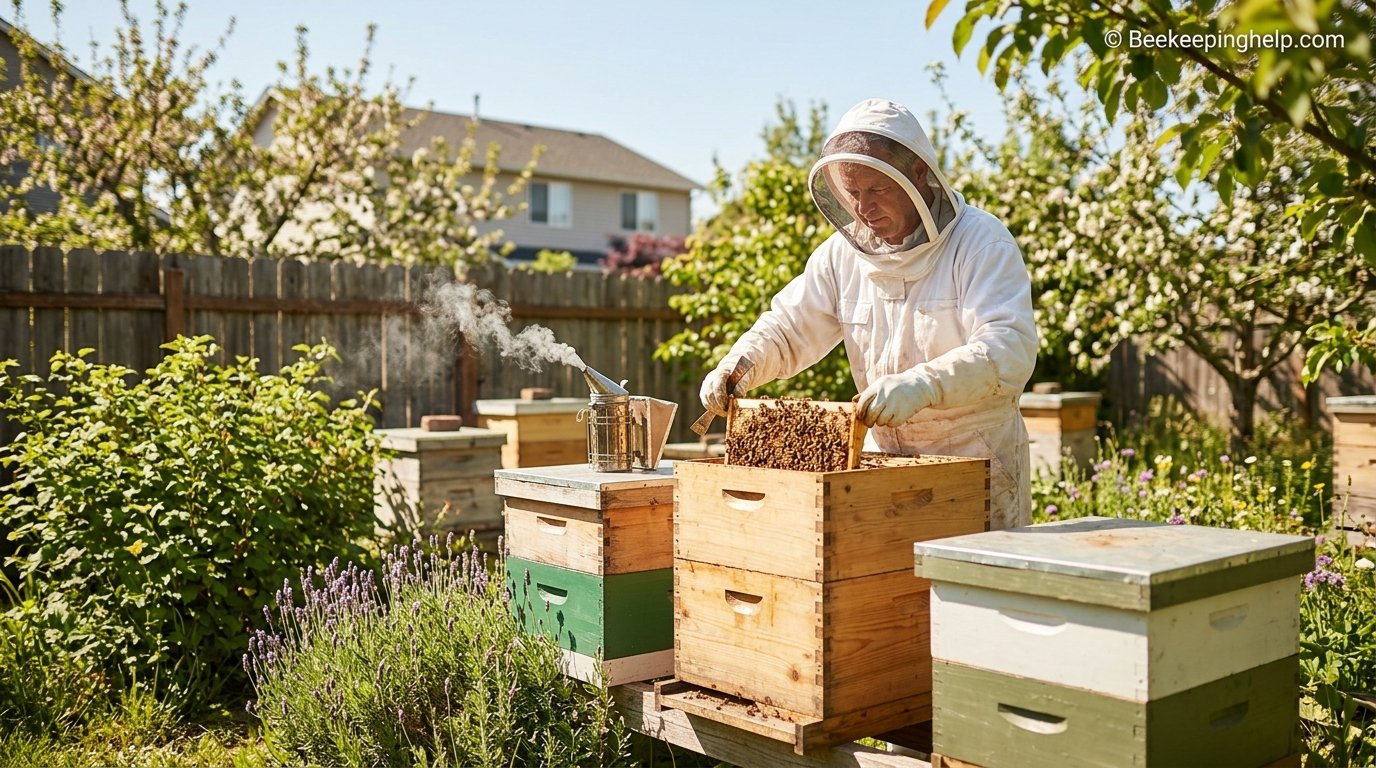
How Much Does It Cost to Start Beekeeping? A Realistic Budget Breakdown
From hive boxes to bee suits to the bees themselves, here’s exactly what new beekeepers spend in year one — and where you can trim costs without cutting corners on your colony’s health.
1. What Determines Beekeeping Startup Costs
Before you can put a dollar figure on beekeeping, it helps to understand why the range is so wide in the first place. Ask ten beekeepers what they spent in their first year and you’ll likely get ten different answers, some under three hundred dollars and others well past a thousand. The gap comes down to a handful of variables: how many hives you start with, whether you buy new equipment or source it used, what type of hive system you choose, how much protective gear you feel comfortable in, and where you live, since regional pricing and shipping costs for bees can shift the total noticeably.
Most beginners start with one or two colonies rather than a single hive, and that decision alone changes the math considerably. A single hive is cheaper upfront, but two colonies give you a built-in safety net: if one queen fails or one colony collapses over winter, you still have bees and drawn comb to rebuild from. That resilience comes at roughly double the cost of woodenware, protective gear you may already own regardless, and two packages of bees instead of one.
Geography plays a bigger role than most new beekeepers expect. Package bees shipped long distances cost more, local bee clubs often subsidize starter equipment or run group buys, and climate determines how much winter feeding and insulation you’ll need. Before you get into the itemized numbers below, it’s worth reading a general overview of what beekeeping actually involves day to day, since the ongoing time and labor commitment factors into whether the upfront spend makes sense for your situation.
Thinking in Terms of Cost Per Colony, Not Just Cost Per Purchase
It’s easy to look at a single receipt and think of beekeeping as one big upfront expense, but it’s more useful to think in terms of cost per colony spread across its productive lifespan. A well-maintained hive body can last well over a decade with occasional repainting, which means the true annualized cost of that box is a small fraction of its sticker price once you divide it across the years of use you’ll get from it. Frames and foundation wear out faster and need to be budgeted separately, but the boxes, covers, and bottom boards are effectively a long-term asset rather than a consumable.
This distinction matters when you’re deciding how much to spend upfront. A slightly more expensive, well-built cedar hive that resists rot for fifteen years can end up cheaper per year than a budget pine hive that needs replacing every five or six seasons in a humid climate. The same logic applies to a bee suit: a heavier three-layer ventilated suit costs more initially but tends to outlast two or three budget suits, especially if you’re inspecting hives multiple times a week during peak season. When you’re comparing prices, it’s worth asking not just “what does this cost today” but “what will this cost me per year of actual use.”
2. Essential Hive Equipment Costs
The hive itself is the single largest line item for most new beekeepers, and it’s made up of more individual parts than people expect. A complete setup isn’t just a wooden box; it’s a stack of components that each serve a specific purpose in the colony’s life cycle. Understanding what each part of a hive actually does makes it much easier to know where you can economize and where you shouldn’t.
A standard ten-frame Langstroth setup typically includes a bottom board, one or two deep brood boxes, several medium honey supers, frames and foundation for each box, an inner cover, and a telescoping outer cover. Bought new and assembled, a single complete hive with enough supers for a first honey harvest generally runs somewhere in the range of two hundred to four hundred dollars. Unassembled kits shave off a meaningful chunk of that, often twenty to thirty percent, in exchange for a weekend of assembly and painting.
| Component | Assembled Price Range | Unassembled Kit Price Range |
|---|---|---|
| Bottom board | $20–$35 | $12–$20 |
| Deep brood box | $30–$45 each | $18–$28 each |
| Medium honey super | $25–$40 each | $15–$25 each |
| Frames & foundation (per box, 10 ct.) | $25–$45 | $18–$32 |
| Inner cover | $12–$20 | $8–$14 |
| Telescoping outer cover | $25–$40 | $18–$28 |
It helps to see how these pieces actually fit together and function as a system rather than a pile of parts, and a walkthrough of how a beehive works is worth reading before you finalize a shopping list, since it clarifies why certain components (like properly spaced frames) aren’t optional extras.
Frame and Foundation Choices Affect the Total More Than You’d Think
Frames and foundation are easy to overlook as a line item because they seem like a small accessory next to the boxes themselves, but multiplied across eight to ten frames per box and several boxes per hive, the choice of foundation material adds up quickly. Plastic foundation, often sold pre-coated with a thin layer of wax, is generally the cheapest and most durable option, and bees typically draw comb on it readily once it’s been lightly primed. Pure beeswax foundation embedded in a wooden frame costs more per unit and is more fragile during handling, but many beekeepers prefer it because it more closely matches what bees would build naturally and contains no plastic that ends up melted into old comb over the years.
Foundationless frames, where bees are simply given a wooden starter strip and left to draw their own comb from scratch, represent the cheapest option of all in terms of material cost, since there’s no foundation sheet to buy at all. The tradeoff is that foundationless comb is more fragile, especially in the first season, and can be more prone to cross-combing if the hive isn’t kept perfectly level. For a first-year beekeeper trying to minimize both cost and risk, a mix of plastic foundation in the brood boxes for durability and a few foundationless frames in the honey supers for easier, wax-cappings-friendly harvesting is a common middle ground.
3. Choosing a Hive Type and Its Price Range
Not every hive system costs the same, and the type you pick has real budget implications beyond the initial box. Traditional Langstroth hives remain the most affordable and widely supported option because parts are standardized and interchangeable across brands, which keeps replacement costs low for years to come. Flow Hive systems, by contrast, use a specialized frame that lets honey drain out of a tap without opening the hive, and that convenience carries a significant price premium.
If you’re weighing the two, a detailed comparison of Flow Hive versus Langstroth lays out exactly where the extra cost goes and whether it’s worth it for a first-year beekeeper. In short, a Flow Hive brood box paired with a Flow honey super can cost two to three times what an equivalent Langstroth setup runs, largely because of the patented flow-frame technology.
Beyond Langstroth and Flow Hive, some beekeepers experiment with top-bar hives or log hives inspired by how bees naturally nest in tree cavities. These alternative styles can be considerably cheaper to build from raw lumber, though they sacrifice the standardization that makes replacement parts easy to find. If you want a visual sense of how the major styles differ before deciding, a roundup of beehive types with pictures is a useful reference, and a curated list of the best beekeeping hives currently on the market can narrow your options by budget tier.
How Climate Shapes Which Hive Type Makes Financial Sense
Climate is an underrated factor in the hive-type decision, and it has a direct cost impact. In colder regions with long winters, thicker-walled hives or added insulation wraps become close to mandatory, and that’s an extra expense that doesn’t show up in a basic price comparison between hive styles. Top-bar hives, in particular, tend to lose heat faster than a stacked Langstroth box because of their shape, which means beekeepers in northern climates who choose that style often spend more on supplemental insulation than they saved on the hive itself. In milder, drier climates, that concern mostly disappears, and the cheaper build option stays cheaper in practice, not just on paper.
Humidity is another factor that’s easy to underestimate. In consistently damp regions, softwoods like pine need more frequent repainting and sealant touch-ups to avoid rot, while naturally rot-resistant woods like cedar or cypress cost more upfront but need far less maintenance over the years. If you live somewhere with hot, humid summers and cold, wet winters, it’s often worth paying the premium for a more weather-resistant wood species from the start rather than repeatedly patching a cheaper hive that keeps absorbing moisture.
Langstroth Pros
- Lowest upfront cost
- Universally available replacement parts
- Easiest to find used equipment for
Flow Hive Cons
- 2–3x the price of Langstroth
- Proprietary parts cost more to replace
- Less forgiving for total beginners on a budget
4. Protective Gear Costs
Protective gear is one area where new beekeepers sometimes try to cut corners, and it’s usually the wrong place to do it. A full bee suit with an attached veil, a separate jacket-and-veil combo, or a minimalist veil-only setup all sit at very different price points, and the right choice depends heavily on how defensive your local bee genetics tend to be and how confident you feel handling an open hive.
Entry-level full suits made from lightweight cotton-poly blends typically run forty to eighty dollars, while ventilated three-layer suits designed to keep stings from reaching skin even through direct contact can run well over one hundred fifty dollars. Gloves add another fifteen to thirty dollars, and many beekeepers eventually buy a second pair once they realize how much dexterity they lose with heavy leather gauntlets. A thorough bee suit review comparing fabric weights, ventilation, and stitching quality across price tiers is worth reading before you commit, since suit failures at the seams are one of the most common causes of stings for beginners.
Gear also needs ongoing care, and that has its own minor cost. Washing propolis and wax residue out of a suit without damaging the fabric or degrading its sting-resistance takes a specific approach, which is covered in a guide on how to properly wash a bee suit. A suit that’s washed incorrectly can lose its protective qualities well before it wears out visually, effectively shortening its usable life and forcing an earlier replacement purchase.
One question that comes up constantly among beginners in areas with aggressive wasp populations is whether the same gear that stops honey bee stings also protects against wasps, and the honest answer is nuanced; it’s addressed directly in a piece on whether bee suits protect against wasps.
5. Bee Smoker and Hive Tool Pricing
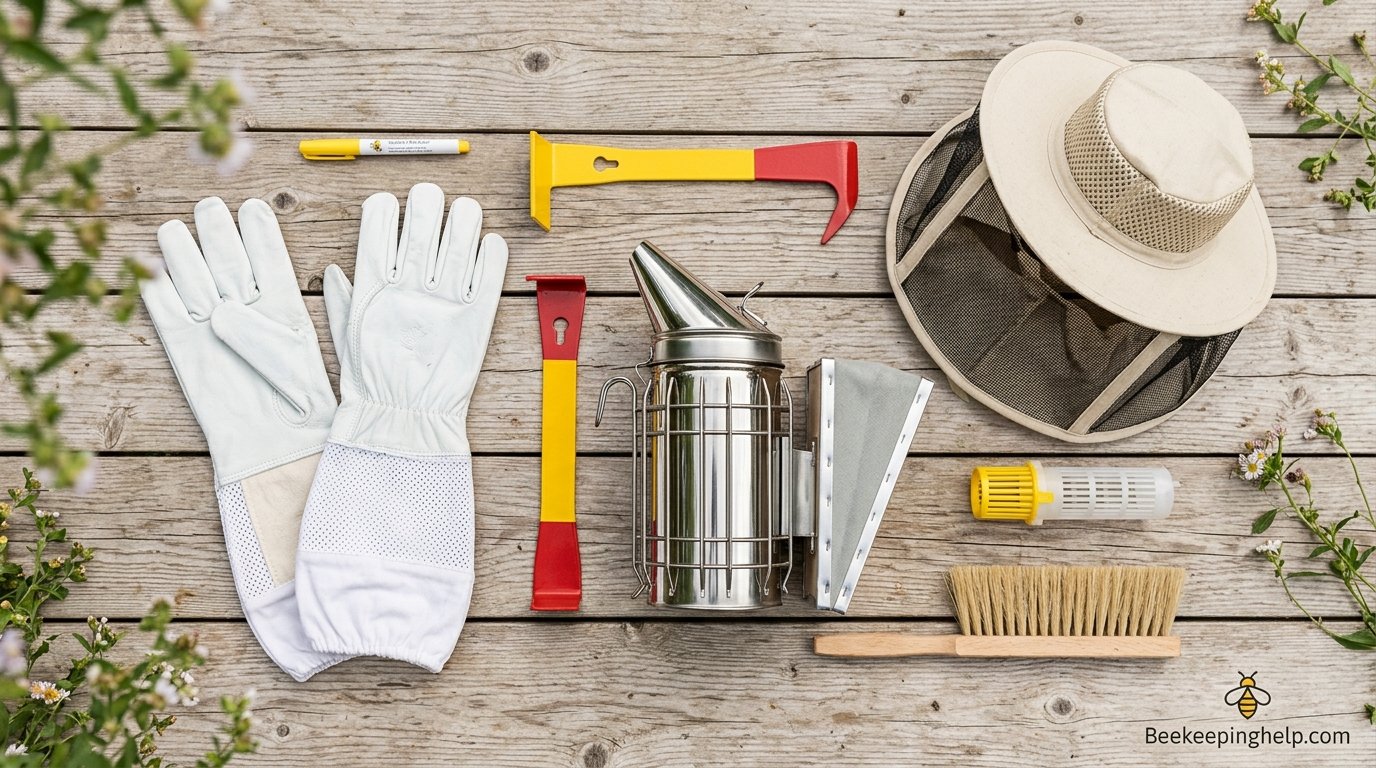
A smoker and a hive tool are small purchases compared to the hive itself, but they’re non-negotiable for safe, calm inspections, and skipping them to save twenty dollars almost always backfires. Basic stainless steel smokers with a simple bellows start around twenty-five dollars, while larger-capacity smokers with heat shields and guards, useful once you’re managing multiple hives, can run fifty dollars or more.
If you’ve never used one, it’s worth understanding how a bee smoker actually works before you buy, since smoker size and burn-time requirements differ depending on how many colonies you’re inspecting in a single session. Fuel matters too, and a rundown of what to use in a bee smoker can help you avoid buying specialty fuel pucks when free materials like untreated pine needles or burlap work just as well.
A hive tool, the flat metal pry bar used to separate frames and scrape propolis, typically costs eight to fifteen dollars. Most beekeepers eventually own two or three, since they’re easy to set down in the grass mid-inspection and never see again.
Small Accessories That Quietly Add Up
Beyond the smoker and hive tool, there’s a category of small accessories that rarely gets its own line item in a beginner’s budget but collectively adds real cost. A hive stand, which lifts the hive off damp ground and makes it harder for pests like skunks or ants to access, can be built from cinder blocks and scrap lumber for almost nothing, or bought pre-made for twenty to forty dollars. An entrance reducer, a small wooden or metal insert that narrows the hive entrance to help a young colony defend itself, usually costs less than ten dollars and is worth having from day one rather than waiting until a robbing event forces the issue.
A queen excluder, the wire or plastic grid placed between the brood box and honey supers to keep the queen from laying eggs in the honey stores, typically runs ten to twenty dollars. Some beekeepers skip it entirely and simply extract around any brood comb they find, but most beginners find the small cost worth avoiding the extra sorting work at harvest time. None of these accessories are individually expensive, but budgeting an extra fifty to seventy dollars for this category prevents the frustration of realizing mid-season that you need something you didn’t account for.
| Item | Basic Price | Upgraded Price |
|---|---|---|
| Bee smoker | $25–$35 | $45–$65 |
| Hive tool | $8–$12 | $15–$22 (frame grip style) |
| Bee brush | $6–$10 | $12–$18 |
6. Cost of the Bees Themselves
Eventually the equipment conversation has to turn to the bees, and this is where costs can vary the most by season and region. A three-pound package of bees with a mated queen, the most common way beginners start a colony, typically runs one hundred forty to one hundred eighty dollars, and prices tend to climb closer to two hundred during peak spring ordering season when demand outstrips regional supply.
A nucleus colony, often called a “nuc,” is a small established colony on four or five drawn frames with brood, honey stores, and a laying queen already in place. Nucs cost more than packages, generally one hundred seventy-five to two hundred fifty dollars, but they establish faster since the bees aren’t starting from scratch on drawn comb. Some beekeepers instead capture a swarm for free or acquire an unwanted colony from another keeper, though this route requires more experience to execute safely and successfully.
Shipping and local pickup fees add another variable. Bees shipped by mail or freight typically add fifteen to forty dollars, while local pickup from a regional supplier or bee club avoids that entirely and is often the cheaper, lower-stress option for a first purchase.
Why Queen Genetics Change the Price Tag
Not all queens are priced the same, and the difference isn’t just marketing. A standard mated queen included in a basic package or nuc is usually bred for general hardiness and productivity, but queens selected for specific traits, such as strong hygienic behavior that helps resist mites and disease, or noticeably gentler temperament for beekeepers in populated areas, often cost an additional twenty to fifty dollars over a standard queen. Breeders who maintain closed genetic lines with documented mite-resistance testing tend to sit at the higher end of that range, and their queens are frequently sold separately from packages rather than bundled in.
For a first-year beekeeper, a standard queen is usually the more sensible choice, since the extra cost of specialty genetics is easier to justify once you have a season of hands-on experience and a clearer sense of what traits matter most in your specific location. That said, if your area has a known history of aggressive mite pressure or africanized genetics nearby, paying the premium for a queen with documented gentler, more resistant lineage can reduce both future treatment costs and the risk of an unpleasant first season.
7. Feeders and Feeding Supplies
New colonies almost always need supplemental feeding, especially in their first few weeks while they build comb and establish stores, so a feeder isn’t optional gear. Entry-level feeders come in several styles: boardman feeders that fit in the hive entrance, frame feeders that replace a frame inside the box, and top feeders that sit above the brood chamber. Prices for basic plastic or wood feeders generally fall between ten and twenty-five dollars.
Many experienced beekeepers build their own feeders from repurposed containers, and a step-by-step guide on how to make a bee feeder can cut this cost down to almost nothing if you’re comfortable with basic tools. If you’d rather buy, a comparison of the best bee feeders on the market breaks down which styles hold syrup longest and drip least, which matters more than price alone since a leaky feeder can attract robbing bees from other colonies.
Sugar syrup itself is a recurring cost worth budgeting for beyond the feeder hardware. A newly installed package can go through several gallons of 1:1 syrup in its first month alone, and a guide on what to feed a bee at different times of year helps avoid overspending on premium pollen substitutes when plain sugar syrup does the job for most of the season.
8. DIY vs. Buying: Building Your Own Hive
Building your own hive from raw lumber is one of the most effective ways to cut startup costs, sometimes by forty to fifty percent compared to a pre-cut kit, provided you already own basic woodworking tools or can borrow them. A step-by-step walkthrough of how to make a beehive covers the exact box dimensions and bee-space tolerances that matter for a functional hive, since even small measurement errors can lead to burr comb or gaps that let in pests.
It also helps to understand how commercial hives are manufactured at scale, since that context makes clear why certain design choices, like finger-jointed corners or specific wood species, exist for durability reasons rather than aesthetics. Skipping those details to save time can mean a hive that warps or rots within a couple of seasons, erasing any money saved upfront.
Building Your Own
- Cuts material costs significantly
- Customizable to your exact preferences
- Good project if you already have tools
Buying a Kit
- Guaranteed correct bee-space measurements
- Faster — ready within days, not weekends
- No tool investment required
9. Ongoing Maintenance Costs
A hive isn’t a one-time purchase; wood exposed to weather year-round needs periodic upkeep to last. Exterior paint or a weatherproof sealant protects the boxes from rot and extends their usable life by years, and a guide on how to paint a beehive covers which paint types are safe near an active colony and which solvents to avoid entirely. Budget ten to twenty dollars per hive for exterior-grade paint every couple of seasons.
Frames and foundation also wear out faster than the boxes themselves, especially in the brood chamber where wax gets built up, chewed, and repaired repeatedly. Replacing a handful of frames each season, rather than an entire box, is the more realistic ongoing cost most beekeepers face, typically five to ten dollars per frame depending on whether you use plastic or wax foundation.
Pest Exclusion Hardware Is a Recurring Small Cost
Beyond paint and frame replacement, ongoing maintenance also includes small hardware that protects the colony from pests and rodents, particularly during the cooler months when a hive is more vulnerable. Mouse guards, which fit over the entrance to keep rodents from nesting in the hive over winter, typically cost five to ten dollars and are cheap insurance against a colony returning in spring to find its comb chewed apart. Robbing screens, used during dearth periods when other colonies or wasps try to steal stores from a weaker hive, run fifteen to twenty-five dollars and are worth having on hand even if you don’t need them every season.
None of these items are expensive individually, but they’re the kind of maintenance cost that’s easy to forget when budgeting only for the big-ticket startup items. A reasonable estimate is an extra twenty to thirty dollars per hive per year set aside for this category of small protective hardware and periodic replacements, on top of the mite treatment and feeding costs covered in the next section.
10. Annual Recurring Costs After Year One
Once the initial equipment purchase is behind you, beekeeping shifts to a lower but still real annual cost. Varroa mite treatments are the biggest recurring line item for most keepers, typically fifteen to thirty dollars per hive per year depending on the treatment method chosen. Sugar for syrup, replacement frames, occasional queen replacement if a colony goes queenless, and honey extraction supplies like uncapping tools and filters round out the yearly budget.
| Recurring Item | Typical Annual Cost (per hive) |
|---|---|
| Varroa mite treatment | $15–$30 |
| Sugar for syrup | $10–$25 |
| Replacement frames/foundation | $15–$40 |
| Requeening (if needed) | $25–$45 |
| Extraction supplies (shared across hives) | $50–$150 one-time, then minimal |
Most established beekeepers report annual per-hive costs settling into a much smaller range than the first-year outlay, which is one reason the startup investment feels steep but tends to pay off if you stick with the hobby past year one.
Registration, Permits, and Insurance: The Costs New Keepers Forget
Many regions require hobbyist beekeepers to register their hives with a state or local agricultural department, and while the fee itself is usually modest, often somewhere between free and thirty dollars a year, it’s a cost that catches first-timers off guard simply because it isn’t mentioned in most equipment shopping guides. Registration also sometimes triggers a mandatory inspection, which is free in many areas but occasionally comes with its own small fee depending on the state.
If you live in a municipality or homeowners’ association with specific rules about backyard hives, there may also be permit fees or required setback distances that indirectly cost money, such as fencing or flyway barriers needed to keep bees flying upward and away from neighboring property lines. Liability insurance is optional in most residential settings but worth considering if you plan to sell honey or host visitors, and basic beekeeping liability riders through a local insurer or beekeeping association membership often run well under a hundred dollars annually. None of these costs are large individually, but budgeting fifty to a hundred dollars for registration, permits, and optional insurance in your first year avoids an unpleasant surprise partway through the season.
11. Startup Cost Breakdown by Budget Tier
Pulling everything together, here’s roughly what a single-hive startup looks like across three common budget approaches: a bare-bones budget build, a mid-range new-equipment setup, and a premium setup with upgraded gear and a Flow Hive component.
| Category | Budget Tier | Mid-Range Tier | Premium Tier |
|---|---|---|---|
| Hive (unassembled/assembled/Flow) | $120 | $260 | $550 |
| Protective suit & gloves | $50 | $110 | $180 |
| Smoker & hive tool | $30 | $55 | $85 |
| Feeder | $10 (DIY) | $20 | $35 |
| Bees (one package or nuc) | $150 | $175 | $225 |
| Estimated Total | ~$360 | ~$620 | ~$1,075 |
These figures assume a single hive; doubling to two colonies roughly doubles the hive and bee line items while leaving most of the gear costs (suit, smoker, tools) unchanged, since that equipment serves multiple hives at once.
12. Ways to Reduce Your Startup Costs
There are several legitimate ways to bring your first-year total down without compromising your colony’s health or your own safety. Joining a local beekeeping association is consistently the highest-leverage move new keepers can make, since many clubs run mentorship programs, equipment loan libraries, and group orders on packages that beat individual retail pricing. A broader look at what’s involved in beekeeping as a hobby can also help you right-size your first purchase instead of over-buying gear you won’t use for a year or two.
Buying used woodenware is another common cost-cutter, though it comes with a caveat: used equipment can carry disease spores like American foulbrood, so it should always be scorched or bleached before use, and frames with old dark comb are generally better replaced than reused. If you’re just getting oriented on the sequence of decisions involved, a full walkthrough on how to start beekeeping lays out the order of operations so you don’t buy equipment before you actually need it.
Finally, timing your purchases matters. Buying woodenware and gear in the fall or winter, well before spring bee-ordering season, often means better pricing and availability than scrambling in March when everyone else is placing the same orders.
Equipment Swaps and Shared Extraction Gear
One cost-saving strategy that’s easy to overlook is equipment sharing within a local club or a small group of nearby beekeepers. Extraction equipment, such as an extractor, uncapping tank, and filtering buckets, is one of the more expensive one-time purchases in the hobby, often running well over a hundred dollars for even a basic manual setup, but it’s also something you only use for a few days each year at harvest time. Many clubs maintain shared extractors that members can borrow or rent for a small fee, which lets a first-year beekeeper skip that entire purchase until their operation has grown enough to justify owning one outright.
The same logic applies to less frequently used items like frame-building jigs, wax-melting equipment, and swarm-catching gear. Building a small network of nearby beekeepers to trade tips and borrow specialty equipment isn’t just a social nicety, it’s a direct way to defer or eliminate some of the less urgent purchases on this list until you have a clearer sense of which parts of the hobby you’ll actually stick with long-term.
Frequently Asked Questions
What is the absolute minimum I can spend to start beekeeping?
A bare-bones single-hive setup using a used or unassembled hive, a basic veil-only suit, a simple smoker, and one package of bees can come in around two hundred fifty to three hundred dollars, though this leaves little cushion for unexpected replacements.
Is it cheaper to start with a package or a nuc?
Packages are generally cheaper upfront, but nucs establish faster since they already have drawn comb, brood, and stores in place, which can offset the higher initial price through a stronger first-season buildup.
Do I need two hives to start, or is one enough?
One hive is enough to begin, but many mentors recommend two so you have a healthy colony to draw resources from if the other struggles, at roughly double the cost of the hive and bees themselves.
How much does a full bee suit cost compared to just a veil?
A veil alone can cost as little as fifteen to twenty-five dollars, while a full ventilated suit with integrated veil and boots typically runs eighty to one hundred fifty dollars or more.
Can I really build my own hive to save money?
Yes, building from raw lumber can cut hive costs by roughly forty to fifty percent, provided the measurements and bee-space tolerances are followed precisely so the finished hive functions correctly.
What ongoing costs should I expect after the first year?
Expect to budget for varroa mite treatments, sugar for syrup, occasional frame replacement, and possibly requeening, which together typically run considerably less than the first-year equipment outlay per hive.
Is a Flow Hive worth the extra cost for a beginner?
It depends on your priorities; Flow Hive systems cost two to three times more than a comparable Langstroth setup but simplify honey harvesting, which some beginners find worth the premium and others don’t.
How much does it cost to feed a new colony in its first month?
A newly installed package can go through several gallons of sugar syrup in its first few weeks, which at typical sugar prices amounts to a modest but real recurring cost worth planning for.
Do I need a specific type of paint for my hive?
Exterior-grade latex paint is generally considered safe once fully cured, but certain solvent-based paints and preservatives should be avoided near an active colony because of fume exposure.
Where can I find cheaper beekeeping equipment?
Local beekeeping clubs, group equipment orders, off-season purchasing, and carefully inspected used woodenware are the most reliable ways to reduce costs without sacrificing colony safety.
Does location affect how much beekeeping costs?
Yes, shipping costs for bees, regional equipment pricing, and climate-driven feeding and insulation needs all vary by location and can shift your total noticeably from the averages listed here.
Are there hidden costs beginners often forget to budget for?
Extraction equipment, replacement frames, mite treatments, and suit maintenance supplies are the most commonly overlooked costs, since new beekeepers tend to focus mainly on the hive and bees themselves.
Conclusion: Budgeting for a Realistic First Year
Starting beekeeping doesn’t have to break the bank, but it does require an honest look at every category of spending rather than just the hive and the bees. Somewhere between three hundred fifty and eleven hundred dollars covers the vast majority of first-year setups, depending on whether you build your own equipment, buy used, or go all-in on a premium kit. The good news is that most of the big-ticket items, the hive boxes, the suit, the smoker, are one-time purchases that carry you through many seasons if you take reasonable care of them.
The best next step is usually the simplest one: connect with a local beekeeping club before you buy anything, since their guidance on regional pricing, mentorship, and equipment loans can shape your budget more than any single purchasing decision.