How to Start Beekeeping: Your Complete Step-by-Step Guide to Becoming a Successful Beekeeper
Everything you need to know about starting your first hive, from choosing equipment to harvesting your own honey — written for absolute beginners.
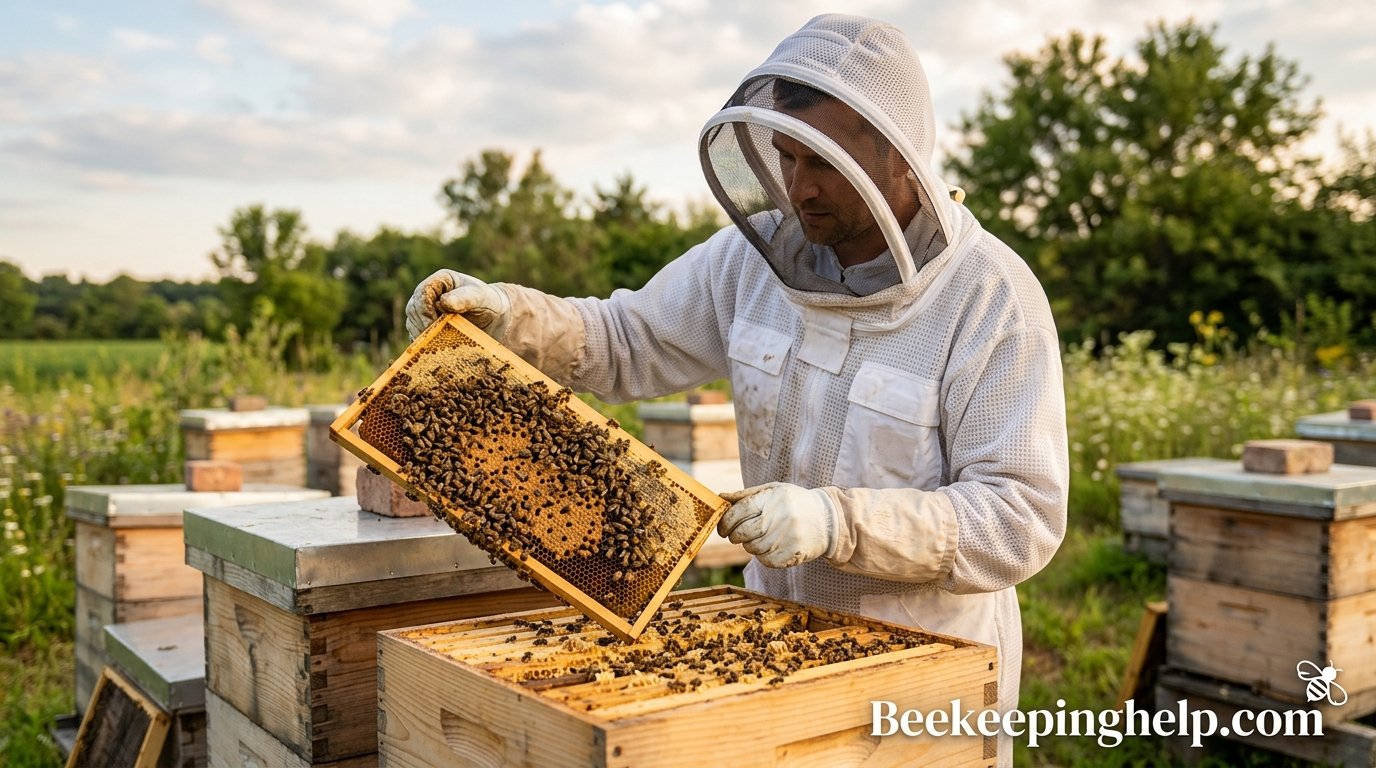
Why Start Beekeeping? A Rewarding Journey Awaits
Beekeeping is one of the most fulfilling hobbies you can pursue. Whether you’re drawn to the idea of harvesting your own honey, supporting pollination in your garden, or simply fascinated by the intricate social lives of honeybees, starting a beekeeping journey opens up a world of discovery and connection with nature.
The practice of keeping bees dates back thousands of years, with evidence of managed hives found in ancient Egyptian tombs and depicted in Stone Age cave paintings. Today, modern beekeeping has evolved into both a beloved hobby and a vital agricultural practice. As concerns about bee population decline have grown, backyard beekeepers play an increasingly important role in maintaining healthy pollinator populations.
But where do you begin? The prospect of working with tens of thousands of stinging insects can feel overwhelming at first. The good news is that honeybees are generally gentle creatures, and with proper knowledge and preparation, anyone can become a successful beekeeper. This comprehensive guide will walk you through every step of the process, from your initial research all the way through to harvesting your first jar of golden honey.
Throughout this guide, you’ll learn about choosing the right hive type, understanding bee biology, managing your colony through the seasons, and troubleshooting common issues that arise. We’ll cover the equipment you need, the costs involved, and the ongoing commitment required to keep your bees healthy and productive.
Before we dive into the step-by-step process, it’s worth understanding what makes beekeeping so special. Unlike many other agricultural pursuits, beekeeping requires relatively little space — you can keep bees in suburban backyards, on rooftops, or in rural fields. The time commitment is manageable for most lifestyles, typically requiring just a few hours per week during the active season. And the rewards extend far beyond honey: beeswax, propolis, pollen, and even the experience of watching your colony thrive all contribute to a deeply satisfying hobby.
Let’s begin your journey into the fascinating world of beekeeping.

Complete Beekeeping Starter Kit
Everything you need to begin your beekeeping journey — includes hive tool, smoker, bee suit, and more.
View on Amazon1 Research and Educate Yourself
Before you purchase a single piece of equipment or order your first bees, investing time in education is absolutely critical. Beekeeping has a steep learning curve, and the more you know before your bees arrive, the better prepared you’ll be to handle the challenges that inevitably arise during your first season.
Read Comprehensive Beekeeping Books
Start with a few well-regarded beekeeping books that cover the fundamentals. Look for titles that address your specific climate zone and geographic region, as beekeeping practices vary significantly depending on where you live. Some essential topics your reading should cover include bee biology and behavior, hive management techniques, seasonal management calendars, pest and disease identification, and honey harvesting methods.
Don’t try to memorize everything on your first read. Instead, focus on understanding the big picture — how a colony functions as a superorganism, what the beekeeper’s role is in supporting that organism, and what the annual cycle of hive management looks like. You’ll refer back to your books frequently during your first few seasons.
Take a Beekeeping Class
Many local beekeeping associations offer beginner courses, typically held in late winter or early spring. These classes are invaluable because they combine classroom instruction with hands-on hive demonstrations. You’ll learn how to light a smoker, open a hive, identify the queen, read frames, and spot signs of disease — skills that are much harder to learn from a book alone.
Community colleges, agricultural extension offices, and nature centers also frequently offer beekeeping courses. Some beekeeping supply companies host workshops as well. The investment in a quality beginner course will pay dividends throughout your beekeeping career.
Find a Mentor
Perhaps the single most valuable thing you can do as a new beekeeper is find an experienced mentor. A mentor can guide you through your first season, help you interpret what you’re seeing in your hive, and provide hands-on assistance during critical operations like installing your bees or checking for the queen.
Local beekeeping clubs are the best place to find mentors. Many clubs have formal mentorship programs that pair beginners with experienced beekeepers. Even informal relationships with fellow club members can provide tremendous support. Don’t be afraid to ask questions — experienced beekeepers generally love sharing their knowledge with newcomers.
Online Resources and Communities
The internet offers a wealth of beekeeping information, from YouTube channels with detailed hive inspection videos to forums where beekeepers discuss problems and solutions. Online communities can be particularly helpful for getting quick answers to urgent questions during the season.
However, be cautious about online advice. Not all information is accurate, and practices that work in one region may not work in another. Always cross-reference online advice with trusted books, your local extension service, or your mentor’s guidance.
2 Check Local Regulations and Requirements
Before you invest in equipment or order bees, you must understand the legal landscape of beekeeping in your area. Regulations vary dramatically from one municipality to another, and failing to comply can result in fines, forced removal of your hives, or conflicts with neighbors.
Understanding Zoning Laws
Most municipalities have zoning ordinances that address beekeeping, either explicitly or through general livestock regulations. Some cities welcome backyard beekeeping with minimal restrictions, while others impose strict rules about the number of hives, setback distances from property lines, and proximity to neighboring structures.
Contact your local planning or zoning department to learn about specific regulations in your area. Ask about any required permits, registration fees, or inspections. Some areas require you to register your hives with the state department of agriculture, which helps with disease tracking and management.
Homeowners Association Rules
If you live in a community governed by a homeowners association (HOA), review the covenants, conditions, and restrictions (CC&Rs) carefully. Some HOAs prohibit beekeeping entirely, while others may allow it with board approval. If your HOA doesn’t currently address beekeeping, you may need to petition the board for approval or work to have the rules amended.
Building Good Neighbor Relations
Even where beekeeping is legal, maintaining good relationships with your neighbors is essential. Before bringing bees home, have a friendly conversation with adjacent neighbors. Explain what you’re planning, address any concerns they might have about stings, and offer to share your harvest with them. Many people are more receptive to beekeeping than you might expect, especially when they understand the environmental benefits.
Consider installing a flyway barrier — a tall fence, hedge, or screen that forces bees to fly upward above head height as they leave the hive. This simple measure dramatically reduces the chance of bees encountering people at ground level and can prevent many potential conflicts.
3 Choose the Perfect Location for Your Hive
Selecting the right location for your beehive is one of the most important decisions you’ll make as a new beekeeper. The ideal apiary site provides your bees with the conditions they need to thrive while minimizing potential conflicts with humans and animals.
Sunlight Requirements
Honeybees generally prefer hives that receive morning sun with some afternoon shade, especially in hot climates. Early morning sunlight encourages foragers to start their day earlier, which increases honey production. In northern regions with cold winters, full sun exposure throughout the day can help hives stay warm and reduce moisture buildup inside the hive.
If you live in a hot southern climate, afternoon shade becomes more important to prevent the hive from overheating. A deciduous tree that provides shade in summer but allows sun through in winter is ideal. Avoid placing hives in deep, permanent shade — this can lead to damp conditions, increased disease, and less productive colonies.
Wind Protection
Strong winds can chill a hive, making it harder for bees to maintain the temperature needed for brood development. Position your hive so that it’s protected from prevailing winds, either by natural features like trees and hills or by man-made windbreaks. A solid fence at least six feet tall works well as a windbreak and has the added benefit of creating a flyway barrier.
Orient the hive entrance away from prevailing winter winds. In most of the Northern Hemisphere, this means the entrance should face south or southeast, catching morning sun while avoiding cold north winds.
Water Access
Bees need a reliable water source within about 500 feet of the hive. They use water to dilute honey for feeding, to cool the hive through evaporation during hot weather, and to dissolve crystallized sugar. Without a nearby water source, bees may find their way to swimming pools, pet bowls, or neighbors’ birdbaths — creating potential conflicts.
Set up a shallow water source with pebbles or corks for the bees to land on before you install your bees. A birdbath with stones protruding above the water level works perfectly. Bees prefer water with some mineral content, so adding a small amount of salt can make your water station more attractive to them.
Ground Conditions and Access
Place your hive on level, well-drained ground. Hives on slopes can be difficult to work with and may allow rainwater to pool at the entrance. Wet conditions promote fungal growth and can stress the colony. If your site is naturally damp, consider placing the hive on a raised platform or hive stand.
You’ll need to access your hive regularly for inspections, so ensure there’s a clear path from your house to the apiary. You’ll often be carrying equipment, wearing bulky protective gear, and possibly working in less-than-ideal weather — a convenient, accessible location makes these tasks much more manageable.

Adjustable Beehive Stand
Keep your hive off the ground and level with this sturdy, adjustable stand. Essential for proper drainage and pest prevention.
View on Amazon4 Select Your Hive Type
Choosing the right hive type is a foundational decision that will affect every aspect of your beekeeping experience. There are several hive designs available, each with distinct advantages and trade-offs. Understanding your options will help you select the hive that best matches your physical abilities, management style, and goals. For a detailed visual comparison of all available options, check out our guide on beehive types with pictures.
Langstroth Hive
The Langstroth hive is by far the most popular hive design in North America and much of the world. Invented by Reverend Lorenzo Langstroth in the mid-1800s, this design revolutionized beekeeping by utilizing the concept of “bee space” — the precise gap (about 3/8 inch) that bees will leave open rather than filling with comb or propolis.
Langstroth hives consist of stacked rectangular boxes containing removable frames. The bees build their comb within these frames, making inspection, honey harvesting, and colony management straightforward. The standardized dimensions mean that equipment from different manufacturers is interchangeable, and replacement parts are readily available.
The main drawback of Langstroth hives is the weight. A full deep box (also called a “brood box”) can weigh 60-80 pounds, and honey supers can weigh 40-60 pounds when full. If you have back problems or difficulty lifting heavy objects, this is an important consideration. For more details on the best options available, see our guide to the best beekeeping hives.
Top Bar Hive
The top bar hive (TBH) is a horizontal hive design that’s popular among natural beekeepers and those who prefer a more hands-off management approach. Instead of stacked boxes, the TBH uses a single long trough with bars laid across the top. Bees build their comb downward from these bars, creating natural, unattached comb.
The primary advantage of the top bar hive is that you never need to lift heavy boxes — all work is done at waist height by removing individual bars. This makes it an excellent choice for beekeepers with physical limitations. The design is also simple enough to build at home with basic woodworking skills. If you’re interested in building your own, check out our tutorial on how to make a beehive.
However, top bar hives typically produce less honey than Langstroth hives, and the non-standardized design means equipment compatibility can be an issue. Inspection can also be more challenging, as the hanging comb is more fragile than comb built within supported frames.
Warre Hive
The Warre hive (pronounced “war-ray”) was designed by French abbe Emile Warre as a hive that mimics the natural nesting habits of wild bees. It uses stacked boxes like the Langstroth, but the boxes are smaller and the management approach is more minimal — the beekeeper adds empty boxes to the bottom of the stack rather than manipulating frames.
Warre hives appeal to beekeepers seeking a more natural, low-intervention approach. However, the lack of frame manipulation makes it difficult to inspect for disease, and the quilt box ventilation system requires specific knowledge to set up correctly. This hive type is generally not recommended for absolute beginners.
Flow Hive
The Flow Hive is a relatively recent innovation that allows honey to be harvested directly from the hive without opening it. Special frames contain cells that can be split open by turning a key, allowing honey to flow out through a tube into a collection jar. While this technology is impressive, it’s based on a Langstroth-style hive and works best when combined with traditional beekeeping knowledge.
For a detailed comparison of these two popular options, read our Flow Hive vs Langstroth analysis. You can also explore types of beehives in trees if you’re curious about natural bee nesting habits.
Hive Type Comparison
| Feature | Langstroth | Top Bar | Warre | Flow Hive |
|---|---|---|---|---|
| Difficulty Level | Moderate | Easy | Moderate-Hard | Easy-Moderate |
| Honey Production | High | Moderate | Moderate | High |
| Lifting Required | Heavy (60-80 lbs) | Light (individual bars) | Moderate (small boxes) | Heavy (60-80 lbs) |
| Equipment Cost | Moderate | Low | Low-Moderate | High |
| Inspection Ease | Excellent | Good | Limited | Good |
| Standardization | Universal | Varies | Limited | Proprietary |
| Best For | All beekeepers | Natural beekeeping | Experienced beekeepers | Convenience-focused |
5 Gather Your Essential Equipment
Once you’ve chosen your hive type, it’s time to assemble all the equipment you’ll need. Having everything ready before your bees arrive is crucial — you don’t want to be scrambling for supplies on installation day. Understanding how each piece of equipment works will also help you feel more confident when you first open your hive. Learn more about the individual components in our guide to parts of a bee hive and their functions.
The Smoker
The smoker is arguably the beekeeper’s most important tool. When you puff cool smoke into the hive, it triggers a feeding response in the bees — they gorge on honey in preparation for a possible hive evacuation. This makes them calmer and less likely to sting. The smoke also masks alarm pheromones that guard bees release, preventing a coordinated defensive response.
A good smoker should produce cool, thick smoke for an extended period. Common fuel materials include pine needles, burlap, cotton, wood shavings, and dried leaves. Avoid materials that produce hot sparks or toxic fumes. The smoker should have a heat shield to protect your hands and a hook for hanging it on the side of the hive during inspections.
The Hive Tool
The hive tool is a flat, pry-bar-like instrument used for nearly every hive operation. You’ll use it to separate boxes that bees have glued together with propolis (a resinous substance bees collect from trees), to pry frames loose for inspection, to scrape excess burr comb, and to clean the hive interior. Always have your hive tool with you when working bees — you’ll reach for it constantly.
There are two main styles: the J-hook hive tool and the flat hive tool. The J-hook version has a bent end that’s useful for lifting frames by their end bars. Many beekeepers prefer this style for its versatility. Consider buying two — hive tools have a way of disappearing at the worst possible moment.
Protective Gear
A quality bee suit or jacket with a veil is essential, especially for beginners. While experienced beekeepers sometimes work their hives with minimal protection, new beekeepers should always suit up completely until they develop confidence and learn to read their bees’ temperament.
Bee suits come in ventilated and non-ventilated varieties. Ventilated suits are more comfortable in hot weather but cost more. A good suit should have elastic cuffs at the wrists and ankles, a secure veil-to-suit connection, and enough room to wear light clothing underneath. Leather or goatskin gloves protect your hands, though some beekeepers prefer nitrile gloves for better dexterity.
Additional Essential Equipment
- Bee Brush: A soft-bristled brush for gently moving bees off frames during inspection and honey harvest
- Frame Grip: A tool that makes it easier to lift frames, especially helpful when frames are heavy with honey
- Entrance Feeder: For providing sugar syrup to new colonies or during nectar dearths
- Queen Excluder: A grid that prevents the queen from laying eggs in honey supers while allowing workers to pass through
- Entrance Reducer: A wooden or metal piece that narrows the hive entrance, helping a new colony defend against robbing
- Hive Stand: Raises the hive off the ground, improving ventilation and reducing moisture and pest issues
Beginner Equipment Checklist
- Hive body (deep box) with 10 frames and foundation
- Inner cover and outer telescoping cover
- Bottom board (screened or solid)
- Honey super (medium box) with 10 frames
- Smoker with fuel
- Hive tool (J-hook style recommended)
- Bee suit or jacket with veil
- Gloves (leather or nitrile)
- Bee brush
- Entrance feeder
- Entrance reducer
- Hive stand
Understanding how all these components work together is essential for successful hive management. For a deeper dive into hive anatomy, read our article on how a beehive works. If you’re feeling handy, you might even consider building some of your own equipment — our guide on how to paint a beehive covers the finishing touches that protect your investment.

Premium Bee Smoker
Produce cool, thick smoke with this stainless steel smoker. Heat shield handle and easy-to-use bellows.
View on Amazon6 Purchase Your Bees
With your equipment assembled and your hive set up in its permanent location, it’s time to acquire your bees. There are several ways to obtain your first colony, each with its own advantages and considerations. Planning ahead is essential — popular suppliers sell out quickly, and orders are typically placed months in advance.
Package Bees
Package bees are the most common way for beginners to start. A package typically contains about three pounds of bees (roughly 10,000 individuals) along with a separately caged queen. The bees in a package are collected from various colonies and are not related to the queen — they must accept her through the cage before she’s released.
Packages are usually available for pickup or delivery in early to mid-spring. When you receive your package, you’ll need to install the bees into your hive promptly. The package comes with a can of sugar syrup for feeding during transit, and the queen hangs in a small cage inside the package with a few attendant bees to care for her.
The main advantage of packages is availability — they’re produced in large quantities and are widely shipped. The downside is that the bees start with no drawn comb, no brood, and no food stores, which means they take longer to establish than a nucleus colony.
Nucleus Colonies (Nucs)
A nucleus colony, or “nuc,” is a small, established colony consisting of typically five frames of drawn comb containing brood, honey, pollen, worker bees, and an accepted, laying queen. Nucs are the best option for beginners because the colony is already established and functioning — the queen is proven and laying, the bees have food stores, and the colony has momentum.
The main drawback of nucs is that they can be harder to find and are usually more expensive than packages. They’re also typically available only for local pickup, as they can’t be shipped long distances like packages. Order your nuc early — demand often exceeds supply, and waiting lists can be long.
Catching Swarms
Swarm catching is a free way to acquire bees, but it’s not recommended for beginners. Swarms are groups of bees that have left their original hive with the old queen to establish a new colony. While they’re generally gentle (they have no home to defend and are full of honey), the genetics and health status of the colony are unknown.
If you’re interested in catching swarms, join your local beekeeping club and sign up for their swarm list. Experienced beekeepers will often help newcomers collect swarms, providing a great learning opportunity. You can also learn more about natural bee habitats by reading about types of beehives in trees.
Choosing a Bee Breed
Several subspecies (or “races”) of honeybees are available to beekeepers, each with distinct characteristics. The most common include:
| Bee Breed | Temperament | Honey Production | Winter Hardiness | Best For |
|---|---|---|---|---|
| Italian | Very Gentle | High | Moderate | Beginners, warm climates |
| Carniolan | Gentle | Good | Excellent | Cold climates, spring buildup |
| Buckfast | Gentle | High | Good | Disease resistance |
| Russian | Moderate | Good | Excellent | Varroa resistance |
| Caucasian | Very Gentle | Moderate | Moderate | Propolis production |
For most beginners, Italian bees are the recommended choice. They’re gentle, productive, and forgiving of beginner mistakes. Carniolans are an excellent alternative if you live in a cold climate, as they’re known for their winter hardiness and rapid spring buildup.
7 Install Your Bees in the Hive
Installation day is the moment everything becomes real. Your bees have arrived, your hive is set up, and it’s time to introduce thousands of insects to their new home. This is simultaneously the most nerve-wracking and most exhilarating part of getting started. Take a deep breath — with proper preparation, installation is straightforward and safe.
Preparing for Installation
Choose a warm, calm day for installation if possible. Late afternoon is ideal because the bees will have less time to fly before dark, giving them the night to settle into their new home. Have everything ready before you begin: your hive assembled and in position, your smoker lit and producing cool smoke, your protective gear on, and a spray bottle filled with 1:1 sugar syrup (equal parts sugar and water).
If you’re installing a package, lightly spray the bees through the screen with sugar syrup before opening the package. This calms them and gives them something to occupy their attention. Remove the feeder can from the package and set it aside.
Installing a Package
Remove three or four frames from the center of the hive body to create space for pouring the bees in. Give the package a gentle shake to dislodge the bees from the screen, then remove the syrup can and quickly pour the bees into the open space in the hive, much like pouring water. Don’t worry about getting every last bee — the stragglers will find their way in through the entrance.
Find the queen cage among the bees in the package. It’s a small, elongated cage with a screen on one side and a cork or candy plug on the other. Remove the cork from the candy end — the bees will eat through the candy over the next few days, gradually releasing the queen. This delay allows the bees to accept the queen’s pheromone before she’s free.
Hang the queen cage between two center frames with the screen facing down (so the queen can reach the candy and the attendants can access food). Replace the frames you removed, being careful not to crush the queen cage. Close up the hive, install the entrance reducer to the smallest opening, and place the feeder with sugar syrup on top of the hive.
Installing a Nucleus Colony
Installing a nuc is simpler because the colony is already established. Open your hive and remove enough frames to create space for the five nuc frames. Transfer the frames from the nuc box to your hive in the same order they were in the nuc — maintaining the brood nest in the center is important. Fill any remaining space with empty frames, close the hive, and add the feeder.
After Installation
Leave the bees alone for at least a week after installation. They need time to settle in, draw comb, and begin foraging. Check the feeder every few days and refill as needed — new colonies consume sugar syrup quickly. After one week, perform your first hive inspection to check that the queen has been released and is laying eggs.

Ventilated Beekeeping Suit
Stay cool and protected with this three-layer ventilated suit. Full-body protection with easy-visibility veil.
View on Amazon8 Manage Your Colony Through the First Season
Your first season of beekeeping is all about learning to observe, understand, and support your colony as it grows. Regular hive inspections are the cornerstone of good colony management. Through these inspections, you’ll learn to read the signs of a healthy colony, spot problems early, and make informed management decisions.
Conducting Hive Inspections
During your first season, plan to inspect your hive every seven to fourteen days. Each inspection should take 15-30 minutes. Approach the hive calmly from the side or rear — never stand directly in front of the entrance, as you’ll block the bees’ flight path. Give the hive a few puffs of smoke at the entrance, wait 30 seconds, then remove the outer cover and give a few more puffs under the inner cover.
When removing frames, always start from the outside and work your way in. This minimizes disruption to the brood nest in the center. As you examine each frame, look for these key indicators:
- Eggs: Tiny white rice-grain-shaped eggs standing upright in the bottom of cells confirm the queen was present within the last three days
- Brood Pattern: A healthy queen lays in a solid, concentric pattern. Scattered, patchy brood (“shotgun pattern”) may indicate a failing queen or disease
- Queen Sighting: Finding the queen is reassuring but not necessary at every inspection — evidence of her presence (eggs and young larvae) is sufficient
- Food Stores: Frames of capped honey and cells filled with pollen (various colors) indicate adequate nutrition
- Space: If the bees have filled 7-8 of 10 frames, it’s time to add a honey super to prevent swarming
- Signs of Disease: Look for discolored or sunken cappings, unusual odors, dead or deformed bees, or abnormal larvae
Feeding Your Colony
New colonies almost always need supplemental feeding, especially in spring when natural nectar sources may be limited. Feed 1:1 sugar syrup (one part white sugar to one part water by weight) using an entrance feeder or top feeder. Continue feeding until the bees have drawn out most of the comb in the first box and are bringing in their own nectar.
During nectar dearths — periods when few flowers are blooming — even established colonies may benefit from feeding. Watch for bees robbing other hives or hanging around your garbage cans, as these are signs that natural forage is scarce.
Managing Swarm Prevention
Swarming is the natural reproduction of a honeybee colony. While swarming is a sign of a healthy, thriving colony, it means you lose half your bees and your honey production for the season. During your first year, preventing swarms is a top priority.
The primary swarm prevention technique is giving the colony enough space. When bees feel crowded, they begin preparations to swarm. Adding honey supers before the bees need them, ensuring the queen has room to lay, and maintaining good ventilation all help reduce swarming impulse. If you see queen cells (peanut-shaped cells usually on the bottom of frames), the colony may be preparing to swarm — consult your mentor immediately for guidance on how to respond.
Pest and Disease Management
Varroa mites are the single greatest threat to managed honeybee colonies worldwide. These parasitic mites feed on bee fat bodies and transmit viruses that can devastate a colony. Every beekeeper must have a varroa management plan.
Monitor mite levels monthly using a sugar roll or alcohol wash test. If mite levels exceed the treatment threshold (typically 2-3 mites per 100 bees), treat with an approved miticide. There are both chemical and organic treatment options available — discuss the best approach for your situation with your mentor or local beekeeping association.
Other common pests include small hive beetles, wax moths, and ants. Maintaining strong colonies, keeping the apiary clean, and using appropriate traps or barriers will help manage these threats.
9 Harvest Your Honey
Harvesting honey is the moment every new beekeeper eagerly anticipates. After months of inspections, feeding, and careful management, you finally get to taste the fruits of your labor — literally. However, patience is key during your first year. Resist the temptation to harvest too much honey too early. Your colony needs adequate stores to survive the winter.
When to Harvest
Honey is ready to harvest when at least 80% of the cells in a frame are capped (sealed with wax). Uncapped honey has a higher moisture content and will ferment if stored. In most regions, the primary honey flow occurs in late spring and summer, with a possible secondary flow in fall.
During your first year, be conservative with your harvest. A new colony needs 60-90 pounds of honey to survive the winter, depending on your climate. Only harvest surplus honey from the upper supers, and always leave the brood box and at least one super full of honey for the bees.
The Harvesting Process
There are several methods for harvesting honey, ranging from simple crush-and-strain to using a motorized extractor. The basic process involves removing the honey super from the hive, brushing or blowing the bees off the frames, uncapping the wax seals on both sides of each frame, and extracting the honey.
For beginners with just one or two hives, the crush-and-strain method is the simplest and most affordable approach. Simply scrape the comb off the frames into a bucket, crush it thoroughly, and strain the mixture through a mesh filter to separate the honey from the wax. The wax can be saved and used for candles, lip balm, or other products.
If you plan to keep bees long-term, investing in an extractor makes the process much more efficient and allows you to return the drawn comb to the hive for the bees to refill — saving them significant energy compared to building new comb from scratch.
Bottling and Storage
After extraction, let the honey settle in a food-grade bucket for 24-48 hours. Air bubbles and wax particles will rise to the top and can be skimmed off. Then bottle your honey in clean glass jars with tight-fitting lids. Raw honey stored properly will last indefinitely — it’s one of the only foods that never spoils.
Label your jars with the harvest date and any relevant details (variety of flowers, location, etc.). If you plan to sell your honey, check your local regulations regarding food safety requirements, labeling laws, and cottage food exemptions.
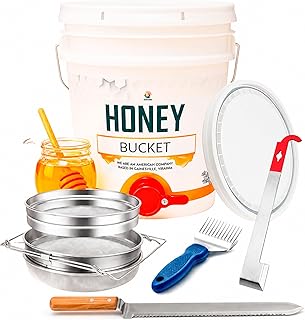
Honey Extractor Kit
Complete extraction setup with uncapping tools, strainer, and bucket with honey gate. Perfect for small-scale beekeepers.
View on Amazon10 Prepare Your Hive for Winter
Winter preparation is the most critical management task of the beekeeping year. A colony that enters winter unprepared will not survive, regardless of how productive it was during the summer. Proper winterization begins in late summer and early fall, well before cold weather arrives.
Ensuring Adequate Food Stores
The most important factor in winter survival is having enough honey stores. In northern climates, a colony needs 60-90 pounds of honey to make it through winter. In milder southern climates, 40-60 pounds may suffice. If your colony doesn’t have enough stores, begin feeding 2:1 sugar syrup (two parts sugar to one part water) in early fall to help them build reserves.
Don’t harvest honey in fall — everything in the hive at this point should stay with the bees. If you’ve been conservative with your summer harvest, your colony should have adequate stores. If not, heavy syrup feeding can supplement their reserves, though it’s not as good as real honey for winter nutrition.
Reducing the Hive Entrance
Install an entrance reducer and set it to the smallest opening. A smaller entrance is easier for the bees to defend against robbing wasps and other colonies, and it reduces drafts inside the hive. Some beekeepers use a mouse guard — a metal strip with small holes that allows bees to pass but keeps mice out of the warm hive.
Moisture Management
Moisture is a bigger killer of winter bees than cold. As the cluster generates warmth, moisture condenses on the cold inner cover and drips back down onto the bees, chilling them. A moisture quilt or moisture board placed above the inner cover absorbs this condensation and allows it to evaporate through the top of the hive.
Good ventilation is also important. The hive needs airflow to carry away moisture, but not so much that it creates drafts on the cluster. A small upper entrance (created by slightly offsetting the inner cover) provides ventilation while allowing bees to exit on warm days for cleansing flights.
Wind Protection and Insulation
If your apiary is exposed to strong winter winds, provide a windbreak. A solid fence, hedge, or temporary bales of straw positioned on the windward side of the hive can significantly reduce heat loss. Wrapping hives with tar paper or commercial hive wraps is a common practice in cold climates — the dark color absorbs solar heat during the day and provides a wind barrier.
Avoid wrapping too tightly, as this can trap moisture. The wrap should be secured around the hive but allow some air circulation. Some beekeepers add insulation above the inner cover in the form of foam board or a quilt box filled with wood shavings.
11 Expand Your Apiary
Once you’ve successfully overwintered your first colony, you may find yourself bitten by the beekeeping bug (figuratively, of course). Expanding from one hive to two or more is a smart move for several reasons, and there are multiple ways to grow your apiary sustainably.
Why Keep More Than One Hive?
Having two or more hives gives you invaluable comparison ability. When you can look at two colonies side by side, you can quickly identify when one is underperforming or struggling. If one colony loses its queen, you can combine it with the stronger colony rather than losing it entirely. If one colony needs resources, you can transfer frames of brood or honey from the other.
Most beekeeping experts recommend starting with at least two hives for this reason. The additional cost is relatively modest compared to the security and learning benefits it provides.
Making Splits
One of the most rewarding aspects of beekeeping is creating new colonies from your existing ones — a process called “making a split.” In its simplest form, a split involves taking frames of brood, honey, and bees from a strong colony and placing them in a new hive with a new queen or queen cell. This mimics the natural swarming process but under your control.
There are many splitting techniques, from simple walk-away splits (where you leave the bees to raise their own queen) to more controlled methods using purchased queens. Your mentor can walk you through the process your first time. Splits are typically made in spring when colonies are growing rapidly and drones are available for mating new queens.
Adding More Equipment
As your apiary grows, you’ll need additional equipment beyond just hives and bees. Consider investing in a dedicated honey extraction setup, additional protective gear for helpers, a wagon or cart for moving heavy equipment, and organized storage for your supplies. A well-organized apiary makes management tasks faster and more enjoyable.
12 Join the Beekeeping Community
Beekeeping is a journey best shared. The beekeeping community is one of the most welcoming and generous hobbyist communities you’ll find, with experienced beekeepers eager to help newcomers succeed. Engaging with this community will accelerate your learning, provide support during challenges, and enrich your beekeeping experience immeasurably.
Local Beekeeping Associations
Join your local beekeeping association as soon as possible. These clubs typically hold monthly meetings with educational presentations, organize hands-on workshops, coordinate group equipment purchases at discounted prices, and maintain mentorship programs. The annual membership fee (usually $20-50) is one of the best investments you’ll make in your beekeeping education.
Many associations also participate in community outreach, setting up observation hives at farmers’ markets, schools, and fairs. Volunteering for these events is a great way to give back and deepen your own understanding of bees.
Online Communities
Online beekeeping forums and social media groups provide 24/7 access to a global community of beekeepers. These platforms are excellent for getting quick answers to questions, sharing photos of what you’re seeing in your hive, and learning about techniques and products that other beekeepers recommend.
Popular platforms include dedicated beekeeping forums, Facebook groups, Reddit communities, and YouTube channels. As mentioned earlier, always verify online advice against trusted sources, as the quality of information varies widely.
Beekeeping Conferences and Events
State and regional beekeeping conferences offer multi-day educational experiences with expert speakers, vendor exhibits, and networking opportunities. These events are worth attending even as a beginner — you’ll learn about the latest research, discover new products, and connect with beekeepers from across your region.
Some conferences offer beginner tracks specifically designed for new beekeepers, covering fundamental topics in depth. The vendor exhibits are also a great place to compare equipment in person before making purchasing decisions.
Common Beginner Mistakes to Avoid
Every beekeeper makes mistakes, especially during their first few seasons. However, learning from the mistakes of others can save you time, money, and heartache. Here are the most common pitfalls that trip up new beekeepers and how to avoid them.
Common Mistakes
- Not educating yourself before getting bees
- Skipping protective gear to “tough it out”
- Opening the hive too frequently
- Harvesting too much honey the first year
- Ignoring varroa mite management
- Not having a second hive for comparison
- Placing the hive in a poor location
- Failing to feed a new colony
Best Practices
- Take a class and find a mentor first
- Always wear full protective gear
- Inspect every 7-14 days, no more
- Leave plenty of honey for winter
- Monitor and treat mites proactively
- Start with at least two hives
- Choose a sunny, sheltered location
- Feed new colonies sugar syrup generously
Inspecting Too Often or Too Rarely
There’s a sweet spot for hive inspections. Opening the hive too frequently (more than once a week) stresses the colony, disrupts the bees’ work, and can chill brood during cool weather. On the other hand, going more than two weeks without inspecting during the active season means you might miss critical issues like swarm preparations, queen failure, or disease outbreaks.
Aim for inspections every 10-14 days during spring and summer, and less frequently during fall. Each inspection should be purposeful — know what you’re looking for before you open the hive, and work efficiently to minimize the time the hive is open.
Ignoring Varroa Mites
This cannot be overstated: varroa mite management is not optional. Untreated colonies typically die within one to two years from the viruses that varroa mites transmit. Many beginners avoid treating because they want to keep their bees “natural,” but the reality is that managed colonies in most areas cannot survive without some form of mite management.
Develop a monitoring and treatment plan from day one. Test mite levels monthly during the active season using a sugar roll or alcohol wash. Treat when levels exceed the threshold for your area. There are organic treatment options (such as oxalic acid, formic acid, and thymol-based products) that are compatible with natural beekeeping philosophies.
Poor Hive Placement
A poorly placed hive can cause ongoing problems that are difficult to fix once the bees are established. Common placement mistakes include putting the hive in deep shade (leading to damp conditions and disease), in a low-lying area that floods (bees need dry conditions), too close to a neighbor’s property line or high-traffic area, or in a location that’s difficult to access in bad weather.
Take time to observe your intended location through different times of day and weather conditions before committing. Remember that you’ll be visiting this spot regularly in all conditions — make sure it’s accessible and practical year-round.
Expecting Too Much Honey the First Year
First-year colonies are focused on building comb, raising brood, and establishing themselves. They typically produce little to no surplus honey during their first season. This is completely normal. Setting realistic expectations prevents disappointment and ensures you don’t over-harvest, leaving your bees without adequate winter stores.
Think of your first year as an investment. You’re building the foundation for years of productive beekeeping. The honey will come — and when it does, it will taste all the sweeter for the patience you exercised.
Understanding the Costs of Beekeeping
Beekeeping requires a moderate initial investment, with ongoing costs that are relatively modest compared to many other hobbies. Understanding the financial commitment upfront helps you plan appropriately and avoid surprises. Here’s a realistic breakdown of what to expect.
| Item | Estimated Cost | Notes |
|---|---|---|
| Hive (assembled) | $150 – $300 | Includes all boxes, frames, covers, bottom board |
| Package or Nuc of Bees | $120 – $250 | Nucs cost more but establish faster |
| Protective Gear | $50 – $150 | Suit/jacket, gloves, veil |
| Smoker | $20 – $40 | Stainless steel recommended |
| Hive Tool | $10 – $20 | Buy two — they disappear easily |
| Feeder | $10 – $30 | Entrance or top feeder |
| Beekeeping Class | $50 – $150 | Often includes mentorship |
| Books and Resources | $30 – $60 | 2-3 quality beekeeping books |
| Association Membership | $20 – $50/year | Invaluable for support and resources |
| Mite Treatment | $20 – $50/year | Essential for colony health |
| Sugar for Feeding | $20 – $40/year | White granulated sugar |
| Total First Year | $400 – $900 | Varies by region and choices |
After the first year, ongoing costs drop significantly. You won’t need to repurchase your hive, protective gear, or tools. Annual expenses typically run $50-150 for treatments, feeding, and association membership. If you sell honey, beeswax, or other hive products, your beekeeping can eventually pay for itself or even generate a modest income.

Beekeeping for Beginners Book
A comprehensive guide covering everything from hive setup to honey harvesting. Perfect companion for new beekeepers.
View on AmazonFrequently Asked Questions About Starting Beekeeping
The initial investment for starting beekeeping typically ranges from $400 to $900 for your first hive, including the hive structure, a package or nucleus colony of bees, protective gear, a smoker, hive tools, and a beginner beekeeping class. After the first year, annual maintenance costs drop to approximately $50-150 for treatments, feeding supplies, and association membership. Many beekeepers find that selling honey and other hive products helps offset these costs over time.
Beekeeping is legal in most residential areas, but regulations vary significantly by municipality. Many cities allow backyard beekeeping with certain restrictions on the number of hives, setback distances from property lines, and water source requirements. Some areas require permits or registration. Always check your local zoning laws, state regulations, and homeowners association rules before starting. Even where beekeeping is legal, maintaining good relationships with neighbors through communication and sharing honey is important.
During the active season (spring through fall), expect to spend about 30 minutes to one hour per hive every one to two weeks for inspections. Additional time is needed for equipment maintenance, honey extraction, and pest management. In winter, beekeeping requires very little time — just occasional checks from the outside to ensure the hive is intact. Overall, beekeeping is a manageable hobby for people with busy schedules, requiring roughly 2-4 hours per month during the active season.
Stings are an inevitable part of beekeeping, but they’re far less frequent than most people imagine. Wearing proper protective gear, using your smoker correctly, working calmly and deliberately, and choosing gentle bee breeds all minimize the risk. Most beekeepers average only a few stings per season. Over time, many beekeepers develop a degree of tolerance to bee venom, though some individuals may develop allergies. If you have a known allergy to bee stings, consult an allergist before starting beekeeping and always carry an epinephrine auto-injector.
The Langstroth hive is widely recommended as the best hive type for beginners. It’s the most common hive design in North America, which means equipment is readily available, standardized, and interchangeable between manufacturers. There’s also an enormous body of educational resources, books, and experienced beekeepers who work with Langstroth hives. The 10-frame deep configuration is the traditional choice, though the 8-frame version is popular among beekeepers who prefer lighter boxes. For a detailed comparison of all hive types, see our guide on beehive types with pictures.
First-year honey production varies widely depending on your location, weather conditions, local nectar flows, and how well your colony establishes itself. Some first-year colonies produce 20-60 pounds of surplus honey, while others produce none at all. The priority during the first year is building a strong, healthy colony that will survive winter. Don’t be disappointed if your first-year harvest is modest — subsequent years typically yield significantly more as the colony matures and the bees have drawn comb ready to fill.
The best time to begin planning is during fall or winter, giving you months to research, take classes, order equipment, and prepare your apiary site. Bees are typically installed in spring — packages and nucleus colonies become available from March through May depending on your region. Starting in spring gives the colony the entire active season to build up stores before winter. Avoid starting in late summer or fall, as the colony won’t have enough time to establish itself before cold weather arrives.
No, you don’t need a large property to keep bees. Many successful beekeepers maintain hives in suburban backyards, on rooftops, and even on balconies. A space as small as a few square feet can accommodate a hive. The key considerations are proper sun exposure, wind protection, water access, and adequate distance from neighbors and high-traffic areas. Urban beekeeping has become increasingly popular, with hives thriving in cities around the world. Check your local regulations, as some municipalities have specific rules about hive placement in residential areas.
Bees survive winter by forming a tight cluster and consuming the honey stores they’ve accumulated during the active season. The cluster generates heat by vibrating their flight muscles, maintaining an internal temperature of around 93°F (34°C) even in freezing conditions. As they consume honey, the cluster gradually moves across the frames to access more stores. This is why ensuring adequate honey reserves (60-90 pounds in cold climates) is critical for winter survival. Beekeepers may also provide supplemental sugar candy or fondant as emergency food during late winter when stores may be running low.
The best way to find a mentor is through your local beekeeping association. Most clubs have formal mentorship programs that pair beginners with experienced beekeepers. Attend meetings, introduce yourself, and express your interest in learning. Many experienced beekeepers are eager to share their knowledge and may invite you to observe their hive inspections. Online communities can also connect you with mentors, though in-person mentorship is far more valuable for hands-on skills. Some beekeeping classes include mentorship as part of the curriculum.
If you have a known severe allergy (anaphylaxis) to bee stings, beekeeping carries significant health risks. Consult with an allergist before starting — they can perform testing to determine the severity of your allergy and discuss options such as venom immunotherapy (allergy shots) that may reduce your sensitivity. Some beekeepers with mild allergies keep bees successfully by always carrying an epinephrine auto-injector (EpiPen), wearing full protective gear, and working with gentle bee breeds. However, this is a personal health decision that should be made in consultation with medical professionals.
The distinction is primarily one of scale and intent. A hobbyist beekeeper typically manages one to ten hives for personal enjoyment, honey production, and garden pollination. A sideliner beekeeper operates a larger operation (10-50+ hives) that generates supplemental income. A commercial beekeeper or bee farmer manages hundreds to thousands of hives as a primary business, often providing pollination services to agricultural operations in addition to honey production. Most people who start beekeeping as a hobby remain hobbyists, though some discover a passion that grows into a sideline or even full-time business.
Start Your Beekeeping Journey Today
Beekeeping is more than a hobby — it’s a connection to one of nature’s most fascinating and vital creatures. The journey from curious beginner to confident beekeeper is filled with learning, wonder, and the sweet reward of your own honey. Every expert beekeeper started exactly where you are now, with a desire to learn and a willingness to try something new.
The twelve steps outlined in this guide provide a clear roadmap from your first spark of interest to a thriving, productive apiary. Take them one at a time, lean on the beekeeping community for support, and don’t be afraid to make mistakes — they’re the best teachers.
Your bees are waiting. The flowers are blooming. It’s time to begin.
Find Your Perfect Hive →