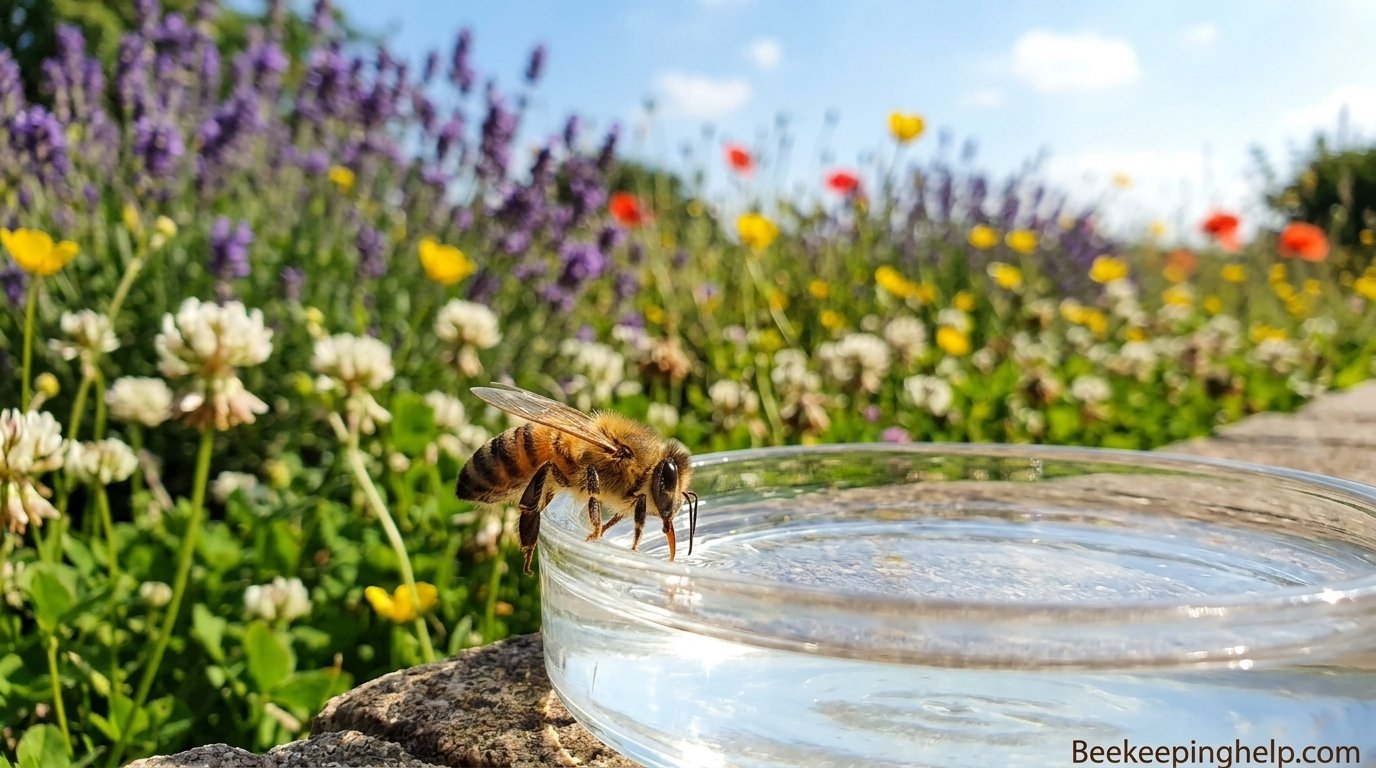
What to Feed a Bee: The Complete Guide for Honey Bees, Bumble Bees and Tired Backyard Visitors
Sugar syrup, pollen, fondant, or just a spoonful of sugar water on a warm patio table. Here is exactly what to feed a bee, when to do it, and what to keep far away from them.
The short answer
Honey bees do best on their natural foods: nectar, honey, and pollen. When those are missing, you can step in with plain white cane sugar syrup (thin 1:1 in spring, thick 2:1 in fall), pollen substitute patties for protein, and solid fondant or sugar bricks during cold snaps. A single exhausted bee on the ground can be offered a few drops of sugar water on a spoon. Never feed brown sugar, molasses, powdered sugar, or honey from an unknown source.
Most people who search for what to feed a bee fall into one of two camps. The first group is standing over a single sluggish bee on a warm driveway, wondering whether a bit of sugar water will bring it back. The second group has a hive, a worrying lack of flowers outside, and a nagging sense that the colony may not have enough food to make it through the next few weeks. Both questions deserve a careful answer, because the wrong food can do real harm even when it is offered with the best intentions.
Bees are surprisingly particular eaters. They have evolved over millions of years to live on a very specific menu, and every part of it does a job. Nectar and honey deliver energy. Pollen delivers protein, fats, vitamins, and minerals. Water keeps the colony cool, dilutes stored honey, and helps nurse bees produce brood food. When you understand what each of those foods does, the rules for feeding bees stop feeling like a list of arbitrary dos and don’ts and start making sense on their own.
In this guide, we will walk through the full picture. You will learn what bees eat when left alone, how to help a single tired bee, how to decide whether your colony needs supplemental food, and exactly how to mix and deliver syrup, pollen, and solid feed. We will compare the main types of feeders, explain what should never go into a feeder, and finish with a simple seasonal plan you can adapt to your own climate. If you are only just starting out and want the bigger context first, our beginner’s guide to starting beekeeping and the main beekeeping resource hub are good companions to this article.

What Bees Eat in Nature
Before you feed a bee anything, it helps to know what a bee would choose for itself. A honey bee colony is a tiny, tightly managed food economy, and almost everything inside the hive connects back to four basic resources: nectar, pollen, water, and plant resins. Only the first three are actually eaten, but resin plays a supporting role in keeping the whole household healthy.
Nectar and honey: the fuel
Nectar is the sugary liquid flowers produce to attract pollinators. It is mostly water, usually somewhere between 70 and 80 percent, with sugars such as sucrose, glucose, and fructose making up the rest. Forager bees suck it up with their tongues, store it in a special stomach called the honey stomach, and carry it home. Back at the hive, they pass it mouth to mouth to younger house bees, who add enzymes and spread the droplets around to evaporate. When the moisture drops to about 18 percent, the bees cap the cell with wax. That finished product is honey.
Honey is the colony’s long-term energy reserve. Adult bees burn it to fly, to keep the nest warm, and to power just about everything else they do. In winter, when no flowers are available, a cluster of bees survives entirely on stored honey, shivering their flight muscles to generate heat. A strong colony in a cold climate can go through many pounds of honey between late fall and early spring, which is why the question of how much honey is left is so central to feeding decisions.
Pollen and bee bread: the protein
If nectar is the fuel, pollen is the building material. Bees collect pollen on the hairs of their bodies and pack it into small baskets on their hind legs. At the hive, it is stored in comb cells, mixed with a little nectar and bee saliva, and packed down tightly. Fermentation begins, and the result is often called bee bread. It is far more digestible than raw pollen and keeps well for months.
Young nurse bees eat enormous amounts of this stuff. It contains the protein, lipids, vitamins, and minerals they need to develop the glands that produce brood food, commonly called royal jelly for the queen and a thinner worker jelly for the rest of the larvae. Without a steady pollen supply, a colony cannot raise healthy brood. The queen slows or stops laying, and the population begins to shrink. That is why pollen shortages are just as serious as nectar shortages, even though they are harder to notice from the outside.
Water: the quiet essential
Water is easy to overlook because we don’t think of it as food. Yet bees use it constantly. In summer, water collectors bring in droplets to spread through the hive and fan, cooling the nest through evaporation. In spring, nurse bees use water to dilute crystallized honey and to prepare brood food. A colony with no reliable water source nearby can become stressed surprisingly quickly, so a shallow water station with pebbles or floating corks is one of the kindest things you can add to a bee yard.
Propolis and honeydew: the extras
Bees also gather plant resins from tree buds and wounds and mix them with wax to make propolis. It is not a food, but it seals cracks, smooths the inside of the hive, and has mild antimicrobial properties. In some regions and seasons, bees also collect honeydew, a sweet liquid excreted by sap-feeding insects such as aphids. It can make a dark, strongly flavored honey, but it can also be a poor winter food in cold climates because of its high mineral content, which may contribute to dysentery when bees can’t take cleansing flights.
| Food | What it provides | Where bees get it |
|---|---|---|
| Nectar | Carbohydrates, quick energy, water | Flowers and extrafloral nectaries |
| Honey | Stored energy for winter and dearth | Ripened nectar in capped comb |
| Pollen and bee bread | Protein, fats, vitamins, minerals | Flowers, stored in comb cells |
| Water | Cooling, dilution, brood food production | Ponds, puddles, drip lines, birdbaths |
| Honeydew | Sugars, some minerals | Sap-feeding insects on trees and plants |
Understanding how all of this fits together inside a working colony is easier when you can see the structure of the nest. If you want to picture where the honey stores, pollen frames, and brood nest actually sit, our explainer on how a beehive works lays it out in plain language.
Why the natural menu matters when you feed
Every supplemental food you give a bee is a stand-in for one of these natural resources. Sugar syrup stands in for nectar. Fondant and sugar bricks stand in for honey. Pollen patties stand in for bee bread. None of them is a perfect substitute, and none should be treated as a permanent replacement. Colonies that live entirely on sugar tend to be weaker over time, because sugar contains none of the trace nutrients, enzymes, and plant compounds that make honey and real pollen so valuable.
The best approach is to think of feeding as a bridge. It carries a colony across a gap, whether that gap is a cold spring, a summer drought, a poor fall flow, or the first few weeks after a new package is installed. Once the bridge has done its job, the bees should go back to eating what they gather themselves.

Plant the menu bees already love
A pollinator wildflower seed mix gives bees natural nectar and pollen from spring through fall, which means less feeding for you.
Check Bee Seed Mixes on AmazonFound a Tired Bee? Here Is What to Do
This is the situation behind a huge share of searches for what to feed a bee. You spot one lying on a path, barely moving, legs curled or crawling in slow circles. It looks exhausted. Your instinct is to help, and in many cases a little care really can make a difference. The trick is to understand why the bee is on the ground in the first place, because the right response depends on the cause.
Why a bee ends up on the ground
Bees are not built for long, effortless flights. A foraging honey bee wears out its wings over a few short weeks, and old bees often simply run out of energy and land wherever they happen to be. Bumble bees, especially queens in early spring, can be caught out by cold weather. A bee that is too cold cannot warm its flight muscles enough to take off, so it sits still until the day warms up or something changes. Other bees are dehydrated, hungry, or have been exposed to pesticides, in which case they may tremble, twitch, or move in uncoordinated ways.
It helps to know that some tired bees are at the very end of their natural lives. That is normal, and no amount of sugar will change it. But a bee that is simply cold, hungry, or worn out can often recover in ten to twenty minutes with a small boost of energy, and that is worth trying.
The simple sugar water rescue
The classic emergency remedy is a mixture of about two parts white sugar to one part warm water. Stir it until the sugar completely dissolves. You can use roughly two tablespoons of sugar and one tablespoon of water for a small batch. Then follow these steps.
- Move slowly and stay calm. A tired bee is rarely aggressive, but a startled one may still sting or fly away in a panic.
- Gently coax the bee onto a piece of stiff paper, a leaf, or a clean spoon. Avoid handling it with your bare fingers.
- Move it to a shaded, sheltered spot, ideally near flowers or a plant with a wide surface, such as a hosta leaf or a marigold.
- Place two or three small drops of the sugar water on a flat surface near the bee, or on the spoon within reach of its mouthparts. You do not need to pour it. A tiny amount is enough.
- Wait quietly. If the bee is alive and able to feed, you will see its tongue, called a proboscis, extend and begin to drink.
- Give it time to rest, sip, and warm up. Many bees will groom themselves, flex their wings, and fly away within the hour.
A small but important detail: use white granulated sugar only. Brown sugar, honey from the store, and sweetened drinks all contain compounds that can harm bees. Honey is especially risky, because it can carry spores of bee diseases that don’t affect us but can spread to wild and managed colonies.
Tired bee, cold bee, or dying bee?
If the air temperature is low, your bee might not be hungry at all. It might just be chilled. In that case, feeding is less important than getting it warm. Move it somewhere out of the wind, such as a sunny windowsill outside, and let it warm gradually. Don’t place it on a hot surface, and don’t put it inside a warm house where it may become confused and lose its way back outdoors.
For a bumble bee queen in early spring, a few drops of sugar water on a spoon can be enough to give her the energy she needs to continue looking for a nest site. Because queens are so valuable to the next generation of bumble bees, a small rescue attempt is worthwhile if you find one grounded and sluggish.
| What you see | Likely cause | What helps |
|---|---|---|
| Still, no movement, cool day | Chilled | Shelter and gentle warmth, then a few drops of sugar water |
| Slow crawling, wings worn or ragged | Old forager, worn out | A few drops of sugar water and a safe resting spot |
| Trembling, twitching, unable to right itself | Possible pesticide exposure | Move to a quiet, shady spot; recovery is uncertain |
| Bumble bee queen in early spring | Low energy after waking or nest-searching | Sugar water on a spoon and a sunny, sheltered flower |
| Bee legs curled, no response at all | End of life | Nothing further; leave it undisturbed |
What not to do
Please don’t put a bee in a jar, don’t offer sports drinks or fruit juice, and don’t leave a bowl of syrup out on the patio day after day. A permanent syrup station can draw in wasps and ants, encourage honey bees from nearby hives to start robbing each other, and even pull wild bees into places where they don’t belong. A rescue should be a one-time, small-scale kindness, not an open buffet.
If you keep finding bees in trouble in the same spot, look around for a cause. It may be a treated lawn, a recently sprayed shrub, or a lack of any nearby flowers. In those cases, fixing the environment is more helpful than any amount of sugar water.
A better long-term way to feed backyard bees
The kindest way to feed wild bees is to plant for them. A mix of early bloomers such as crocus and willow, summer favorites such as bee balm, lavender, and borage, and late-season flowers such as asters and goldenrod means there is always something for them to drink and eat. Add a shallow dish of water with stones and you have covered the other basic need as well.
Keep a rescue kit on hand
Small droppers and shallow feeding dishes make it easy to offer a tired bee a few drops of sugar water without touching it.
See Droppers on AmazonWhen a Honey Bee Colony Actually Needs Feeding
Here is the truth that many beginners take a while to accept: a healthy, well-placed colony in a good location often needs little or no supplemental feeding. Bees are excellent at looking after themselves. The moments when you should step in are specific, and feeding at the wrong time can create as many problems as it solves. Overfeeding can fill the brood nest with syrup, leaving the queen no room to lay. It can also encourage robbing, dilute the quality of your honey, and make colonies dependent on you.
Five situations where feeding makes sense
- A new colony. Newly installed packages, nucs, and swarms have to draw comb, raise brood, and build up stores all at once. Feeding helps them do that faster, especially when natural forage is thin.
- Spring buildup. In cold climates, stores run low right when the colony begins raising lots of brood. A cold, wet spring can leave bees with food in the hive but unable to fly out to gather more.
- A summer dearth. Many regions have a gap in mid to late summer when little is blooming. Colonies can quietly burn through their stores if you don’t notice.
- Fall preparation. Colonies that didn’t gather enough honey by the end of the main flow may need extra food to reach a safe winter weight.
- Emergencies. A colony that is light, starving, or has lost access to stored honey because of cold weather needs immediate help.
How to tell what your bees have
Guessing is the enemy here. The best way to decide whether to feed is to actually look, and there are a few simple ways to do it.
Inspect the frames. When you open a hive, note how much capped honey and uncapped nectar you see, and whether there is a ring of stored pollen around the brood. A nearly empty comb with a handful of nectar is a signal. If you are working the hive in colder or damper conditions, our review of the best bee smokers can help you choose a tool that makes calm, quick inspections easier.
Use the heft test. Tilt the back of the hive gently upward with your hands or fingers under the bottom board or rear handhold. A hive heavy with honey feels solid and hard to lift. A light hive gives easily. With experience, you will develop a feel for it, and it lets you check winter stores without opening the box and letting warm air escape.
Watch the entrance. Busy bees carrying pollen mean forage is coming in. Lots of bees hanging around with little traffic, or bees dragging out dead brood or even larvae, can be signs of starvation.
Look at the weather and the calendar. A colony with only a modest honey reserve in early spring is far more vulnerable than the same colony in the middle of a strong flow. Local knowledge, from a beekeeping club or an experienced neighbor, is worth more than any general guide when it comes to knowing your area’s flow timing.
Signs your colony may be short on food
- Very light hive weight when tilted from the back
- Little to no capped honey on the frames near the cluster
- Larvae that look shrunken, dry, or are being removed from cells
- Bees with their heads pushed into empty cells, sometimes dead in place
- Reduced brood pattern and a queen that seems to be laying less
- Robbing behavior or fighting at the entrance as neighboring bees smell weakness
Don’t feed during a honey flow if you plan to harvest. Syrup stored in supers can end up mixed with honey you plan to eat or sell. Feed only when supers are off, or accept that anything stored from syrup is not honey.
Consider the hive you are working with
The type of hive matters more than many people realize. A cold, drafty hive with a poorly protected entrance loses heat and eats more food. A colony in a well-insulated hive burns fewer resources overall. If you are still choosing equipment, our guides to the best beekeeping hives and the different beehive types with pictures will help you compare designs, and each has its own feeding quirks that we will look at later.
A quick decision framework
| Situation | Feed? | What to offer |
|---|---|---|
| New package on foundation, little bloom nearby | Yes | 1:1 syrup until comb is drawn |
| Established colony, strong nectar flow | No | Nothing; let them work |
| Cold, rainy spring, light hive | Yes | 1:1 syrup and pollen patty if brood is present |
| Mid-summer dearth, stores dropping | Maybe | 1:1 syrup in small amounts; guard against robbing |
| Late fall, hive below target weight | Yes | 2:1 syrup while it is still warm enough for bees to store it |
| Deep winter, cluster near empty comb | Emergency | Fondant, sugar brick, or candy board over the cluster |
Inspect with confidence
A solid hive tool, bee brush, and inspection kit make it far easier to check stores without stressing the colony.
Shop Inspection Kits on AmazonSugar Syrup, Done Right
Sugar syrup is the workhorse of bee feeding. It is cheap, easy to make, and bees take to it readily. It is also the food most often prepared badly, so it’s worth slowing down and getting the details right. The good news is that the recipe is almost embarrassingly simple: sugar and water.
Choose the right sugar
Use plain white granulated sugar made from cane or beets. That’s it. Sucrose is the sugar bees handle best, and refined white sugar is free of the minerals, molasses, and additives that can upset a bee’s digestive system. Avoid brown sugar, raw or turbinado sugar, molasses, and any sugar labeled as powdered or confectioner’s, because the latter contains anti-caking starches. Skip sugar blends and anything flavored or fortified.
Beet sugar and cane sugar are both fine. Some beekeepers claim to prefer one over the other, but the differences are small, and either dissolves and feeds bees well. Just make sure it is pure sugar with nothing added.
Choose the right ratio
Beekeepers describe syrup thickness as a ratio of sugar to water, most often 1:1 or 2:1. A 1:1 syrup is equal parts sugar and water, and it closely resembles the thin nectar bees collect from flowers. That similarity matters, because a thin syrup stimulates the colony to build comb and raise brood, just as a natural spring flow would. A 2:1 syrup, meaning two parts sugar to one part water, is much thicker and is closer to honey in consistency. Bees can store it with less work, so it is the better choice for fall feeding when the goal is to pack stores away quickly.
| Ratio | Sugar : water | Approximate recipe | Best use |
|---|---|---|---|
| 1:1 (thin) | Equal parts | 4 cups sugar + 4 cups water | Spring buildup, new colonies, drawing comb |
| 2:1 (thick) | Two parts sugar to one part water | 8 cups sugar + 4 cups water | Fall feeding for winter stores |
| 5:3 (medium) | Five parts sugar to three parts water | 5 cups sugar + 3 cups water | Late summer in mild climates, a middle ground |
Whether you measure by weight or by volume matters less than being consistent. Volume is easier for most hobbyists, and it produces good results. If you want more precision, some beekeepers use a kitchen scale or even a refractometer to check sugar content, though this is far from essential.
How to mix it safely
- Start with warm or hot tap water in a clean pot or bucket. You don’t need to boil it. If you do heat it on the stove, remove it from the heat before adding sugar.
- Add the sugar gradually while stirring until it dissolves completely. For 2:1 syrup, the water needs to be quite warm to dissolve that much sugar.
- Let the syrup cool to room temperature before you put it in the feeder. Hot syrup can harm bees and can also damage plastic feeders.
- If your tap water has a strong chlorine smell, let it sit out for a few hours first. Bees can be sensitive to strongly treated water.
- Store any leftover syrup in a clean, closed container and use it within a week or so, keeping it cool.
Never scorch or caramelize the sugar. Overheated sugar can form hydroxymethylfurfural, often shortened to HMF, which is toxic to bees. If your syrup smells burnt or has turned brown, throw it out and start over.
Should you add anything?
Some beekeepers add a small amount of essential oil, such as lemongrass or spearmint, or commercial feeding stimulants, in the belief that it draws bees to the feeder and helps keep the syrup from spoiling. Others add probiotics, vitamin blends, or apple cider vinegar. The evidence for many of these is mixed, and bees will take plain syrup perfectly well. If you experiment, keep it light and don’t overdo it. Too much essential oil can put bees off entirely.
A few practical points are worth remembering. A tiny pinch of table salt is sometimes used to supply trace minerals, but there is no need. Don’t add honey to your syrup unless you are absolutely sure of its source, since bought honey can carry disease spores. And never add medications to syrup unless you have been advised to by a qualified professional and it is permitted where you live.
How much to feed, and how fast
The amount depends on the size of the colony and the goal. A new package might take a quart or more of syrup every couple of days during the first weeks. A well-established colony in fall may take several gallons over a month to reach winter weight. As a rule, offer only as much as the bees will finish in a few days. Syrup left sitting in warm weather can ferment or grow mold, and stale syrup is hard on bees. Refill when the feeder is nearly empty, and clean it regularly.
Weather also plays a role. Bees are far less willing to take liquid feed when it gets cold, typically once daytime temperatures stay below about 50 degrees Fahrenheit. When that happens, syrup goes unused, and it is time to shift to solid feed. We cover that in the winter section below.
Keep the mess under control
Syrup is sticky, and it attracts everything from ants to wasps. Drips on the ground, around the hive, or on your gear can trigger robbing. Take care when filling feeders, wipe up spills, and if you find your suit stained with syrup after a day in the yard, our guide on how to wash a bee suit shows how to clean it without wearing out the fabric.
Start with the right sugar
Plain pure cane granulated sugar is all you need for safe syrup. Buying in bulk keeps the cost down through the season.
Shop Pure Cane Sugar on AmazonPollen and Protein Feeding
Syrup solves the energy problem. It does nothing for protein. A colony that is raising brood needs a constant supply of pollen, and when forage is missing, no amount of sugar can fill that gap. This is where pollen substitutes and pollen supplements come in.
Why protein matters
A growing larva is essentially a fast-expanding bundle of protein. Nurse bees that don’t get enough pollen struggle to produce brood food, and they may even cannibalize young larvae to recycle the nutrients. Adult bees that were raised on poor nutrition tend to live shorter lives and have weaker immune systems. Winter bees, the long-lived generation that carries a colony through the cold months, need excellent nutrition in late summer and fall to build the fat reserves that keep them alive.
Pollen is not a single nutrient. Different plants provide different amino acids, lipids, and micronutrients. A colony that has access to many types of flowers is naturally better fed than one that has only a single crop, which is one more reason to encourage diverse plantings around your apiary.
Pollen substitutes versus real pollen
Substitutes are made from ingredients such as soy flour, brewer’s yeast, and other protein sources, often with added vitamins and minerals, and pressed into patties or sold as a powder. They are convenient, shelf-stable, and consistent, and many colonies take to them eagerly. They are not identical to real pollen, though, and most beekeepers treat them as short-term tools rather than long-term diets.
Real pollen, whether collected by pollen traps or purchased, has a richer, more complete profile. It can also carry pathogens if it comes from an unknown source, so it should be treated, often by irradiation, before being fed. Because of that risk, hobbyists tend to use commercial patties, which are safer and easier to handle.
| Option | Pros | Cons |
|---|---|---|
| Commercial pollen substitute patty | Easy to use, consistent, no real pollen disease risk | Not a perfect match for real pollen; can attract small hive beetles |
| Dry pollen substitute powder | Can be offered outside the hive or mixed into patties | Messier; may draw robbing insects |
| Real trapped pollen, treated | Closest to natural nutrition | Expensive; disease risk if untreated or from an unknown source |
| Pollen supplement patties (with real pollen) | A middle ground with some natural content | Costlier than pure substitutes |
When to feed pollen
The most common time is late winter or early spring, several weeks before natural pollen is available, when the queen begins to lay more heavily. Feeding a patty at that moment can help a colony build strength earlier, which pays off when the first flows arrive. Some beekeepers also feed pollen substitute in fall to help produce fat, healthy winter bees, particularly after a dry summer with poor forage.
However, there are times not to feed protein. If natural pollen is plentiful, bees will ignore patties, and leftover product simply invites pests. Feeding pollen in a queenless hive or one with little brood is pointless, since there are no larvae to use it. And feeding it through the coldest weeks can stimulate brood rearing too early, leaving the colony exposed if a cold snap follows.
How to place a patty
- Warm the patty slightly if it is stiff, so it is easy to handle.
- Place it directly on top of the frames over the brood nest, with wax paper or parchment above and below if it is thin, or slice a small opening in the plastic wrapping so the bees can chew through.
- Use a small patty at first, typically no more than a few ounces to half a pound, so that the bees can finish it before it dries out or draws pests.
- Check it in a week. If it is gone, add another. If it is untouched, remove it, because the bees have enough pollen from the field.
Watch out for small hive beetles. In warm climates, these pests love pollen patties. Feed small patties, check them often, and remove any that are moldy or full of larvae.
Give bees real pollen in a natural way
Beyond patties, the healthiest source of pollen is a diverse landscape. Native trees such as maple, willow, and poplar provide the earliest pollen of the year, followed by fruit trees, clover, and many garden flowers. If you have room to plant even a small strip of bee-friendly flowers, you’re essentially building a free feeding station that works without any effort from you once established.
Take particular care with pesticides. Insecticides on blooming plants, including systemic products taken up by the roots, can contaminate both nectar and pollen. Skipping spray on flowering plants is one of the best forms of feeding you can offer.
Bridge the protein gap
Pollen substitute patties help colonies keep raising brood when natural pollen is scarce in early spring or a dry fall.
See Pollen Patties on AmazonFeeding New Colonies and Spring Buildup
Some of the most valuable feeding you will ever do happens in the first weeks of a colony’s life, and again at the start of each spring. Both are periods of rapid growth, and both can stall if the bees run short of food at the wrong moment.
Feeding a newly installed package
A package of bees arrives with a queen, a few pounds of workers, and a can of syrup for the trip. That is about it. They have no comb, no honey, and no brood. Everything has to be built from scratch, and wax is expensive for bees to produce. It takes many pounds of sugar or honey to make a single pound of wax. That is why feeding is standard practice for new packages, particularly when natural forage is thin.
Use 1:1 syrup, and feed continuously until the bees have drawn out most of the foundation in the first box or until a strong natural flow begins. Most packages will take syrup readily, often finishing a quart in a day or two once they get going. Keep a small entrance to help the young colony defend itself, and use an internal feeder or a hive-top feeder rather than an open dish.
Nucs and swarms
A nucleus colony, or nuc, comes with drawn comb, brood, and some stores, so it starts in a much stronger position than a package. It may still need feeding for a few weeks after you move it into a full-size hive, mainly to encourage the bees to expand into the new space. Swarms, on the other hand, are often full of energy and packed with honey they carried with them, but they also have no comb. They benefit from syrup for a couple of weeks while they build.
If you are setting up hives for the first time and need a hive that will hold up to years of use, our guides on the parts of a bee hive and their functions and on Flow Hive versus Langstroth can help you choose and understand the equipment you’ll be feeding into.
Spring buildup in an established colony
A colony that made it through the winter faces a tricky stretch. Stores are often low, the queen is beginning to lay ramp-up numbers of eggs, and the weather may swing from warm to freezing within days. Bees may have plenty of brood to feed but few flowers to visit, and a long stretch of wet weather can leave them unable to fly at all.
The classic approach is a light stimulative feeding of 1:1 syrup a few weeks before the main flow begins. This tells the colony that resources are available, encouraging the queen to lay more and the workers to prepare for growth. Combine it with a small pollen patty if brood is present and natural pollen is scarce. As soon as reliable natural forage arrives, taper off and stop.
The risk of feeding too early or too much
It’s tempting to feed heavily in spring, but too much syrup can backfire. Bees fill empty cells with syrup, and if they fill the brood nest, the queen has nowhere to lay. This is sometimes called being honey-bound, or in this case, syrup-bound. Overfeeding can also trigger early swarming as the colony grows crowded. Balance is key. Give a little, watch how the bees respond, and adjust.
Another risk is feeding in weather that is too cold. Bees need to be able to break cluster to reach liquid syrup. If daytime highs are still barely above freezing, a feeder placed at the top of the hive may be out of reach, or the syrup may become too cold to consume comfortably. In that case, solid feed is the better choice until conditions improve.
Bee-friendly plants to bridge the gap
Some of the best spring feeding is done by plants. Early bloomers such as crocus, snowdrops, willow, hazel, and maple are famously helpful in bridging that hungry gap. Following them, fruit trees, dandelions, and clover support the buildup as it accelerates. If you plan your garden to bloom in waves, your bees may need far less help from you in the first place.
| Colony type | Starting stores | Typical feeding plan |
|---|---|---|
| New package | Almost none | 1:1 syrup continuously until foundation is drawn |
| Nuc | Some brood, some stores | 1:1 syrup for a few weeks to encourage expansion |
| Captured swarm | Honey in their bodies, no comb | 1:1 syrup for two to three weeks |
| Overwintered colony | Variable, often low in early spring | Light 1:1 syrup and pollen if forage is late |
Easy feeding for new colonies
An entrance or in-hive feeder lets you top up a young colony without opening the whole hive every time.
Browse Entrance Feeders on AmazonFall Feeding: Building Winter Stores
If spring feeding is about growth, fall feeding is about survival. By the end of the season, a colony in a cold climate needs enough honey to last until flowers return, sometimes five or six months later. When natural stores fall short, the kindest and most effective thing you can do is feed heavily, and at the right time, so that the bees can process and cap the food before the weather turns.
How much do bees need for winter?
The answer depends heavily on your climate and colony size. In regions with long, cold winters, a standard Langstroth colony often needs somewhere in the range of 60 to 90 pounds of honey or stores to be safe. In milder areas where bees can fly on warm days and forage nearly year-round, the requirement is lower, though winter dearths still happen. A very general guide is that a full deep frame of capped honey weighs about six to eight pounds, so counting frames can give you a rough estimate. Local beekeepers are your best source for what works in your area.
Weigh your hives if you can. A luggage scale under a hive corner, or a simple lift-and-compare method against a hive you know is heavy, tells you far more than a guess. If a colony is clearly light in early fall, it is time to act.
Start early, feed thick
Timing is critical. Bees convert syrup into stored food by adding enzymes and evaporating some of the water, and this only works when temperatures are warm enough for them to fly and move around the hive. Beekeepers in cold regions typically begin fall feeding in late summer or very early fall, as soon as the honey supers are off and the main flow is over, and aim to finish while nights are still relatively mild.
Use 2:1 syrup for fall feeding. Because it is already thick, the bees spend less energy drying it, and they can cap it quickly. Offer it in a large-capacity feeder such as a hive-top feeder, and keep refilling as the bees drain it. Don’t hesitate to feed steadily for several weeks. A hungry colony will move several gallons in a short time when the weather cooperates.
Where the bees put the food
Bees usually stash syrup in the outer frames and above the cluster, then pull it toward the cluster as the weather turns cold. Ideally, the brood nest, which will shrink through fall, has a band of honey around it, with additional frames of stores on the sides. If you find that syrup has filled the entire brood nest and the queen has no room to lay in the last weeks of fall, don’t panic. The last round of brood is important for winter bees, but in many climates the queen naturally tapers off anyway, and a few full frames of stores are the priority.
Feed the right colonies. A weak, queenless, or heavily diseased colony is a poor investment for winter. Consider combining weak colonies with stronger ones rather than spending pounds of sugar on a hive unlikely to survive.
Pests and robbing in fall
Late summer and early fall are peak season for robbing. Nectar dries up, colonies are large, and a hive full of syrup smells attractive to every bee and wasp in the neighborhood. Take precautions. Feed in the evening so that bees settle before daylight activity begins. Reduce entrances on all your hives. Avoid spilling syrup around the hives, and choose internal feeders over open-air or entrance feeders when robbing is a risk.
Yellowjackets and wasps are frequent opportunists at this time of year. Many beekeepers wonder how much protection a suit gives against them, and our article on whether bee suits protect from wasps answers that question in detail. For working through busy, defensive yards during fall feeding, a good quality suit is one of the best investments you can make. You can compare tested options in our bee suit review.
Dealing with mites before you feed
Fall is also the time when Varroa mite populations peak. A colony that is heavily infested will struggle to survive winter no matter how much honey it has. Test for mites and treat if needed before heavy feeding, so that the winter bees being raised right now are healthy. Feeding a colony that is already collapsing from mites wastes resources and can spread mites and disease as bees drift or rob.
A sample fall feeding schedule
| Time | Action | Notes |
|---|---|---|
| Late summer, supers off | Check weight; treat for mites if needed | Know your baseline before you feed |
| Early fall | Begin 2:1 syrup in a large feeder | Reduce entrances and feed in the evening |
| Mid fall | Keep feeding until frames are capped and hive is heavy | Check that the brood nest still has room |
| Late fall, cooling nights | Stop liquid feed; remove feeder | Syrup is hard for bees to process in the cold |
| Early winter | Add fondant or sugar brick if the hive is still light | Solid feed goes above the cluster |
The role of forage and water
Don’t forget the natural sources. Goldenrod, asters, and other fall bloomers can make a big difference in many regions, and a bee yard positioned near late-season forage can go into winter with far more honey than one on bare ground. Provide clean water as well. Bees will use it to dilute syrup and cool the colony on warm afternoons.
Encourage bees to take fall syrup
A feeding stimulant made for bees can help colonies accept and preserve syrup during the important fall feeding window.
Check Feeding Stimulants on AmazonWinter Feeding: Fondant, Sugar Bricks, and Candy Boards
Winter changes everything. Once the weather turns cold, bees form a tight cluster and stay there. They can’t break away to reach a feeder full of cold syrup, and syrup that does get carried in can add moisture to a hive that already struggles with condensation. Solid feed is the safer alternative. It supplies emergency calories without adding water, and it sits right above the cluster where the bees can reach it without leaving their warm ball.
Fondant
Baker’s fondant is a firm, smooth sugar paste, and it has been used by beekeepers for a long time as winter insurance. Use plain fondant with no added flavoring, colors, or fats, and no corn starch. Many beekeepers buy blocks of it from suppliers, while others make it at home from a sugar and water mixture. Commercial fondant is easiest, and it gives predictable results.
To use it, place a block or a slab on top of the frames directly above the cluster. If the block comes in plastic, cut a hole or slit on the side facing the bees so they can reach the fondant while the plastic keeps it from drying too fast. Add a shim or an empty box around it if it sits above the frames. Bees will lick and chew it, and a good block can last for days or weeks depending on the size of the colony.
Sugar bricks
A sugar brick is a firm, dry block made from granulated sugar with just enough water to bind it. It is a cheap, homemade option that many beekeepers like because it also absorbs a little moisture from the hive. A common recipe uses about five pounds of white sugar with roughly a quarter cup of water. Mix until the sugar has the texture of damp sand, pack it firmly into a mold such as a loaf tin, and let it dry and harden for a day or two, or dry it briefly in a very low oven. Once hardened, it can be placed on the top bars like fondant.
Take care that the mix isn’t too wet. Overly wet sugar bricks can become sticky and soft, and one that is too dry will crumble. If it holds together when you squeeze it, you are close.
Candy boards
A candy board is a shallow frame or tray that sits above the brood boxes and holds a slab of hardened sugar. It looks like an empty box with a bottom, a rim, and a pool of candy. Bees reach it through a small opening near the cluster. Because it sits in the hive as part of the top structure, a candy board is a set-and-forget solution that offers emergency food throughout the coldest months without needing you to open the hive. Some designs also add ventilation and insulation, which helps manage moisture.
The mountain camp method
One of the simplest solid-feeding approaches is called the mountain camp method. You lay a sheet of newspaper across the top bars, leaving some gaps, and pour dry granulated sugar on it in a pile, then add an empty box around it to enclose the sugar. Bees will slowly dampen and eat it. The newspaper helps keep the sugar contained, and the method is inexpensive and requires little preparation. It works best when the colony is already in reasonably good shape and just needs a safety net.
| Method | Cost | Effort | Moisture effect | Best for |
|---|---|---|---|---|
| Baker’s fondant | Moderate | Very low | Neutral | Quick emergency feeding |
| Sugar brick | Low | Moderate to make | Absorbs slight moisture | Homemade winter insurance |
| Candy board | Moderate to build | Low once installed | Can improve moisture control | Set-and-forget winter safety |
| Mountain camp dry sugar | Very low | Low | Bees dampen it as needed | Budget-friendly stopgap |
Placement and timing
Add solid feed before the bees actually run out, not after. Aim to place it on a mild day, before deep winter, or at the first hint that stores are dwindling. Opening the hive in freezing weather should be a last resort and done as fast as possible. The heft test comes in handy again here, since it tells you when to act without exposing the cluster.
Make sure the food is directly above the cluster, because a cold cluster won’t move sideways to reach food, even if it is only a few inches away. Bees can and do starve with full frames of honey just a short distance from the cluster, simply because the cold kept them from moving.
Leave the entrance open and ventilated. Moisture is the real winter killer, more so than cold. Ensure that upper ventilation allows damp air to escape, and that feed placed on top doesn’t block airflow.
Winter feeding in mild climates
In warmer regions, bees may still fly on many winter days and can take liquid syrup when it is above about 50 degrees. In those places, an in-hive feeder can serve well as a winter supplement. Just watch for fermentation and keep any syrup fresh. Because bees in mild climates burn through stores quickly when they keep flying and rearing brood, careful weight checks are especially important.
Winter insurance in a block
Ready-made bee fondant sits above the cluster and gives colonies emergency calories without adding moisture to the hive.
Shop Bee Fondant on AmazonEmergency Feeding: When a Colony Is Starving
Sometimes you open a hive or notice a warning sign and realize the colony is in real trouble. Starvation can happen faster than most people expect. A strong colony in cold weather can burn through a large amount of honey in a matter of weeks, and the loss of a single warm day to make it out to a feeder may be all it takes to end the story. Acting quickly can save a colony, but only if you feed correctly.
Recognizing starvation
The clearest signs are weak or absent flight on days that should be active, dead bees in front of the hive, and, when you open it, workers with their heads deep in empty cells, sometimes lying lifeless in that position. In a hive that has just begun to starve, you may find a cluster that is still alive but weak and lethargic, sometimes with brood that has been abandoned or is being removed.
Another warning sign is a colony that is aggressively defensive or restless in an unusual way, or bees that seem to be attempting to rob other hives. When a hive runs low, the workers become desperate, and behavior can change noticeably.
What to do first
- Assess the weather. If temperatures are mild enough for bees to fly, liquid syrup is the fastest fix. If it is cold, use solid feed.
- Open the hive briefly and calmly. A light puff of smoke helps, and having your equipment ready in advance will reduce the time the hive stays open. If you are choosing gear, our roundup of the best bee smokers and a guide to what to use in a bee smoker can help you keep the bees calm during a rushed rescue.
- Find the cluster. Feed must go directly above or beside it. Bees that are too cold to move will not travel to a distant feeder.
- Provide immediate calories. In warm weather, place a feeder filled with 1:1 syrup right over the cluster. In cold weather, place fondant or a sugar brick above the frames. Some beekeepers even spray a very light mist of warm 1:1 syrup directly on a weakened cluster for an instant boost, though it should be done cautiously and only in mild conditions to avoid chilling bees.
- Close up and let them recover. Do not keep the hive open. Check back in several days to see how they are responding.
Using frames of honey
If you have frames of capped honey from a healthy colony of your own, you can place one or two next to the cluster of the starving hive. This is often the fastest and most natural fix. Only use honey from colonies you know are free of disease. Never use frames of unknown origin. When in doubt, use sugar rather than risk spreading American foulbrood or another disease.
Stay protected while you help
Starving colonies can be jumpy, and other bees may swarm to robbing opportunities as soon as you open a hive. A well-fitting suit, gloves, and veil are essential, especially when working with a stressed colony. If you have been wondering which option suits you best, the bee suit review covers the top choices.
After the emergency
Once the colony has stabilized, figure out what went wrong. Did the colony go into winter light? Was there a weather event that kept the bees from moving to their stores? Did the colony grow too large for the available forage? Emergency feeding buys time, but the real fix is to prevent the situation from happening again. Weigh hives regularly, plan feeding schedules in advance, and be ready to intervene early.
| Weather | Best emergency food | Placement |
|---|---|---|
| Above about 50 F, bees flying | 1:1 or 2:1 syrup | In-hive or hive-top feeder above the cluster |
| Cool but not freezing | Fondant or sugar brick | Directly on the top bars over the cluster |
| Deep cold | Fondant or dry sugar (mountain camp) | Above the cluster; minimize time hive is open |
| Any weather, healthy donor available | Frames of capped honey | Beside the cluster |
Be ready before the emergency
A ventilated suit with a sturdy veil keeps you calm and protected when a stressed colony needs quick attention.
Compare Bee Suits on AmazonTypes of Bee Feeders, Compared
The best food in the world does little good if the bees can’t reach it safely. Feeder choice affects how much syrup you can offer, how much of a robbing risk you create, how often you have to open the hive, and how many bees drown. There is no single best feeder for everyone, so it is worth understanding how each design works. If you want a full, product-by-product rundown, our detailed roundup of the best bee feeders covers specific models, and if you like to build your own gear, you can follow our tutorial on how to make a bee feeder at home.
Entrance feeders
An entrance feeder is a small container, usually a jar or a plastic reservoir, that sits at the hive entrance and lets bees sip syrup through a slot. It is cheap, simple, and lets you see at a glance how much the bees have taken without opening the hive. The trade-offs are significant, however. Syrup sits outside the hive, where it cools quickly and is easily robbed by neighboring bees and wasps. The capacity is small, and in cold weather bees may not want to leave the cluster to reach it. Entrance feeders are best for small, new colonies in warm weather with a reduced entrance.
Hive-top feeders
These sit on top of the hive body, under the lid, and can hold several gallons of syrup. Bees climb up through a slot and feed from a screened area, which reduces drowning. Because they are inside the hive, they are safer against robbing and keep syrup at a more stable temperature. They are excellent for heavy fall feeding. The drawback is that refilling means lifting the lid, which disturbs the bees to some degree, and they take up vertical space that may require an extra box or a shim.
Frame feeders (division board feeders)
A frame feeder looks like a thin plastic or wooden container the size of a frame, and it hangs inside the hive next to the other frames. It holds a modest amount, generally a gallon or less, and offers bees easy access without exposing them to the outside. It is a good choice for new colonies. You need a float or ladder inside to prevent drowning, and you have to open the hive to refill, disturbing the bees more than with other designs.
Baggie feeders
A baggie feeder is exactly what it sounds like: a zip-top bag filled with syrup, laid on the top bars, and slit with a few small cuts so bees can reach the liquid. It is cheap and easy, and it avoids many drowning problems. It does need an empty box or shim so the lid closes over it, and the bag can leak if it is punctured incorrectly or handled roughly.
Inverted jar or pail feeders
Here, a jar or pail with tiny holes in the lid is inverted over the inner cover hole or on top of the frames. Capillary action and vacuum keep the syrup from pouring out, but bees can suck through the holes. It works well and costs little, though it needs a box around it to protect it from weather, and lid holes must be small enough to avoid leaks.
Open feeders (bucket or trough)
An open feeder places syrup in an open container in the yard, sometimes a distance away from any hive, so many colonies can eat from it. It is easy to fill and can feed many hives at once, but it is widely discouraged. It encourages robbing, spreads disease between hives, drowns a large number of bees, and draws wasps and other insects. For most small-scale beekeepers, the risks outweigh the convenience.
| Feeder type | Typical capacity | Robbing risk | Drowning risk | Best use |
|---|---|---|---|---|
| Entrance feeder | About a quart | High | Low | Small new colonies in warm weather |
| Hive-top feeder | Several gallons | Low | Low with a good float | Heavy spring and fall feeding |
| Frame feeder | Up to about a gallon | Low | Moderate without a float | Packages and nucs |
| Baggie feeder | A quart to a gallon | Low | Very low | Budget feeding, small colonies |
| Inverted jar or pail | Half a gallon to a gallon or more | Low to moderate | Low | DIY setups over the inner cover |
| Open feeder | Large | Very high | High | Rarely recommended |
Hive-top vs entrance feeder: a quick look
Hive-top feeder: pros
- Holds a large volume of syrup
- Sits inside the hive, so less robbing
- Keeps syrup warmer and steadier
- Ideal for big fall feeding
Hive-top feeder: cons
- Refilling disturbs the colony
- Needs extra height under the lid
- Costs more than jars or bags
- Must be cleaned to avoid mold
Entrance feeder: pros
- Cheap and easy to set up
- Easy to check the level from outside
- Refill without opening the hive
- Handy for a small new colony
Entrance feeder: cons
- Invites robbing and wasps
- Small capacity
- Syrup cools in cold weather
- Not suited to heavy fall feeding
Does hive design affect your feeding options?
Yes, and quite a lot. Standard Langstroth boxes accept almost every kind of feeder, which is one reason they are so popular. Top-bar hives have no frames or space above the bars for a large feeder, so beekeepers usually rely on smaller in-hive feeders or solid feed. Warré and other vertical designs tend to favor feeding from the top or through a special feeding shim. Specialty hives such as the Flow Hive also have particular guidelines, and it is wise to avoid feeding syrup into the honey-harvesting frames altogether. When you are unsure how a hive is arranged, our overview of beehive types with pictures is a handy reference.
Keeping any feeder clean
Regardless of the design, cleanliness matters. Old syrup grows mold and yeast, and a dirty feeder can spread disease. Rinse feeders with warm water between refills, scrub them periodically, and let them dry. Don’t use harsh detergents that leave residues, and never leave old syrup sitting in the sun.
The feeder that handles the big jobs
A large-capacity hive-top feeder keeps syrup inside the hive, out of reach of robbers, and lasts for many seasons.
Shop Hive-Top Feeders on AmazonWhat Never to Feed a Bee (and Other Feeding Mistakes)
Knowing what to avoid matters just as much as knowing what to offer. Some well-meaning substitutes look harmless but cause digestive problems, spread disease, or even poison bees. Here are the most common mistakes and the reasons behind them.
Foods to avoid
| Do not feed | Why it is a problem |
|---|---|
| Brown sugar, raw sugar, turbinado | Contains molasses and minerals that bees struggle to digest, which can cause dysentery |
| Molasses or syrups from grocery stores | Too high in solids and minerals; not suited to bee digestion |
| Powdered sugar | Usually contains cornstarch or other anti-caking agents |
| Honey from an unknown source | May carry spores of American foulbrood and other diseases |
| Fruit juices and sodas | Additives, acids, and preservatives can harm bees; they also ferment quickly |
| Artificial sweeteners | Provide no usable energy; bees may starve while appearing to eat |
| Overheated or scorched syrup | Can contain HMF, which is toxic to bees |
| Fermented or moldy syrup | Can cause illness and encourage disease |
Why honey from the store can be dangerous
People often assume that honey is the most natural food for bees, so it must be the best. In principle, that is true when it comes from your own healthy hives. But grocery honey is a gamble. Much of it is blended from many sources, sometimes including imported honey, and it can carry spores of American foulbrood, a serious bacterial disease of honey bee brood. Those spores don’t harm people, but they can infect a colony and remain viable for decades. Because of this risk, sugar syrup is the safer choice unless you have honey you can trace to a disease-free source.
Robbing: the hidden feeding problem
Feeding can accidentally trigger a chaotic behavior known as robbing, where stronger colonies invade weaker ones to steal stores. Robbing bees fight at the entrance, and the weaker colony can be destroyed in a matter of hours. Feeding syrup, especially when there is little natural forage, can raise the risk. To reduce it:
- Use in-hive feeders rather than entrance or open feeders when possible.
- Reduce hive entrances during feeding periods and dearths.
- Feed in the evening, and never spill syrup around the yard.
- Keep hive boxes tight; close any cracks and gaps that let robbers in.
- Consider a robbing screen for small or weak colonies.
Fermentation and mold
Syrup that sits around in warm conditions can ferment. Fermented syrup smells sour or yeasty, and it can make bees sick. Thin 1:1 syrup spoils faster than thick 2:1, and the risk climbs as the weather warms. Offer small amounts, replace it regularly, clean feeders, and never top up an old batch with new syrup. If you see mold floating on the surface or a slimy film along the sides, discard the syrup and wash the feeder thoroughly.
Feeding too much
It may sound odd, but overfeeding is a real hazard. Excess syrup can crowd the brood nest and stall the queen. It can push colonies toward swarming, especially in spring. And in summer, when supers are on, syrup risks contaminating honey. If bees are ignoring the feeder, don’t force them. That usually means they have found enough to eat.
Treating feeding as a replacement for management
A final mistake is using food to cover up a bigger problem. Colonies with a failing queen, heavy Varroa infestations, or serious disease won’t be saved by syrup. Feed to help healthy colonies through hard patches, not to prop up ones that need another kind of intervention. And if you are building your own equipment, choose materials and finishes with care. Our guides on how to make a beehive and how to paint a beehive cover the choices that keep colonies healthy and weather-tight, which in turn means less feeding.
Protect feeding colonies from robbers
A robbing screen or entrance reducer gives small colonies a fighting chance while you feed through a dearth.
Shop Robbing Screens on AmazonA Year-Round Feeding Plan You Can Adapt
Now that we have covered each food and each situation, let’s stitch everything together into a plan. Climate, colony strength, and local nectar flows all change the details, so treat this as a framework rather than a strict schedule. What matters most is that you observe your bees, keep notes, and adjust with experience.
Late winter to early spring
Check hive weight on a mild day and add fondant if it is light. Once bees are flying and the queen begins laying, consider a small pollen patty if natural pollen is not yet available. As temperatures climb, switch from solid feed to thin 1:1 syrup if the colony still needs it. Watch for signs of buildup, such as more bees, more brood, and more traffic at the entrance.
Spring flow
As forage takes off, reduce and eventually stop feeding. Remove feeders before adding honey supers, and clean and store them. New packages and nucs may still need syrup until their comb is drawn and their population catches up. If the weather turns cold or wet, be ready to feed again for a few days to bridge the gap.
Summer
Most strong colonies need nothing in early summer. Watch for a dearth in mid to late summer, when flowers fade and bees may begin to use their stores. Offer a light 1:1 feed in small amounts if hives are getting light, but be cautious about robbing. Provide clean water throughout the heat.
Fall
Once supers are off, check weights, treat for mites, and start 2:1 feeding for any colony below its target. Stop liquid feeding before the weather gets too cold for the bees to process it.
Winter
Add fondant, sugar bricks, or a candy board where needed, and keep hive entrances open with good ventilation. Use the heft test every few weeks on mild days, and stay prepared for emergencies.
| Season | Goal | Main food | Watch for |
|---|---|---|---|
| Late winter | Prevent starvation | Fondant or sugar brick | Light hive, cluster away from stores |
| Early spring | Support buildup | 1:1 syrup and pollen patty | Cold snaps, syrup-bound brood nest |
| Main flow | Let bees forage | None | Syrup mixing into honey supers |
| Summer dearth | Hold stores steady | Small amounts of 1:1 syrup | Robbing and wasps |
| Fall | Build winter stores | 2:1 syrup | Mites, incomplete capping, cold nights |
| Winter | Survive until spring | Solid feed | Moisture and starvation |
Keep a simple record
The single most useful habit is writing things down. Note the date, hive weight, what you fed, how much, and how the bees responded. Over a season or two, patterns will emerge that no general guide can give you: when your local flow starts and ends, which colonies eat more, and which feeders work best in your yard. A simple notebook or a printed log sheet is plenty.
Feed the landscape, not just the hive
The most sustainable feeding strategy for both honey bees and wild bees is a landscape rich in flowers. Plant in waves so something is always in bloom. Leave some dandelions and clover in the lawn. Let herbs go to flower. Add a shallow water dish. Skip pesticides on anything in bloom. Every one of these small choices reduces how often you have to reach for the sugar bag, and it helps the many wild bee species that no one is going to feed with a spoon.
If you are just building your practice, remember that feeding is one skill among many. Our main beekeeping guide ties them all together, from choosing a hive to reading your colony through the seasons.
Track what your bees eat
A dedicated hive journal makes it simple to record weights, feedings, and inspections so you can spot patterns year after year.
See Beekeeping Journals on AmazonFrequently Asked Questions About What to Feed a Bee
What is the best thing to feed a bee?
For honey bees, the best foods are their own honey and pollen. When those aren’t available, plain white cane or beet sugar dissolved in water is the safest supplement, with pollen substitute patties for protein. For a single tired bee found outdoors, a few drops of sugar water made from two parts sugar to one part water is the standard first-aid remedy.
Can I feed a bee sugar water?
Yes. Sugar water made from plain white sugar is safe and useful for bees when natural food is short. Use roughly equal parts sugar and water for spring feeding and two parts sugar to one part water in fall. For a lone bee on the ground, a small drop on a spoon is plenty. Avoid leaving out large open dishes, which can attract wasps and cause bees to rob each other.
Can I feed bees honey instead of sugar?
Only if the honey comes from your own healthy colonies or another source you know is disease-free. Store-bought honey may carry spores of American foulbrood and other diseases that can devastate a hive. Sugar syrup is the safer choice for most beekeepers, and it is what nearly every guide recommends when natural stores run low.
Can bees eat brown sugar or raw sugar?
They shouldn’t. Brown sugar, raw sugar, and turbinado all contain molasses and minerals that bees have difficulty digesting, and they can cause dysentery, especially in winter when bees can’t leave the hive to relieve themselves. Stick with plain white granulated sugar, and skip powdered sugar as well because of the starch it contains.
What is the difference between 1:1 and 2:1 sugar syrup?
The ratio refers to sugar to water. A 1:1 syrup is thin, similar to flower nectar, and is used in spring and for new colonies to stimulate comb building and brood rearing. A 2:1 syrup is thicker, resembles honey, and is used in fall so bees can store it quickly with little processing. Use the thinner mix when you want growth and the thicker one when you want stored food.
How often should I feed my bees?
It depends on the season and the size of the colony. A new package may empty a feeder in a few days and need it refilled constantly. An established colony in fall may take several gallons over a few weeks. Offer only what the bees can finish in a few days, refill as needed, and stop when natural forage arrives or the hive reaches its target weight.
Should I feed bees in winter?
Not with liquid syrup in cold weather, because bees can’t leave the cluster to reach it and it adds moisture. If a hive is running light, use solid feed such as fondant, a sugar brick, or dry sugar placed directly above the cluster. Ideally, a colony goes into winter with enough stored honey that emergency feeding isn’t needed at all.
What do bumble bees eat, and can I feed them?
Bumble bees feed on nectar and pollen, just like honey bees. If you find a chilled or sluggish bumble bee, particularly a queen in early spring, you can offer a few drops of sugar water on a spoon and shelter it near flowers. The most helpful long-term action is planting a range of flowers that bloom from early spring through fall.
Do bees need pollen patties?
Not always. If natural pollen is plentiful, bees will ignore patties. They are helpful in late winter or early spring before flowers bloom, or in a poor fall when bees need protein to raise healthy winter bees. Only feed them when brood is present, use small amounts, and remove uneaten patties before pests move in.
Can I put out a bowl of sugar water for wild bees?
It’s better not to. Open syrup dishes attract wasps, ants, and flies, and they can cause honey bees from nearby hives to start robbing. A shallow dish of clean water with pebbles for landing is much safer, and planting nectar-rich flowers is the most reliable way to feed wild bees. Reserve sugar water for the occasional rescue.
How do I know if my bees are starving?
Warning signs include a hive that feels very light, few or no capped honey frames, bees with their heads stuck in empty cells, dead bees piled in front of the hive, and larvae being pulled out. If you suspect starvation, feed immediately: syrup in warm weather, or fondant or sugar directly over the cluster in cold weather.
Is it okay to feed bees while honey supers are on?
It is generally a bad idea. Bees may store syrup in the supers, and the resulting product is not honey. If you plan to harvest, feed only when supers are removed, or before they are put on. If you must feed in an emergency, be prepared to keep that comb separate from anything intended for human consumption.
Can feeding bees cause problems?
Yes, if it is done carelessly. Too much syrup can fill the brood nest and stall the queen, spilled syrup can trigger robbing, and stale syrup can ferment or grow mold. Feeding also cannot fix problems such as mites, disease, or a failing queen. Feed with a clear purpose, in moderation, and only when the bees actually need it.
Final Thoughts: Feed With Purpose, Then Step Back
Feeding a bee is one of the simplest ways to help and one of the easiest to get wrong. The core ideas are refreshingly plain. Give bees what they would gather for themselves, in a form they can use, at the moment they actually need it. That means plain white sugar syrup as a stand-in for nectar, pollen patties as a bridge when protein runs short, and fondant or sugar bricks when the cold locks the cluster in place. For a single tired visitor, it means a few drops of sugar water and a quiet, sheltered rest.
Beyond the recipes, the deeper lesson is to pay attention. Lift the back of the hive. Watch the entrance. Notice what is blooming and what is not. Keep notes. The beekeepers whose colonies thrive are rarely the ones who feed the most. They are the ones who feed at the right time, for the right reason, and then get out of the way and let the bees do what they do best.
If you are ready to put this into practice, start with the basics: a clean feeder, a bag of plain white sugar, and a plan for your season. Then add the extras as your experience grows.
Ready to feed your bees the right way?
Browse feeders, fondant, pollen patties, and everything else you need to keep your colonies fed through every season.
Shop Bee Feeding Supplies on AmazonYou May Also Like
Disclosure: this article contains Amazon affiliate links. If you buy through them, we may earn a small commission at no extra cost to you. Feeding needs vary by climate and colony, so check with a local beekeeping association for guidance specific to your area.