How to Improve Beekeeping Skills: A Complete Roadmap for Every Beekeeper
From reading frames like a veteran to preventing swarms before they happen — twelve practical skill areas that turn a hobby hive into a thriving, low-stress apiary.
Every experienced beekeeper was once a nervous beginner staring into a box of ten thousand stinging insects, unsure whether to feel excited or terrified. The good news is that beekeeping skill is not a talent you’re born with — it’s a stack of small, learnable habits: how you move, how you read a frame, how you time your interventions with the season, and how honestly you keep records of what worked. This guide breaks that stack down into twelve practical skill areas, each one something you can start improving on your very next hive visit. Whether you’re just getting started or you’ve had bees for a few seasons and want to tighten up your technique, work through these steps in order or jump straight to the section you need most.
1. Master the Fundamentals of Bee Biology and Behavior
Every meaningful beekeeping skill traces back to understanding what’s actually happening inside the colony. Bees are not a random cloud of insects reacting to whatever you do — they’re a highly organized superorganism with distinct castes, each performing a job that shifts with age, season, and colony need. A queen can lay well over a thousand eggs a day in peak season, worker bees cycle through nursing, comb-building, guarding, and foraging duties as they age, and drones exist for a single purpose: mating. Once you can look at a frame and mentally sort what you’re seeing into “this is normal colony development” versus “something here needs my attention,” half of the anxiety of hive inspections disappears.
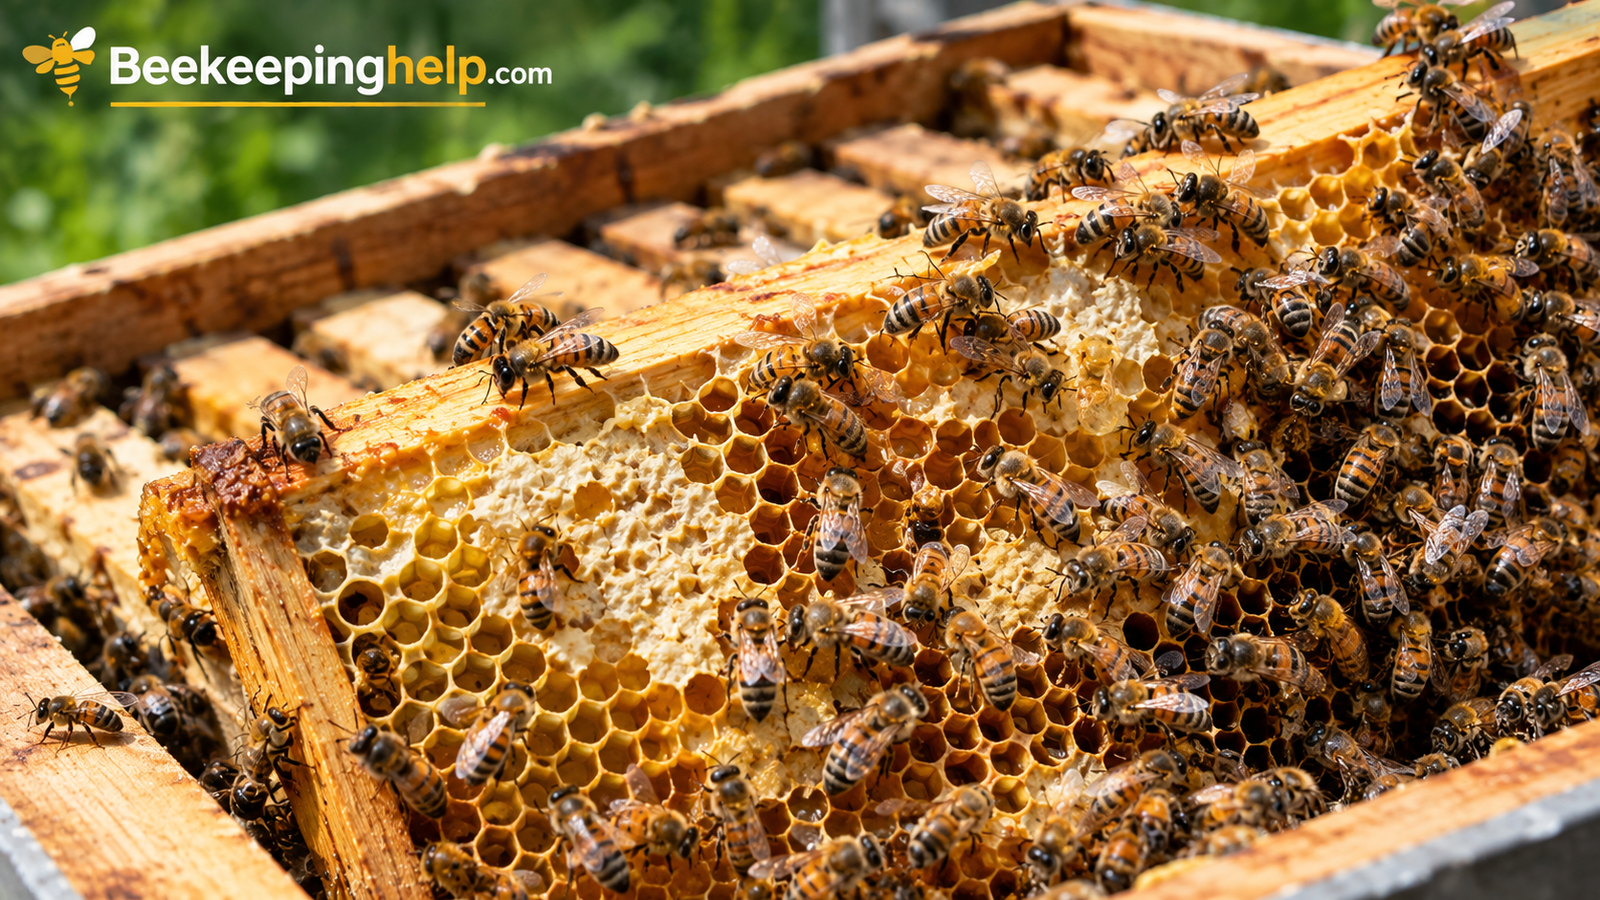
Spend time learning the visual differences between capped brood, capped honey, and capped queen cells — they look similar to a beginner but mean completely different things. Worker brood caps are flat and tan-colored; drone brood caps are domed and slightly darker; honey caps are lighter and waxier in texture. Queen cells hang vertically off the comb face and look like a peanut shell, and where they appear (edges versus mid-frame) tells you whether the colony is preparing to swarm or simply replacing a failing queen. This single piece of visual literacy is one of the most valuable upgrades you can make to your beekeeping beekeeping knowledge base, because it changes inspections from guesswork into diagnosis.
Behavior matters just as much as anatomy. Bees communicate through pheromones and the famous waggle dance, which forager bees use to tell nestmates the direction and distance of a good nectar source. A colony that’s calm and orderly on opening the lid is telling you something different than one that boils up aggressively the moment smoke touches the entrance — the second scenario often points to queenlessness, robbing stress, or a genetics issue worth addressing. Building a mental library of “normal sounds and normal sights” versus “something is off” is a skill that only comes from repetition, but you can accelerate it by reading field guides, watching experienced keepers work a hive, and reviewing a general primer like how a beehive actually functions as a self-regulating system for temperature, humidity, and food storage.
Grab a field guide or bee anatomy reference to keep near your hive tools:
Shop Beekeeping Reference Guides →2. Choose and Deeply Understand Your Hive System
A surprising number of beekeeping struggles trace back to a mismatch between the beekeeper and the hive system they chose. Langstroth hives, the stacked rectangular boxes most people picture, dominate commercial and hobby beekeeping because of their modularity, standardized frame sizes, and compatibility with almost every piece of equipment on the market. Top bar hives offer a gentler, lower-lift alternative that appeals to keepers who want a more natural comb-building process and less heavy lifting. Flow hives promise easier honey harvest through a plastic frame mechanism, though they still require full manual management of the brood chamber underneath. If you’re deciding between systems or wondering whether to switch, a side-by-side breakdown like Flow Hive vs. Langstroth is worth reading before you commit more money to one ecosystem of equipment.
| Hive Type | Learning Curve | Physical Effort | Honey Harvest | Best For |
|---|---|---|---|---|
| Langstroth | Moderate | Heavy boxes when full | Extraction or crush & strain | Most beginners, expandability |
| Top Bar | Moderate–High | Lighter, single bars | Crush & strain only | Natural comb, lower cost tools |
| Flow Hive | Moderate | Same as Langstroth below super | On-tap flow frames | Easier harvesting, higher upfront cost |
| Warre | Higher | Moderate, top-supered | Crush & strain | Minimal-intervention keepers |
Why Understanding Hive Anatomy Helps
- You diagnose problems faster when you know each box’s function
- You buy the right replacement parts instead of guesswork
- You can adapt techniques you read online to your specific hive type
Common Mistakes to Avoid
- Mixing incompatible frame sizes between boxes
- Buying a hive style before researching maintenance demands
- Ignoring how each part of the hive functions together as a system
If you’re building your own equipment rather than buying pre-assembled boxes, understanding construction basics pays off enormously the first time a box warps or a joint fails mid-season. Resources on how to make a beehive and a broader look at how beehives are manufactured commercially will help you spot quality shortcuts in cheaper kits before you buy them. Painting and weatherproofing your boxes is another underrated skill — a properly sealed hive resists rot, reflects excess heat in summer, and simply lasts longer, and a step-by-step approach to how to paint a beehive correctly will save you from repainting every single year.
Finally, get comfortable with the vocabulary: a “nuc” is a small starter colony sold on partially drawn frames, and understanding what a nuc actually is in beekeeping will help you make smarter purchasing decisions when it’s time to expand your apiary or replace a lost colony.
Browse complete beginner hive kits and replacement boxes:
Shop Beehive Kits →3. Perfect Your Hive Inspection Routine
Inspections are where beekeeping skill either compounds or stalls. A rushed, disorganized inspection stresses the colony, wastes your time, and often misses the exact clue you needed to catch a problem early. A skilled beekeeper approaches every inspection with a simple mental checklist: is the queen present or is there fresh brood proving she recently was, does the colony have adequate food stores, is there evidence of pests or disease, and does the colony have enough room to keep expanding. Training yourself to move through frames in the same order every time — often starting from an outer frame and working inward — means you develop a feel for what “normal” looks like in your own hives, which makes anomalies jump out immediately.
Timing and frequency matter as much as technique. Opening a hive too often stresses the colony and slows productivity, while inspecting too rarely means small problems — a failing queen, a mite outbreak, a nectar dearth — go unnoticed until they’re expensive to fix. Most established colonies do well with a full inspection every seven to fourteen days during active season, tapering to occasional checks in winter when opening the hive does more harm than good. Choose warm, calm, sunny afternoons whenever possible; bees are more forgiving when foragers are out and the weather isn’t threatening rain.
Keep your movements slow and deliberate. Fast, jerky motions communicate danger to guard bees, while smooth, predictable movement (paired with appropriate smoker use, covered later in this guide) keeps the colony calm throughout your visit. Resist the urge to bang frames back together or drop the outer cover loudly — small courtesies like this reduce defensive behavior meaningfully over a season of repeated visits.
A dedicated hive tool and frame grip make every inspection faster and safer:
Shop Hive Tools →4. Learn to Read a Frame Like a Veteran Beekeeper
If inspections are the “when” of good beekeeping, reading frames is the “what.” A skilled keeper can pull a single frame, glance at it for ten seconds, and walk away with a confident read on colony health. This skill develops through pattern recognition: a healthy laying queen produces a tight, consistent brood pattern with few skipped cells, while a spotty, scattered pattern often signals an aging or failing queen, genetic issues, or disease affecting the brood. Learning to spot the subtle color and texture differences between healthy capped brood and diseased brood (sunken, discolored, or perforated cappings) is one of the highest-leverage skills you can build, because early disease detection is almost always the difference between a simple treatment and a lost colony.
Pay attention to the “food bands” arranged around brood — healthy colonies typically store a ring of pollen and then honey around the brood nest, creating a natural pantry within reach of nurse bees. If you see brood crowding right to the edges of the frame with no food band, that colony may be heading toward a nutritional shortfall, especially heading into a seasonal dearth. Understanding what dearth means in beekeeping — a period when little or no nectar is available in the environment — helps you anticipate and prevent starvation before it becomes an emergency.
Also learn to distinguish worker and drone comb by cell size and cap shape, since an unusually high ratio of drone brood can indicate a failing queen laying unfertilized eggs (a “drone layer” situation) or a laying worker colony, both of which typically require requeening to fix. The faster you can make this call in the field, the faster you can act — whether that means ordering a new queen, adding a frame of eggs from another hive, or simply monitoring for one more inspection cycle.
It also helps to photograph frames occasionally, especially as a beginner. A quick phone photo of a brood pattern you’re unsure about lets you compare it against reference images later, or share it with a mentor for a second opinion without having to keep the hive open any longer than necessary. Over a season or two, your own photo library becomes a personal reference guide tailored to your exact bees, genetics, and local conditions — often more useful day-to-day than any generic book photo.
A frame-grip magnifier or loupe makes spotting eggs and early disease signs much easier:
Shop Inspection Tools →5. Understand and Manage the Beekeeping Seasons
Beekeeping is fundamentally a seasonal craft, and one of the clearest markers of a skilled keeper is timing every intervention to match the colony’s natural annual rhythm instead of fighting against it. Spring is expansion season: as nectar and pollen flow increases, the queen ramps up egg-laying dramatically, and colonies need room to grow — this is when adding supers, splitting strong hives, and watching closely for early swarm signs all matter most. Summer is peak foraging and honey production, but it’s also when nectar dearths can hit hardest in many regions, requiring close monitoring of stores and sometimes supplemental feeding.
Fall is preparation season. This is when you assess whether each colony has enough honey stores to overwinter, treat for mites before population numbers climb dangerously (mite loads peak in late summer and fall in most climates), and reduce hive entrances to help colonies defend against robbing bees and wasps looking for an easy target during the seasonal food shortage. Winter, finally, is a season of restraint — successful winter beekeeping is largely about not opening the hive unnecessarily, insulating appropriately for your climate, and trusting the preparation work you did in fall.
| Season | Primary Goal | Key Actions |
|---|---|---|
| Spring | Expansion & swarm prevention | Add supers, split strong hives, inspect weekly |
| Summer | Honey production & dearth watch | Monitor stores, consider feeding during gaps |
| Fall | Winter preparation | Mite treatment, stores check, reduce entrances |
| Winter | Minimal disturbance | Insulate, check weight, resist opening the hive |
New keepers often underestimate how much regional climate changes this calendar — a beekeeper in a warm coastal climate manages a very different seasonal rhythm than one in a harsh continental winter zone. Whatever your climate, building a simple seasonal calendar specific to your area (based on your own notes plus local beekeeping association guidance) will do more for your long-term success than any single piece of equipment you could buy.
Insulated hive wraps and moisture quilts help colonies handle seasonal extremes:
Shop Seasonal Hive Gear →6. Master Swarm Prevention and Control
Swarming is a colony’s natural way of reproducing at the colony level — the old queen leaves with roughly half the workforce to found a new colony, while the bees left behind raise a new queen from cells they’ve been preparing. It’s a completely natural behavior, but for a beekeeper it usually means losing a large portion of your bees and a chunk of the season’s honey production right when things were ramping up. Understanding what swarming actually is and why colonies do it is the foundation for preventing it, because most swarm triggers come down to a colony that feels overcrowded, honey-bound, or under-resourced in usable comb space.
The single most effective swarm prevention technique is proactive space management: adding honey supers before the colony feels crowded, and performing a “checkerboarding” or splitting maneuver on strong colonies in early spring before swarm cells even appear. Once you find swarm cells already capped, prevention has essentially failed and you’re now in swarm management mode — options at that point include making an artificial split (moving the old queen and some brood to a new box) or simply accepting the swarm and focusing on helping the parent colony requeen successfully.
Skilled keepers also learn to distinguish swarm cells from supersedure cells, since the response is different. Supersedure cells (usually just one or two, located mid-frame rather than along the bottom edge) indicate the colony is quietly replacing a failing queen on its own terms, which is generally fine to let happen naturally, whereas multiple cells along the bottom edges of several frames is a strong swarm signal requiring immediate action.
Extra deep boxes and frames on hand make emergency splits far easier:
Shop Hive Boxes & Frames →7. Improve Your Feeding and Nutrition Management
Feeding decisions separate a merely surviving apiary from a thriving one. New colonies establishing themselves on foundation, colonies recovering from a split, and any hive heading into a nectar dearth or long winter often need supplemental feeding to avoid starvation. Sugar syrup mixed at a 1:1 ratio (sugar to water by volume) stimulates comb-building and brood-rearing in spring and early summer, while a heavier 2:1 syrup in fall packs more calories per feeding trip, better suited to building winter stores quickly before temperatures drop too low for bees to process thin syrup efficiently.
Understanding what to actually feed a bee colony beyond sugar syrup matters too — pollen substitute patties support brood-rearing when natural pollen is scarce, and emergency fondant or candy boards can save a colony caught short on stores mid-winter when syrup would be too cold and risky to accept. Skilled keepers watch colony weight and visually check stores regularly enough that feeding decisions are proactive rather than a last-minute rescue mission.
Signs Feeding Is Working
- Syrup feeder level drops steadily between checks
- New white wax being drawn on foundation
- Stores visibly increasing frame to frame
Feeding Mistakes to Avoid
- Feeding syrup too late into cold weather
- Leaving feeders open to robbing bees and wasps
- Ignoring signs of robbing behavior around a feeder
If you’re building your own feeders rather than buying them, a simple guide on how to make a bee feeder can save money while giving you a feeder sized exactly to your hive entrance and colony strength. Whichever feeder style you choose, entrance reducers and feeder placement both play a role in minimizing the robbing risk that comes with any open sugar source near a hive.
Compare top-rated hive feeders sized for every colony strength:
Shop Bee Feeders →8. Develop Sharper Pest and Disease Management Skills
Varroa mites remain the single greatest threat to hobbyist colonies in most parts of the world, and skilled beekeepers treat mite monitoring as a routine, non-negotiable part of the season rather than an afterthought. A sugar roll or alcohol wash test, done every four to six weeks during active season, gives you an actual mite count instead of a guess — and mite counts, not visual impressions, should drive your treatment timing. Waiting until you can visually spot mites on adult bees typically means the infestation is already well past the threshold where treatment should have started.
Beyond mites, learn to recognize the early visual signs of common brood diseases: American foulbrood produces a sunken, greasy-looking, perforated cap with a distinctive foul odor and a “ropey” test when a toothpick is drawn through the affected larva; European foulbrood shows twisted, discolored larvae that die before capping. Chalkbrood mummifies larvae into hard white or gray “chalk” pieces you’ll often see at the hive entrance. Each disease has different management implications, ranging from requeening with more hygienic genetics to, in severe American foulbrood cases, destroying the equipment entirely to prevent spread to neighboring colonies.
Robbing and wasp pressure are additional stressors that intensify during dearths, and a weak colony under sustained robbing pressure can collapse within days. Learning to recognize the frantic, fighting behavior at the entrance that signals active robbing — versus normal heavy traffic — lets you react quickly with entrance reducers or robbing screens before real damage occurs.
Building a small first-response kit specifically for pest and disease issues also sharpens your skills over time: a magnifying loupe for close inspection, a notebook page dedicated just to symptom tracking, and a standing plan for who to call (a mentor, local inspector, or extension office) if you ever suspect a reportable disease like American foulbrood. Having that plan decided calmly in advance, rather than improvised during a stressful discovery, keeps small problems from becoming apiary-wide emergencies.
Mite testing kits and treatment strips are essential season-long tools:
Shop Mite Testing & Treatment →9. Upgrade Your Protective Gear and Handling Technique
Confidence around bees improves dramatically once your gear actually fits and functions the way it should. A veil with poor visibility, gloves so thick you can’t feel frame edges, or a suit with gaps at the ankles and wrists will make every inspection more stressful than it needs to be, and stressed body language transmits straight through to the colony. If you’re shopping for new gear or wondering whether your current setup is holding you back, a detailed bee suit review comparing ventilation, sting protection, and mobility across popular models is worth reading before your next purchase.
Even the best suit needs care to keep protecting you — propolis, wax, and sweat build up quickly, and a guide on how to wash a bee suit properly will help you avoid degrading the fabric’s sting resistance through harsh detergents or high heat drying. It’s also worth understanding the limits of your gear: many beekeepers assume a standard suit fully protects against wasps and hornets the same way it does honeybees, but the reality is more nuanced, and a closer look at whether bee suits protect from wasps is worth reading if you deal with wasp pressure around your apiary.
Handling technique matters as much as the suit itself. Skilled keepers hold frames at a slight angle over the hive body (so any falling bees or the queen drop back into the box rather than the grass), lift with bent knees rather than a hunched back on heavy honey supers, and always have a plan for where to set the outer cover and inner cover before they start pulling frames, avoiding the frantic scramble that leads to dropped equipment and squashed bees.
Find a well-ventilated, properly sized bee suit and gloves:
Shop Protective Bee Suits →10. Master Smoker Use and Calm Bee Handling
A well-used smoker is one of the fastest ways to make every inspection calmer and safer, yet it’s also one of the most commonly misused tools in beekeeping. The goal of smoke is not to blast bees into submission — it’s to mask alarm pheromone and trigger a natural instinct to gorge on honey in case they need to evacuate, which makes bees noticeably calmer and less likely to sting. Understanding how a bee smoker actually works mechanically — drawing air through smoldering fuel via the bellows to produce cool, thick smoke — helps you troubleshoot a smoker that keeps going out mid-inspection.
Fuel choice affects smoke quality significantly — dry pine needles, burlap, wood pellets, and cotton fiber fuels each produce slightly different smoke density and burn time, and figuring out what to use in a bee smoker for your climate and preference will save you from a smoker that dies halfway through an inspection. Light it well before you open the hive, let it settle into a steady cool smoke rather than hot flame, and give two or three gentle puffs at the entrance before opening, followed by light puffs across the top of frames as you work rather than a constant barrage of smoke that can actually agitate bees rather than calm them.
Skilled keepers also read colony temperament in real time and adjust their smoke usage accordingly — a naturally calm colony on a warm, nectar-flow day may need almost no smoke at all, while a defensive colony during a dearth may need more frequent light puffs throughout the entire inspection. Overusing smoke has downsides too, including tainting honey flavor if applied too close to supers, so restraint paired with good timing is the real skill here, not sheer volume.
A reliable stainless steel smoker with a guard makes every visit easier:
Shop Bee Smokers →11. Keep Records That Actually Improve Your Decisions
Memory is an unreliable beekeeping tool once you have more than one or two hives, and even with a single colony, precise records reveal patterns you’d otherwise miss entirely. A simple inspection log — date, weather, queen status observed, brood pattern quality, stores level, mite count if tested, and any action taken — turns a season of scattered impressions into a searchable history you can actually learn from. Reviewing last year’s notes before a spring inspection often reminds you of exactly when swarm prep started, when the dearth hit, or when a particular colony’s temperament shifted, letting you anticipate rather than react this time around.
Records also make cost and yield tracking possible, which matters if you’re treating beekeeping as anything beyond a pure hobby. Tracking what you actually spent — from initial setup and ongoing feed to treatments and replacement equipment — against your honey and split income gives you a realistic picture that’s useful whether you’re deciding to expand or simply curious. If you’re still in the planning stages, a breakdown of how much it costs to start beekeeping gives you a realistic budget baseline to compare your own numbers against as your apiary grows.
Whether you use a simple notebook, a spreadsheet template, or a dedicated beekeeping app, the format matters far less than the consistency. A five-minute note jotted immediately after closing the hive, while details are fresh, beats an attempt to reconstruct the visit from memory a week later almost every time.
Weatherproof hive record books and inspection log kits keep notes organized at the apiary:
Shop Beekeeping Log Books →12. Join a Community and Keep Learning Deliberately
Even the most dedicated solo reading can’t replace what you learn standing next to an experienced beekeeper at an open hive. Local beekeeping associations, mentorship programs, and hands-on workshops expose you to regional nuances — local nectar flows, common regional pests, climate-specific timing — that generic guides simply can’t capture in full detail. Many associations also run bulk equipment orders, mentor-matching programs for first-year keepers, and swarm-catching networks that both help your community and give you real hands-on experience beyond your own hives.
Online communities, forums, and video channels are valuable supplements, but treat conflicting advice with a healthy dose of regional skepticism — a technique that works perfectly in a humid southern climate may fail entirely in a dry, short-season northern one. Cross-reference new techniques against what local, experienced keepers in your specific climate actually recommend before adopting them wholesale.
If you’re still deciding whether beekeeping is right for you, or you’re helping a friend weigh the decision, honest resources on how hard it really is to start beekeeping and a practical walk-through of how to start beekeeping from scratch will set realistic expectations. And when it’s time to actually acquire your first colony, understanding how to buy bees for beekeeping — packages, nucs, or full established colonies — ensures your very first skill-building season starts on solid footing rather than a shaky one.
Ultimately, skill improvement in beekeeping is a compounding loop: better observation leads to better records, better records lead to better timing, and better timing leads to healthier colonies that are easier and more rewarding to observe. Commit to steady, deliberate practice across all twelve areas above, and each season will feel noticeably more confident than the last.
It’s also worth remembering that setbacks are part of the learning process rather than proof you’re unsuited to beekeeping. Every experienced keeper has lost a colony to a missed mite treatment, a failed requeening, or a swarm that slipped past despite their best efforts. What separates a skilled beekeeper from a discouraged one is treating each setback as data — updating your records, adjusting your timing next season, and asking your community what they’d have done differently — rather than as a verdict on your ability. Approached this way, beekeeping keeps getting easier, more intuitive, and more enjoyable with every season you put in.
Continue building your library with respected beekeeping books and course guides:
Shop Beekeeping Books →Frequently Asked Questions
How long does it take to become skilled at beekeeping?
Most keepers report feeling genuinely confident by their third season, since that’s usually enough time to experience a full swarm season, a full dearth, a full winter, and at least one pest or disease scare firsthand. Skill builds fastest when you combine hands-on hive time with deliberate study between inspections.
What is the single most important skill for a new beekeeper?
Learning to read a frame accurately — recognizing brood, honey, pollen, and queen cells at a glance — underpins almost every other decision you’ll make, from feeding to swarm prevention to disease response.
How often should I inspect my hive to build skill without overdoing it?
Every one to two weeks during active spring and summer season is typical, tapering off in fall and largely stopping in winter except for brief weight or entrance checks.
Do I need a mentor to improve, or can I learn from books and videos alone?
Books and videos build strong foundational knowledge, but a local mentor accelerates skill dramatically by showing you region-specific timing and technique that generic resources can’t fully capture.
How do I know if my smoker technique needs improvement?
If bees boil up aggressively despite smoke, or your smoker frequently goes out mid-inspection, both point to technique or fuel issues worth revisiting rather than a “bad” colony.
What’s the biggest mistake beginner beekeepers make?
Opening the hive too frequently out of curiosity or anxiety, which stresses the colony and slows its development, is one of the most common early mistakes alongside delayed mite treatment.
How can I improve my ability to spot swarm cells early?
Inspect the bottom edges of frames specifically during spring buildup, since that’s the classic location for swarm cells, and check every seven to ten days once colonies reach full strength.
Is record-keeping really necessary for a hobby beekeeper with one hive?
Yes — even with a single colony, comparing this year’s notes to last year’s timing for swarm prep, dearth onset, and treatment dates meaningfully improves your decision-making.
How do I get more comfortable handling bees without gloves eventually?
Build comfort gradually by first mastering slow, deliberate movement and good smoker technique with gloves on, then experimenting bare-handed only during calm, nectar-flow conditions with a docile colony.
What should I focus on improving during my second season?
Most second-year keepers benefit most from tightening up mite monitoring routines, refining feeding timing, and starting to attempt their first intentional splits rather than only reacting to swarms.
Can joining a beekeeping association really make a measurable difference?
Yes — access to mentors, bulk equipment discounts, and localized seasonal guidance from an association routinely shortens the learning curve by a full season or more for engaged members.
How do I keep improving once I feel confident with the basics?
Set specific seasonal goals — such as raising your own queens, trying a new hive management style, or improving honey yield through better nutrition management — rather than simply repeating the same routine year after year.
Bring It All Together
Improving your beekeeping skills isn’t about mastering one dramatic technique — it’s the steady accumulation of a dozen small habits: reading a frame accurately, timing your interventions to the season, keeping honest records, and handling bees with calm, deliberate confidence. Revisit these twelve areas each season, keep learning from your own notes and your local community, and your apiary will keep rewarding the effort with healthier, calmer, more productive colonies.
Shop Complete Beekeeping Starter Kits →