Beekeeping Fundamentals
Where to Place a Beehive: The Complete Siting Guide for Healthy Colonies
Where you set a hive shapes almost everything that follows — how fast the colony builds out, how calm it stays, how well it survives winter, and how easy inspections feel. Here is exactly how to read your land and choose the right spot.
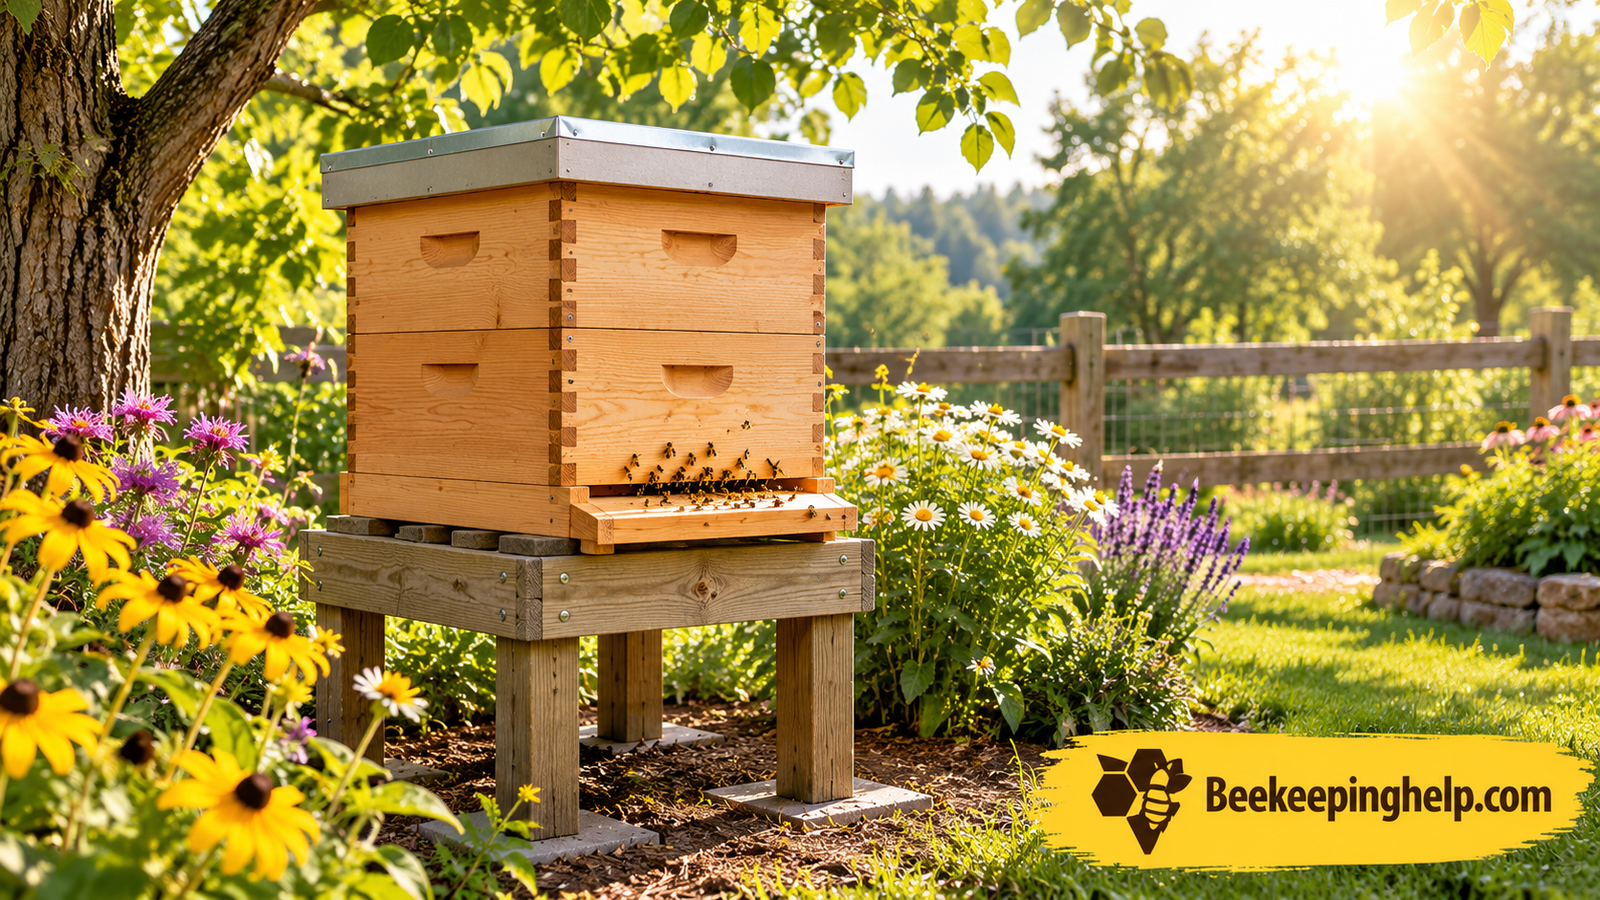
Choosing where to put a beehive feels like one of those small decisions that can be made in five minutes. In reality it is one of the most consequential choices you will make as a beekeeper. The site you pick influences how comfortable your bees are, how quickly they build comb, how defensive they become on a hot afternoon, how well they survive a wet winter, and how often you actually feel like going out to inspect them.
The good news is that hive placement is not complicated. It follows a handful of clear principles: early sun to get the colony moving, shelter from prevailing winds, dry ground underfoot, a flight path that does not cross where people walk, and enough room for you to work comfortably with equipment in hand. Get those right and almost any site becomes workable.
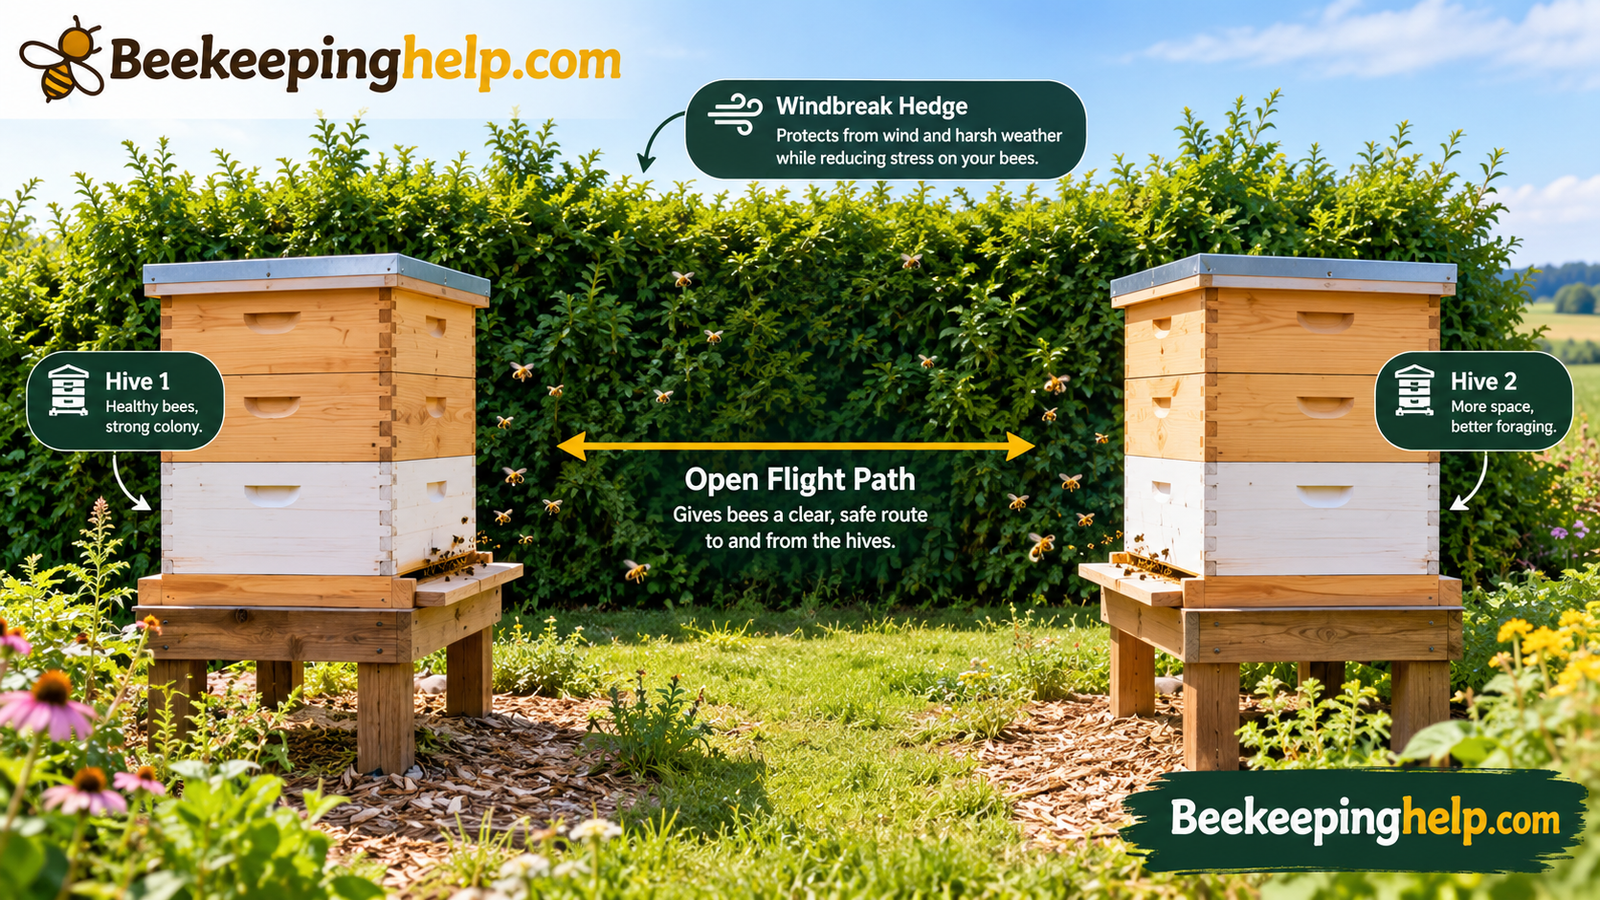
This guide works through the whole decision, from reading sunlight across your plot through to the practical details of stands, pads, and spacing. If you are still at the beginning of the journey and choosing equipment and colonies first, our overview of how to start beekeeping covers the wider picture, and the full beekeeping guide walks through season-by-season management.
Choose Your First Hive
Starter-friendly hive kits sized for a backyard apiary.
Check Beehive Kits on Amazon1. Why Placement Matters More Than Most Beginners Realize
A good site does quiet, constant work for you. A bad site makes every task harder.
It is tempting to think of the beehive as a self-contained box that simply needs somewhere flat to sit. But a colony is a living system that responds continuously to its surroundings. Temperature, light, wind, humidity, and disturbance all shape bee behavior and colony development. Placement is how you set the terms of that relationship.
What a good site actually gives you
Colonies in well-chosen spots tend to start foraging earlier in the morning, build comb steadily, overwinter more reliably, and stay calmer during inspections. They also tend to be more hygienic, because dry, well-drained ground discourages the damp conditions that lead to disease problems. Beekeepers in good sites usually describe their hives as “easy to work” without being able to say precisely why — and placement is usually the reason.
What a poor site costs you
Colonies placed in deep shade, in wind tunnels, on low damp ground, or in spots where the flight path crosses a busy path tend to be slower, more defensive, and harder to inspect. In the worst cases, poor placement contributes directly to colony losses over winter or makes an otherwise gentle colony defensive enough that inspections become stressful for everyone nearby.
A Well-Sited Hive
- Warms early and starts foraging sooner
- Dries quickly after rain
- Stays calmer during inspections
- Builds comb steadily through the season
- Is easy to reach with equipment
A Poorly Sited Hive
- Damp, mouldy, and slow to develop
- Battered by prevailing winds
- Defensive where people pass close by
- Difficult to inspect with heavy supers
- More prone to pests and disease issues
Worth remembering: placement is reversible. If a hive is struggling in a spot, you can move it — usually in short steps at night once the colony is established. Nothing about the decision is permanent.
Understanding what is inside the box also helps you judge a site. Knowing the parts of a bee hive and their functions and how a beehive works gives you a clearer sense of what the colony is dealing with at the entrance, in the brood chamber, and above the queen excluder.
Start With the Right Equipment
Everything a new beekeeper needs in one place.
See Beekeeping Starter Kits2. Sun, Shade, and Hive Orientation
Morning sun is the goal. Afternoon shade is the comfort prize.
If there is one piece of placement advice that survives every climate and every beekeeping style, it is this: give the hive early sun. Colonies that catch the first light of day warm up sooner and get their foragers out earlier, which matters enormously during a short or marginal nectar flow. Sunlight also helps keep the hive interior drier and discourages some of the pests that thrive in dark, damp conditions.
The ideal pattern
Think in terms of a sun arc. A hive that receives direct sun from early morning through midday, and then dappled or partial shade through the hottest part of the afternoon, is close to ideal in most regions. The colony gets a warm start and avoids overheating at the peak of the day.
| Exposure | What the Colony Experiences | Best For | Recommendation |
|---|---|---|---|
| Morning Sun, Light Afternoon ShadeBest Overall | Early warm-up, dry interior, relief from peak heat | Nearly all climates and most beekeepers | Aim for this Ideal |
| Full Sun All Day | Maximum foraging time, risk of overheating in hot regions | Cool or damp climates, winter survival | Good with ventilation |
| Deep or Permanent Shade | Slow morning starts, damp comb, more mould and pests | Rarely ideal | Avoid if possible |
| Dappled Shade Under Trees | Filtered light, some debris from branches, decent warmth | Hot regions needing afternoon relief | Workable with upkeep |
Which way should the entrance face?
The classic answer is south or southeast, and it is a good default because it catches early sun and gets bees flying sooner. That said, it is not a rule that must be obeyed at all costs. If facing south would send the flight path straight across a patio or a neighbor’s path, face the entrance elsewhere and accept a slightly later start. A calm colony with a clear flight path beats an early-starting colony flying at people’s faces.
Hot climates versus cold climates
In genuinely hot regions, afternoon shade and generous ventilation matter more than morning sun; the priority flips toward keeping the colony from cooking during long heatwaves. In cold regions, the balance flips the other way: full winter sun and protection from freezing winds matter most. Read your own climate rather than a generic rule, and adjust accordingly.
Help Your Colony Handle Heat
Entrance reducers and ventilation aids for warmer sites.
Check Hive Ventilation Gear3. Wind, Weather, and Shelter
Bees tolerate cold far better than they tolerate cold and wet combined with wind.
Wind is one of the most underrated factors in hive placement. A colony sitting in a wind tunnel will struggle in every season: foragers get knocked down returning with loads, heat is stripped from the hive in cold months, and rain is driven into the entrance. Shelter is not a luxury — it is a core requirement.
Using natural shelter
Look for existing features that break the prevailing wind: a hedge, a wall, a fence, a barn, dense planting, or a gentle slope that rises behind the hive. The shelter should be close enough to be effective but not so close that it blocks air movement entirely or drops debris onto the hive. As a working guide, a windbreak roughly the same height as the hive or somewhat higher, positioned a short distance behind it, does most of the job.
Creating shelter where none exists
On open ground you can create a simple break with a low fence, a panel, or a planted screen. Even a stack of pallets or a purpose-built windbreak panel on the windy side transforms a spot. If you build one, remember that you still need to walk behind the hive during inspections, so leave working room between the shelter and the hive.
Rain, snow, and standing water
Water is the enemy of a wooden hive. Sites at the bottom of a slope, in frost pockets, or where surface water collects after heavy rain will eventually cause problems — rotting bottom boards, damp brood comb, and struggling colonies. Slight elevation and a well-drained surface solve almost all of this, and it is far easier to solve before you set the first hive than after.
Weather exposure matters at both ends of the season: the same site that is pleasantly sheltered in spring may sit in freezing wind through winter. Walk your property in both conditions before committing.
Bees behave differently when the weather closes in around the apiary, and understanding colony defensiveness helps you interpret what you see at the entrance. Robbing behavior is closely linked to conditions and site layout too — see our guide to robbing in beekeeping for how the placement of hives relative to one another plays into it.
Protect Your Hives From Weather
Hive wraps, covers, and stands that keep wood dry.
See Hive Weather Protection4. Water, Drainage, and Damp Ground
Your bees need water nearby. Your hive must not sit anywhere near it.
There is a useful distinction here that first-time beekeepers sometimes mix up. Bees require a reliable water source within a short flight of the hive, especially in spring when they are raising brood and in hot weather when they use water to cool the colony. But the hive itself must sit on dry, well-drained ground, raised clear of soil moisture.
Giving bees water without causing a nuisance
The classic problem is that bees discover the neighbor’s pool, pet bowl, or washing line and visit constantly. The solution is to provide a better, closer alternative early in the season so they habitually use it instead. A shallow waterer with floating material so the bees can land safely, sited a short distance from the hive and near some light screening, is usually enough to keep them happily occupied.
Ground conditions under the hive
- Drainage first. If water pools on the surface after rain, choose somewhere else or improve the ground.
- Elevate the hive. Raising the bottom board off soil keeps the floor drier and reduces rot.
- Grass management. Keep vegetation trimmed around the stand so it does not hold moisture against the wood or block the entrance.
- A solid base. A pad of gravel, paving, or compacted material under the stand keeps things stable and dry.
- Level ground. A hive that leans will not drain internally and makes inspection awkward.
Water management is closely tied to colony health. Damp conditions encourage mould and give disease an easier foothold, and a colony fighting damp has less energy for everything else. If you want to understand how seasonal resource gaps affect colony needs, our explanation of dearth in beekeeping covers what happens when forage and water become scarce.
Give Your Bees Clean Water
Bee-safe waterers that keep colonies away from pools and paths.
Find Bee Waterers5. Flight Path and Entrance Direction
Bees fly in straight lines up and out. Put something other than people in that line.
Colony defensiveness is often a placement problem rather than a temperament problem. When a hive entrance faces a walkway, a patio, a gate, or a place where children play, foragers repeatedly fly into anyone passing through their line of travel. Over time, both the bees and the people get frustrated.
Think in three dimensions
Bees leave the entrance and climb steadily. A forager leaving a hive at chest height will typically be above head height within a few metres, which means that a fence, hedge, or wall placed a short distance in front of the hive acts as a natural guide: bees rise over it while people pass safely behind it. This is the single most useful trick in residential beekeeping.
Smart Flight Path Design
- Face the entrance toward an open area or fence
- Use a barrier about a metre or so in front
- Keep the entrance away from gates and doorways
- Place hives where people rarely stand still
- Leave the immediate area clear of obstacles
Flight Path Disasters
- Entrance facing a patio or garden table
- Hive positioned beside a narrow path
- Hives clustered where bees drift between colonies
- Low shrubs directly in front blocking the entrance
- Site overlooked by a neighbor’s window
Spacing and drifting
If you plan to run more than one hive, space them out and, where possible, angle the entrances differently or vary the hive colors. Bees drift between hives that look identical and sit in a straight row, which spreads pests and diseases and makes management harder than it needs to be. Small differences in orientation, height, and appearance make each colony easier to identify and reduce drift.
A simple test before you commit: stand at the entrance and imagine a line shooting out and upward at about a steep angle. If that line crosses anywhere people regularly walk, stand, or sit, turn the hive.
Keep Calm During Inspections
Reliable smoke makes working close to the hive far easier.
Shop Bee Smokers6. Working Space Around the Hive
You will stand here with heavy boxes in your arms. Plan for that reality.
Placement decisions often focus entirely on the bees and forget the beekeeper. But a site that is awkward to work becomes a site you avoid, and hives that are not inspected regularly develop problems that could have been caught early. Working room is a genuine part of hive placement.
How much room do you actually need?
Enough to stand behind or beside the hive with room to set down a super, space to step back safely when the bees become active, and a clear route in and out carrying equipment. If you have to balance on uneven ground while holding a full box of honey, the site is wrong — even if every other factor is perfect.
Layout options
- Single hive: generous clearance on three sides, ideally with a wall or fence to work against.
- Small apiary: hives spaced comfortably apart so you can work one without standing in the flight path of the next.
- Corner placement: using two boundaries — a fence and a hedge, for example — to create shelter and a defined working zone.
- Elevated sites: rooftops and raised platforms need rails, safe access, and a plan for carrying heavy supers down stairs.
Equipment weight matters more than people expect. Once you add a full super, the boxes are genuinely heavy, and handling them safely is easier on level ground with a clear path to your vehicle or shed. Our look at how hard it is to start beekeeping covers the practical physical side of the hobby honestly.
7. Neighbors, Pets, and Property Lines
Good placement is as much about people as it is about bees.
Beekeeping almost always happens near other people, and how your hives sit in relation to them determines whether beekeeping becomes a source of friction or a source of honey jars handed over the fence. The overwhelming majority of neighbor complaints come down to placement rather than the bees themselves.
Respectful siting principles
Keep hives well back from boundaries where you can, use barriers to redirect flight paths, maintain good hygiene so there is no spillage or smell, and make sure no one else’s outdoor living space sits directly in the line of travel. If a neighbor has a genuine allergy concern, that is a conversation worth having early and openly — placement adjustments can resolve a great deal.
Know the local rules
Beekeeping regulations vary widely depending on where you live, covering setbacks from property lines, the number of colonies permitted, water requirements, registration, and fencing or screening obligations. Check before you set anything in the ground. Our guide to beekeeping laws by state gives you the framework to investigate your own area properly.
| Setting | Key Concerns | What to Check First | Siting Fit |
|---|---|---|---|
| Suburban BackyardMost Common Choice | Neighbor proximity, pets, shared boundaries | Local setback rules and any screening requirements | Excellent with barriers Popular |
| Rural or Acreage Property | Livestock access, predators, long walks with heavy boxes | Water availability and vehicle access | Excellent |
| Allotment or Community Garden | Shared use, children, foot traffic near beds | Permission from the association and site rules | Good with clear boundaries |
| Rooftop or Balcony | Weight, access, wind exposure, water source | Structural suitability and building rules | Workable with planning |
| Edge of Cropland or Orchard | Pesticide exposure, machinery traffic | Spray schedules and grower communication | Good with coordination |
Pets are worth thinking about too. Dogs usually lose interest in a hive if it is quiet, but a hive at dog height in an enclosed run is asking for trouble. Give the colony height and a little distance, and give the animals a clear route that does not run past the entrance.
If you are weighing whether your own property is even suitable, our guide to keeping bees in your backyard works through the practical checklist, and thinking about beekeeping insurance is sensible once your hives are established.
8. Backyard and Small-Garden Placement
Small spaces can host bees brilliantly — the trick is vertical thinking.
Plenty of successful beekeepers keep colonies in gardens far smaller than people imagine possible. The secret is not square meters; it is directing flight paths upward and outward away from where people spend time, and creating a small, defined working area.
Best spots in a typical garden
- A back corner bordered by two fences, with the entrance facing the open lawn.
- Behind a shed or garage, using the structure as a windbreak and a visual screen.
- Along a side boundary with a screening hedge or fence a metre or two in front.
- Beside a tall planting bed that lifts bees above head height almost immediately.
- Against a sunny wall in cooler climates, gaining reflected warmth and shelter.
Screening and barriers
A fence, hedge, or trellis about the height of a person placed in front of the hive is remarkably effective. Bees flying out hit the barrier and rise above it, while people moving behind the barrier stay completely clear. It also hides the hives from view, which reduces anxiety for anyone uneasy about bees nearby. If you need something immediately, a simple lattice panel with climbing plants achieves the same result and looks intentional.
Garden harmony
Bees and gardens are natural partners. Flowering plants nearby mean short foraging flights, well-fed colonies, and better pollination of your own fruit and vegetables. If you want to keep the colony fed through gaps in the flowering season, our guides on what to feed bees and the best bee feeders cover it in detail.
Small garden golden rule: if people must walk past the hive to reach a shed, gate, or door, that is the wrong spot. Put the hive where people go deliberately, not where they pass by.
Screen Your Hives In Style
Panels, trellises, and fencing that guide bees upward.
Find Screening Options9. Rural, Farm, and Acreage Sites
Space is not a problem on larger properties. Distance and access are.
With room to choose, rural beekeepers gain genuine freedom — and inherit a different set of problems. The most common is distance: a hive placed at the far edge of a property is easy to site and miserable to service once supers are full. The second is livestock and wildlife, which interact with hives in ways that surprise new beekeepers.
Balancing forage against convenience
The ideal rural site sits close to good forage but within a short walk or drive of where you store equipment. Woodland edges, orchard margins, hedgerows, and areas near flowering crops are all productive — but so is a site near a shed with a track leading to it. In practice, the beekeeper who inspects regularly gets better results than the beekeeper who optimizes forage perfectly but avoids the long trek.
Livestock, water, and predators
Cattle and horses will rub against hives and knock stands over if given the chance, so rural sites need a fenced enclosure or a robust barrier. Wildlife such as bears is a serious concern in some regions and demands electric fencing rather than simple avoidance. Skunks scratch at entrances at night, which makes colonies defensive — raising hives higher and keeping the ground clear of long grass helps considerably.
Working with growers
Placing hives near crops can be mutually beneficial for pollination, but it only works if you and the grower communicate clearly about spray schedules. Ask before the season begins, agree on notification, and be willing to move or cover hives when necessary. Cooperation here protects both your colony and the relationship.
If the aim is partly commercial, understanding the economics of the arrangement matters. Our look at whether beekeeping is profitable covers what realistic returns look like.
Gear Up for Out-Apiaries
Durable transport and handling gear for remote sites.
Browse Beekeeping Equipment10. Access, Equipment, and Everyday Practicality
The best site is the one you will visit often, in every weather, without dreading it.
There is a quietly important principle in beekeeping: the distance between your back door and the hive is inversely proportional to how often you will inspect it. Beekeepers with hives close to home tend to spot problems earlier, catch swarming signs in time, and keep on top of feeding and treatment schedules. That alone makes proximity one of the most valuable placement factors.
Practical access checklist
- Vehicle access: can you get equipment to the hive, especially at harvest?
- Path surface: will you carry heavy boxes over mud, steps, or rough ground?
- Storage nearby: hive tools, feeders, and spare boxes within reach saves endless trips.
- Light: early morning or evening inspections are far easier with some natural light.
- Level working area: somewhere to set supers down without tipping them.
- Shelter for you: a wall or shed to stand behind when you need a moment.
Keeping the site tidy
A clean apiary is a sign of a careful beekeeper, and it genuinely affects colony health. Trim grass so it does not reach the entrance, clear wax and propolis debris from the ground, remove old comb promptly, and keep feeders clean. Bees that are not fighting off wax moth, hive beetles, or robbers at ground level are healthier colonies.
Good habits extend to your clothing and tools. Knowing how to clean beekeeping gloves and having a sensible approach to protective gear makes every visit more pleasant — our bee suit review and guide to the best beekeeping gloves help you choose well.
Keep Your Tools Ready
Hive tools, feeders, and essentials stored close to the apiary.
Check Hive Tools11. Common Placement Mistakes to Avoid
Almost every experienced beekeeper has made at least one of these.
The value of reading other people’s mistakes is that you get to skip them. Here are the placement errors that come up again and again, and the practical fixes for each.
Placing hives in permanent shade
It seems kind on a hot day, but it leaves colonies cold, damp, and slow. Fix: move the hive to a spot with morning sun, even partial sun, and use afternoon shade only as a comfort measure in genuinely hot climates.
Forgetting the flight path
Set a hive near a gate or patio and within weeks everyone is being buzzed. Fix: rotate the entrance and install a fence, hedge, or panel about a metre or two in front so bees rise above head height.
Leaving the hive flat on the ground
Soil moisture rots the floor, pests have easy access, and the colony suffers. Fix: always elevate. Even a simple sturdy stand makes an enormous difference.
Choosing the furthest corner of the property
It feels logical to put bees “out of the way”, but it results in fewer inspections. Fix: bring the hive closer to home and solve the people problem with screening instead of distance.
Ignoring local rules until after setup
Discovering a setback requirement after the hive is established is stressful and avoidable. Fix: check regulations, registration, and neighbor expectations before you order anything.
| Mistake | Why It Hurts | Fix | Effort |
|---|---|---|---|
| Hive in Deep ShadeMost Common Error | Cold, damp colony; slow build-up; mould risk | Move to a morning-sun position | Easy Fix First |
| Entrance Facing a Path | Bees collide with people; colony grows defensive | Rotate entrance and add a barrier | Easy |
| Hive Sitting on Soil | Rot, damp floors, easier pest access | Elevate on a sturdy stand | Easy |
| Site Too Far From Home | Inspections get skipped; problems go unnoticed | Relocate closer in short steps | Moderate |
| No Wind Shelter | Heat loss, rain ingress, knocked-down foragers | Add a hedge, fence, or break panel | Moderate |
One more mistake deserves a mention: panicking at normal bee behavior. Colonies are naturally active at certain times of day, and strong activity at the entrance is often a good sign rather than a problem. Learning to read behavior calmly is a skill worth building — see our guide on how to improve your beekeeping skills.
Set Yourself Up to Succeed
Practical beekeeping guides and references for every stage.
Browse Beekeeping Books12. Setting Up the Site: Pads, Stands, and Levels
The last mile is where good placement becomes durable.
Once you have chosen the general spot, the final work is physical: prepare the ground, set a stable base, raise the hive to a comfortable height, and make sure everything is level and secure. This stage is worth doing properly because it affects hive life, colony health, and your own back.
Preparing the ground
Clear vegetation, level the surface, and lay a base that sheds water. Gravel, paving slabs, or a compacted pad all work well. The goal is simple: no pooling water, no soft sinking ground, and no grass growing directly against the wood. If the ground slopes, cut a small level platform rather than shimming the hive with loose blocks.
Choosing a stand
Height is personal, but most beekeepers prefer the hive floor roughly at mid-thigh to waist level so that inspections do not involve constant bending. Stability matters more than appearance: a stand that rocks when you lift a super is a hazard. Whatever you choose, it must support a fully loaded hive without flexing.
| Support | Strengths | Watch Out For | Best For |
|---|---|---|---|
| Purpose-Built Hive StandBest Overall | Stable, correct height, designed for the load | Costs more than improvised options | Beekeepers with one or more permanent sites |
| Concrete Blocks or Pavers | Cheap, durable, immediately available | Can sink or shift on soft ground | Budget setups and level hard ground |
| Timber Stand, Built or Bought | Customizable height, warm to work with | Needs weather protection to last | Handy beekeepers with tools |
| Pallet | Free or very cheap, quick to deploy | Low to the ground; hard on your back | Temporary or out-apiary placements |
Final checks before the colony arrives
- Level the hive so the frames hang correctly and the hive drains.
- Secure it against wind and, where relevant, against animals knocking it.
- Face the entrance away from traffic and toward open space.
- Clear the entrance area of grass, debris, and obstacles.
- Place water nearby so bees develop good habits early.
- Keep your route in clear for the equipment you will carry.
Once the site is ready and the colony arrives, the hive becomes a working system you will learn to read over the seasons. Whether you are building your own equipment or buying it, our guides on how to make a beehive and how beehives are made explain the construction side, while how to paint a beehive covers protecting that woodwork for years of service outdoors.
Finish the Job Properly
Stands, bases, and weather protection for a long-lived apiary.
Check Beehive StandsFrequently Asked Questions About Beehive Placement
Where is the best place to put a beehive?
A spot with early morning sun, shelter from prevailing wind, dry and well-drained ground, and a flight path that does not cross where people walk. Ideally it should also be within easy reach of your equipment so inspections stay regular.
Which direction should a beehive face?
South or southeast is the traditional default because it catches early sun and gets foragers out sooner. But clear flight paths and avoiding disturbance matter more than strict compass direction, so rotate the hive if facing south would send bees toward people.
Should a beehive be in sun or shade?
Prefer morning sun with light afternoon shade. Full sun all day works well in cooler or damp climates, while deep permanent shade is rarely ideal because it keeps colonies cold, damp, and slow to develop.
How far should a beehive be from a house or property line?
Distance requirements vary by location, so check local regulations first. Beyond legal minimums, the practical answer is to place hives far enough away that the flight path, noise, and activity do not reach outdoor living areas — and use a fence or hedge to redirect bees upward.
Can you put a beehive in a small backyard?
Absolutely. Many beekeepers successfully keep colonies in modest gardens. Use a corner or boundary position, add a screen about a person’s height in front of the hive, and make sure the entrance does not face doors, gates, or seating areas.
How high off the ground should a beehive be?
High enough to keep the floor dry and away from ground pests, and at a height that makes inspection comfortable. Many beekeepers prefer the hive floor around mid-thigh to waist level, though lower placements work if bending is not an issue.
Do beehives need to be level?
Yes, ideally. A level hive keeps frames hanging correctly, helps the colony manage space as intended, and allows internal moisture to drain properly. Use a solid base rather than loose shims to correct a slope.
Can I move a beehive after it is established?
Yes. Colonies can be relocated, usually in short steps or at night once foragers have returned, to prevent bees flying back to the old position. Moving is often the simplest fix for a placement problem you discover later.
Do beehives attract pests and predators?
They can. Ground pests, wax moth, and in some regions skunks or bears all interact with hives. Elevation, tidy ground, secure barriers where needed, and regular inspection all reduce the problem considerably.
Should beehives be placed near flowers or water?
Nearby forage is a real advantage because it shortens foraging flights and supports the colony. Bees also need a dependable water source, so provide one nearby to prevent them visiting pools, pet bowls, or neighbor’s outdoor spaces.
Is it a problem to place hives close together?
Some spacing is wise. Hives crammed in a straight row encourage drifting between colonies, which can spread pests and disease. Space them out, vary height or color slightly, and keep clear working room between each one.
Plan Your Apiary With Confidence
Practical references for siting, management, and colony care.
Check Beekeeping GuidesFinal Siting Checklist
Choosing where to place a beehive comes down to a handful of decisions made in the right order. Give the colony morning sun and light afternoon shelter. Keep the ground dry, elevated, and level. Face the entrance toward open space and away from where people live and walk. Put a barrier in the flight path if the hive is near a boundary. Keep water nearby for the bees but moisture away from the hive. And finally, put it somewhere you can reach easily with heavy equipment in your hands.
None of that requires a large property or expensive gear. It requires observation — watching where the sun lands, where the wind blows, where water collects, and where people move through your space. Spend an afternoon doing just that and the right spot usually reveals itself quite clearly.
And if you get it wrong? Move the hive. Beekeeping is forgiving of early mistakes, and a colony relocated to a better site often shows you the difference within a single season.
Ready to Set Up Your Apiary?
Everything you need for a well-placed, well-run hive.
Check Prices on AmazonYou May Also Like
More from Beekeeping Help to keep your colony thriving.
Best Bee Smoker
Reliable, cool smoke for calmer, safer inspections.
How Does a Bee Smoker Work?
Understand the tool so you can use it effectively.
What to Use in a Bee Smoker
Fuels that burn cool, long, and steady all season.
Bee Suit Review
Protection, ventilation, and fit across popular options.
Do Bee Suits Protect From Wasps?
What standard beekeeping gear does and does not cover.
How to Wash a Bee Suit
Clean protective gear without damaging fabric or veil.
Best Beekeeping Gloves
Balance protection and dexterity for confident work.
Best Beekeeping Starter Kit
Everything a new beekeeper needs in one bundle.
Beehive Types With Pictures
Compare common hive designs side by side.
Best Beekeeping Hives
Our picks across hive styles and budgets.
Flow Hive vs Langstroth
Two very different harvesting approaches compared.
Types of Beehives in Trees
How wild colonies nest and what that teaches us.
What Is a Nuc in Beekeeping?
A popular, beginner-friendly way to start a colony.
What Is Swarming in Beekeeping?
Why colonies split and how to recognize the signs.
How to Buy Bees for Beekeeping
Packages, nucs, and colonies — choosing well.
How to Make a Bee Feeder
Simple, practical feeders you can build yourself.
Best Honey Extractor
Manual and electric options for every harvest size.
How to Store Honey
Keep your harvest perfect for years with simple care.
Best Beekeeping Books
Reading worth your time from first hive onward.
How Much Does It Cost to Start Beekeeping?
A realistic budget for equipment, bees, and the first season.
How to Start Beekeeping in Texas
Climate, forage, and seasonal timing for Texas beekeepers.
Beekeeping Insurance
What cover beekeepers need and when it is worth considering.
Local regulations on hive placement, setbacks, and registration vary widely. Always confirm the requirements in your area before establishing an apiary.