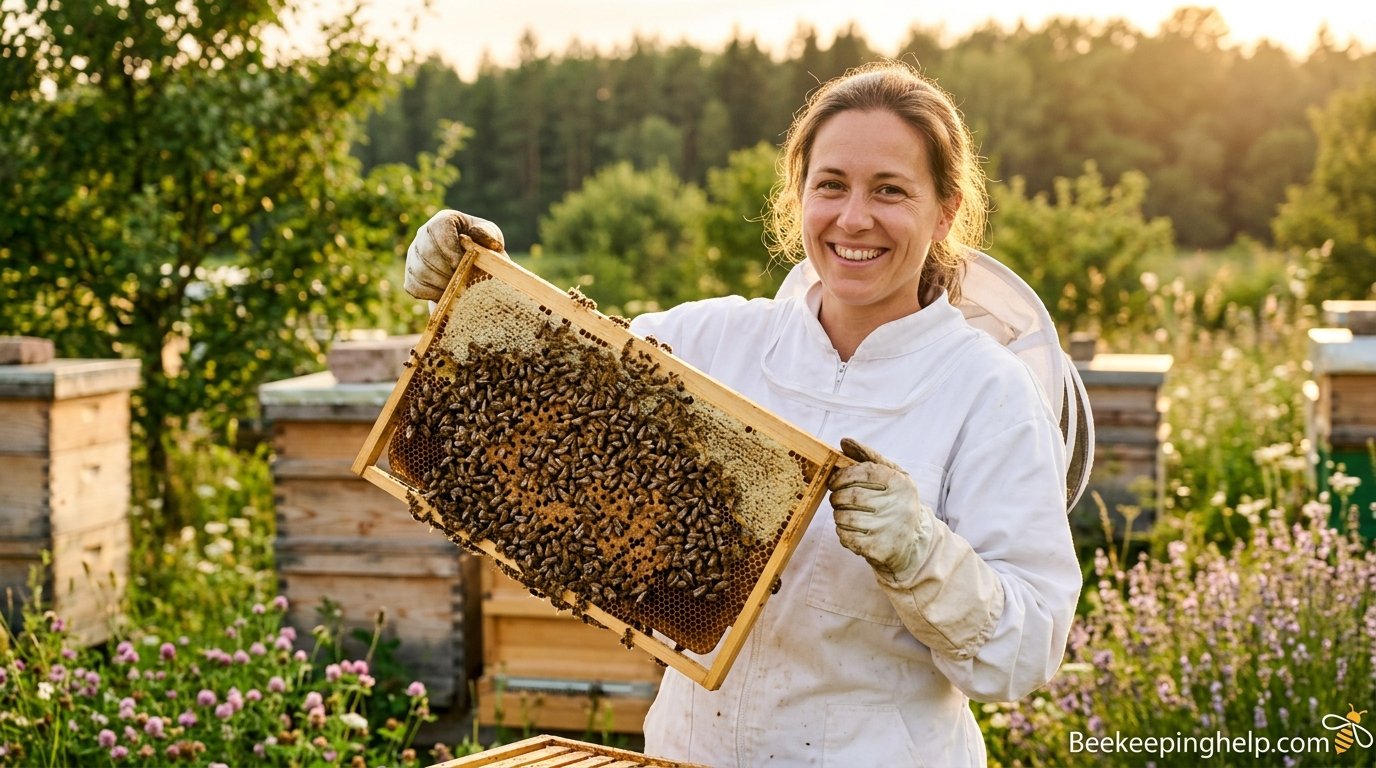
Beekeeping: The Complete Guide to Hives, Honey & Healthy Bees
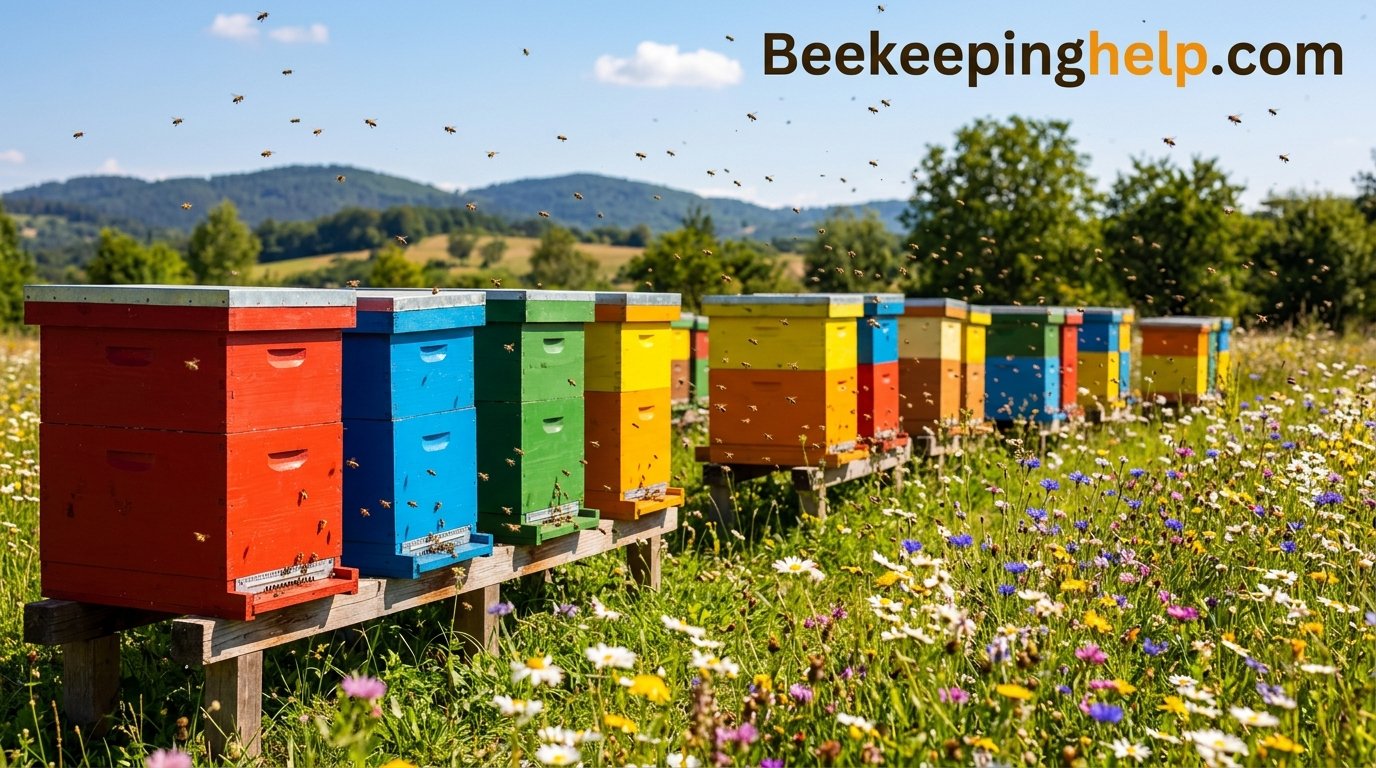
Beekeeping is more than a hobby — it’s a living partnership. From the ancient Egyptians to modern urban rooftops, humans have kept bees for honey, wax, pollination, and the profound satisfaction of working alongside nature’s most organized society. This comprehensive guide walks you through every aspect of beekeeping: hive selection, bee biology, seasonal management, pest control, harvesting, and much more. Whether you’re a complete beginner or an experienced apiarist looking to deepen your knowledge, you’ll find actionable, science-backed information here.
What Is Beekeeping? Understanding the Craft
Beekeeping, also known as apiculture, is the practice of maintaining honey bee colonies in artificial hives. It’s one of humanity’s oldest agricultural traditions, dating back at least 9,000 years. At its core, beekeeping is about creating a stable environment where bees can thrive, reproduce, and produce surplus honey. But it’s also much more than that. A good beekeeper becomes a student of nature, learning to read the subtle signals of a colony: the hum of a queenless hive, the distinctive dance of foragers, the heavy scent of ripening honey.
The modern beekeeper wears many hats. You’re a landlord, providing shelter. You’re a doctor, monitoring for disease. You’re a nutritionist, ensuring your bees have enough food. And you’re a conservationist, supporting one of the planet’s most critical pollinators. According to the USDA, honey bees pollinate approximately 80% of all flowering crops, contributing over $15 billion to U.S. agriculture annually. When you keep bees, you’re not just producing honey — you’re actively participating in ecological stewardship.
For beginners, the journey typically starts with a single hive in the backyard. But beekeeping scales beautifully. Some hobbyists maintain two or three hives for personal use, while sideliners manage 50–100 colonies and sell honey at farmers markets. Commercial operations may run thousands of hives, migrating them across the country to pollinate almonds, apples, blueberries, and more. No matter the scale, the fundamental skills remain the same: observation, patience, and a willingness to learn from mistakes.
If you’re wondering where to begin, our dedicated guide on how to start beekeeping offers a step-by-step roadmap. But before you buy any equipment, it’s wise to understand the broader landscape. Different hive styles suit different goals. Some beekeepers prioritize honey production, while others focus on natural comb building or minimal intervention. Our article on best beekeeping hives compares the top options in detail.
This guide is designed to be your comprehensive resource. We’ll explore everything from the anatomy of a beehive to advanced techniques like queen rearing and swarm management. Along the way, you’ll find practical tips, comparison tables, and links to deeper dives on specific topics. Let’s begin with a look at where beekeeping came from and how it evolved into the practice we know today.

🐝 Beginner Beekeeping Starter Kit
Everything you need to set up your first colony: wooden hive, frames, smoker, hive tool, and protective gloves. Ships fully assembled.
View on AmazonThe History of Beekeeping: From Hollow Logs to Precision Hives
The relationship between humans and honey bees stretches back millennia. Cave paintings in Spain dating to around 8,000 BCE depict early honey hunters climbing trees to raid wild bee colonies. In ancient Egypt, beekeeping was a well-organized industry. Hieroglyphs show beekeepers using cylindrical clay hives, and honey was so valued that it was used as currency, medicine, and even embalming fluid. The bee was a symbol of royalty, and Pharaohs were often referred to as “He of the Bee.”
The ancient Greeks and Romans refined beekeeping further. Aristotle wrote extensively about bee behavior in his “Historia Animalium,” noting the social structure and the mysterious process of honey production. The Roman poet Virgil dedicated an entire book of his “Georgics” to practical beekeeping advice, including how to site hives, capture swarms, and prevent disease. Many of his observations remain surprisingly accurate today.
For centuries, beekeeping relied on “fixed comb” hives — woven baskets, hollow logs, or clay pots where bees built comb directly on the walls. Harvesting meant destroying the colony or cutting out chunks of comb, killing many bees in the process. This changed dramatically in 1851, when Reverend Lorenzo Langstroth, an American minister and amateur entomologist, discovered the concept of “bee space.” He noticed that bees always left a precise gap of about 3/8 inch between combs. Any space larger than that was filled with comb; any space smaller was sealed with propolis.
Langstroth’s genius was designing a hive with movable frames spaced exactly 3/8 inch apart. This allowed beekeepers to remove individual frames for inspection, manage the colony without destroying it, and extract honey efficiently. The Langstroth hive became the standard in North America and remains the most widely used hive design in the world. For a deeper look at hive evolution, visit our article on how beehives are made.
Since Langstroth’s breakthrough, beekeeping has continued to evolve. The development of the centrifugal honey extractor in the late 19th century allowed beekeepers to spin honey out of frames without damaging the comb. Advances in disease management, artificial insemination, and genetics have transformed bee breeding. And in recent years, the Flow Hive introduced a new approach to honey harvesting that captured the public’s imagination. Yet for all the technological change, the essence of beekeeping remains the same: understanding bees and creating conditions for them to flourish.
Beehive Types & Which One Is Right for You
Choosing a hive style is one of the first and most consequential decisions you’ll make as a beekeeper. Each design has distinct advantages and trade-offs in terms of cost, ease of management, honey yield, and bee welfare. The three most common hive types in North America are the Langstroth, the Top Bar, and the Warre. Additionally, the Flow Hive has gained popularity as a modification of the Langstroth system. Let’s explore each in depth.
The Langstroth Hive: The Industry Standard
The Langstroth hive consists of stackable wooden boxes that hold removable frames. The standard dimensions are based on Langstroth’s bee space principle. Boxes come in different depths: deep (9-5/8 inches) for brood, medium (6-5/8 inches) for honey, and shallow (5-3/4 inches) for cut comb. The modular design allows beekeepers to expand or contract the hive as the colony grows or shrinks through the seasons.
Advantages: Standardized parts are widely available and interchangeable. High honey yield due to efficient use of space. Easy to inspect individual frames. Can be managed by one person, though heavy lifting is required. Compatible with most extraction equipment.
Disadvantages: Boxes can be heavy when full (deep boxes may weigh over 90 pounds). Regular inspections are necessary to prevent swarming. Some beekeepers find the rigid geometry less natural for bees. Foundation sheets are often used, which may not suit natural beekeeping philosophies.
The Top Bar Hive: Simplicity and Natural Comb
Top bar hives feature a horizontal box with angled sides and wooden bars laid across the top. Bees build their comb downward from each bar, creating beautiful, catenary-curved combs. There are no frames or foundation — the bees draw natural wax entirely on their own. This design is popular among small-scale and natural beekeepers.
Advantages: Inexpensive to build, often DIY-friendly. No heavy lifting — each bar is lifted individually. Natural comb encourages bees to build cells at their preferred size, which some believe improves colony health. Less intrusive inspections.
Disadvantages: Lower honey yield compared to Langstroth. Comb is fragile and can break if handled carelessly. Not compatible with centrifugal extractors — honey is typically crushed and strained. Requires more frequent monitoring to prevent comb attachment to hive walls.
The Warre Hive: Minimal Intervention
Developed by French monk Emile Warre in the early 20th century, the Warre hive is a vertical top-bar system with boxes added from the bottom rather than the top. The design mimics a tree cavity, with thick walls and a quilt box for insulation. Warre beekeepers practice minimal intervention, opening the hive only for essential maintenance.
Advantages: Excellent insulation and moisture control. Mimics natural bee habitat. Low-management approach reduces stress on bees. Bottom-supering encourages bees to move down naturally, avoiding the “honey-bound” problem.
Disadvantages: Inspections are more difficult because boxes must be lifted from below. Lower honey yields than Langstroth. Not ideal for commercial production. Requires specialized knowledge and different management techniques.
| Feature | Langstroth | Top Bar | Warre | Flow Hive |
|---|---|---|---|---|
| Initial Cost | Moderate ($150-300) | Low ($50-150) | Low-Moderate | High ($500+) |
| Honey Yield | High | Low-Moderate | Low-Moderate | High |
| Ease of Inspection | Excellent | Good | Fair | Good |
| Natural Comb | Optional foundation | Yes | Yes | With frames |
| Heavy Lifting | Yes | No | Some | Some |
| Best For | Production, beginners | Naturalists, hobbyists | Low-intervention | Convenience seekers |
For a visual comparison of different hive styles, check out our gallery of beehive types with pictures. And for a head-to-head between the two most popular modern designs, read our Flow Hive vs Langstroth comparison.

🏠 Langstroth Beehive Kit
Complete 10-frame deep hive with telescoping cover, inner cover, bottom board, and entrance reducer. Unassembled, easy to follow instructions.
Check PriceParts of a Bee Hive and Their Functions
Understanding the anatomy of a beehive is essential for effective management. While the Langstroth hive is composed of several distinct parts, the principles apply broadly to other designs. Our dedicated article on parts of a bee hive and their functions provides an even more granular breakdown, but here’s a comprehensive overview.
Bottom Board
The bottom board serves as the hive’s foundation. It’s typically a flat wooden platform with raised edges on three sides and an opening at the front. Modern bottom boards come in two varieties: solid and screened. Solid boards are traditional and provide good insulation. Screened boards have a wire mesh floor that improves ventilation and helps control Varroa mites by allowing them to fall through and away from the bees. Many beekeepers use screened bottom boards with a removable sticky board or tray to monitor mite populations.
Entrance Reducer
This small wooden strip fits into the entrance slot and can be rotated to provide different opening sizes. It’s crucial for new or weak colonies that need to defend against robbing bees and wasps. During winter, the entrance reducer is set to the smallest opening to conserve heat and keep out mice. In summer, it’s often removed entirely to allow maximum airflow.
Deep Brood Boxes
Brood boxes are the main living quarters for the colony. They’re typically deep boxes (9-5/8 inches tall) that hold 8 or 10 frames. This is where the queen lays eggs, worker bees raise brood, and the colony stores pollen and honey for its own use. Most hives have one or two brood boxes at the bottom of the stack. The frames inside are made of wood or plastic with a foundation sheet imprinted with a hexagonal pattern that guides bees as they draw comb.
Queen Excluder
The queen excluder is a flat metal or plastic grid with openings large enough for worker bees to pass through but too small for the larger queen. It’s placed between the brood boxes and honey supers to prevent the queen from laying eggs in the honey storage area. Not all beekeepers use queen excluders — some find that they reduce honey yield slightly or cause congestion. But for clean honey harvests without brood mixed in, they’re invaluable.
Honey Supers
Supers are the boxes where bees store surplus honey — the honey you harvest. They’re typically medium or shallow boxes that are lighter and easier to lift when full. A medium super full of honey weighs about 50 pounds, compared to 90+ for a deep box. Supers are added to the hive during nectar flows and removed at harvest time.
Inner Cover
The inner cover is a wooden lid with a hole in the center and a rim on one side. It sits on top of the upper box and below the outer cover. The hole provides ventilation and gives bees an upper entrance. The rim side can be placed up or down depending on the season — down for a tight seal in winter, up for airflow in summer.
Outer Cover
The outer cover is the weatherproof roof of the hive. Traditional wooden covers are covered with metal sheeting to shed rain. Some beekeepers use migratory covers, which are flat and designed for hives that are moved frequently. The outer cover protects the hive from rain, snow, and sun.
Frames and Foundation
Frames are the removable wooden or plastic rectangles that hold the wax comb. They’re designed to hang inside boxes with precise bee space. Foundation is a thin sheet of wax or plastic embossed with the hexagonal cell pattern. Bees use foundation as a starting point to build straight, even comb. Natural beekeepers often use foundationless frames, allowing bees to build completely natural comb.
When you’re ready to assemble your first hive, our tutorial on how to make a beehive walks you through the process step by step.
How Does a Beehive Work? The Inner Life of a Colony
A beehive is more than a box of insects — it’s a superorganism. Each individual bee is like a cell in a larger body, and the colony as a whole behaves with a collective intelligence that emerges from thousands of simple interactions. To truly succeed as a beekeeper, you need to understand how this complex system functions. Our article on how does a beehive work explores the biology in detail, but here’s the essential picture.
The Queen: Mother of the Colony
The queen is the only fertile female in the hive. She’s larger than workers, with a long, tapered abdomen. Her sole function is to lay eggs — up to 2,000 per day during peak season. The queen also produces pheromones that regulate the colony’s behavior, suppressing worker reproduction and maintaining social order. A queen can live 3-5 years, though most beekeepers replace them every 1-2 years to maintain vigor.
Worker Bees: The Labor Force
Workers are infertile females that perform every task in the hive. Their roles change as they age. Young workers clean cells and feed larvae. Middle-aged workers build comb, process nectar, and guard the entrance. Older workers venture out to forage for nectar, pollen, water, and propolis. A worker bee lives only 6 weeks during the busy summer season, quite literally working herself to death.
Drones: The Males
Drones are the only males in the hive. They’re larger than workers, with big eyes and no stinger. Their sole purpose is to mate with virgin queens from other colonies. Drones don’t forage or help with hive maintenance. In autumn, when resources dwindle, worker bees drag the drones out of the hive to die. It’s a harsh but efficient system.
The Brood Cycle
The queen lays a single egg in each cell of the brood comb. After three days, the egg hatches into a larva. Worker bees feed the larva royal jelly for the first few days, then switch to a mixture of pollen and honey. After about six days, the larva spins a cocoon and the cell is capped with wax. Inside, the larva metamorphoses into an adult bee. A worker emerges after 21 days, a drone after 24 days, and a queen after just 16 days.
Communication: The Waggle Dance
One of the most remarkable aspects of bee behavior is the waggle dance. When a forager discovers a rich nectar source, she returns to the hive and performs a figure-eight dance on the comb. The angle of the dance relative to vertical indicates the direction of the food source relative to the sun. The duration of the waggle run communicates the distance. Other workers watch and feel the dance, then fly out to find the flowers. This sophisticated communication system allows a colony to efficiently exploit scattered resources across miles of landscape.
Understanding this communication is fascinating, but it also has practical implications. When you see bees performing the waggle dance, it tells you that a strong nectar flow is underway and you may need to add honey supers soon.
How to Start Beekeeping: A Complete Step-by-Step Guide
Starting your beekeeping journey is exciting, but it requires careful planning and preparation. This section walks you through the entire process, from initial research to your first honey harvest. For an even more detailed walkthrough, visit our dedicated how to start beekeeping guide. But here, we’ll cover all the essential steps with practical advice and visual aids.
Step 1: Research and Education
Before you spend a single dollar on equipment, invest time in learning. Read books, watch videos, join a local beekeeping club, and if possible, shadow an experienced beekeeper. Bees are living creatures, and a well-prepared beekeeper is far more likely to succeed. Many local associations offer “bee school” courses in early spring that provide hands-on training.
Step 2: Check Local Laws and Regulations
Beekeeping regulations vary widely by city, county, and state. Some areas require hive registration, while others have restrictions on the number of hives or distance from property lines. Check with your local agricultural extension office or city hall. Also, talk to your neighbors — a heads-up about your new hobby can prevent future conflicts. If anyone in the neighborhood has a severe bee allergy, you may need to reconsider your location.
Step 3: Choose Your Hive Location
Bees need a sunny, sheltered location with access to water and forage. Morning sun is especially important — it warms the hive and encourages early foraging. Protect hives from strong winds with a fence or hedge. Provide a nearby water source (a shallow dish with pebbles works well) so bees don’t bother neighbors’ pools or birdbaths. Avoid low spots where cold, damp air collects, and make sure the entrance faces away from pedestrian areas.
Step 4: Order Your Bees and Equipment
Order your bees and equipment well in advance — spring is the busy season, and suppliers often sell out. You’ll need a hive, protective gear, a smoker, hive tool, and feeder. Bees are typically sold as packages (a queen and 3 pounds of workers in a screened box) or nucs (5 frames of established comb with bees, brood, and queen). Nucs establish faster but cost more. For beginners, a nuc is often the better choice.
Step 5: Assemble Your Hive
Assembling a hive is straightforward — most kits include all the pieces with instructions. Use waterproof wood glue and galvanized nails or screws. Paint the outside of the hive with exterior latex paint in a light color (white, pale yellow, light blue). Light colors reflect heat in summer. Never paint the inside of the hive — bees will coat it with propolis anyway. If you’re building from scratch, our how to make a beehive guide covers the process.
Step 6: Install Your Bees
The big day! Installing bees is exciting and slightly nerve-wracking. For a package installation, remove the feeder can and queen cage from the package. Hang the queen cage between two frames in the brood box. Shake the package gently to pour the bees into the hive. Some beekeepers pour bees through a funnel, others simply dump them in. The bees will spread out and begin building comb immediately. Replace the frames, inner cover, and outer cover. After 3-4 days, check that the queen has been released from her cage.
Step 7: Feed and Monitor
New colonies need supplemental feeding to draw comb quickly. Mix a 1:1 ratio of white sugar to water and provide it in a frame feeder, top feeder, or entrance feeder. Check the colony after 3-4 days to ensure the queen is released and laying. Then inspect every 7-10 days throughout the first season to monitor growth, check for diseases, and add space as needed.
Starting beekeeping is a learning journey. Don’t be discouraged by setbacks — every beekeeper loses colonies at some point. The key is to learn, adapt, and keep going. For more tips and troubleshooting, see our full start guide.
How to Paint a Beehive: Protecting Wood and Bees
Painting your beehive serves two purposes: protecting the wood from weather damage and creating a comfortable environment for the bees. Exterior latex paint is the standard choice — it’s durable, weather-resistant, and safe for bees once dry. Our detailed tutorial on how to paint a beehive covers every step, but here are the essentials.
Choosing Paint
Use exterior latex paint with a low VOC (volatile organic compound) content. Oil-based paints can release fumes that harm bees, so avoid them. Choose light colors — white, cream, pale yellow, light blue, or light green. Light colors reflect sunlight and keep the hive cooler in summer. Dark colors absorb heat and can cause the wax comb to melt on hot days.
Preparing the Hive
Sand any rough edges or splinters. Use exterior-grade wood filler to fill any gaps or nail holes. Clean the surface with a damp cloth to remove dust. Apply painter’s tape to any areas you don’t want painted — especially the edges where boxes connect, as paint can make them sticky and difficult to separate.
Painting Technique
Apply a primer first for best adhesion, especially on new wood. Then apply two thin coats of paint, allowing each coat to dry completely before the next. Paint all exterior surfaces, but never paint the inside of the hive, the frames, or the inner cover. Bees will coat the interior with propolis naturally, which provides antimicrobial properties.
Ventilation and Curing
After painting, let the hive cure for at least a week in a well-ventilated area before installing bees. This allows any residual fumes to dissipate. Some beekeepers prefer to paint their hives in fall so they’re fully cured by spring. For a deeper dive on paint types, colors, and techniques, visit our full painting guide.

🎨 Beehive Paint & Tools
Low-VOC exterior paint in bee-friendly colors, plus brushes and tape. Safe for wooden hives.
View on AmazonFlow Hive vs Langstroth: A Detailed Comparison
The Flow Hive, invented in Australia, generated massive interest when it launched on Indiegogo in 2015. Its innovation is a patented honey extraction system that allows beekeepers to harvest honey directly from the hive without opening it or disturbing the bees. But how does it compare to the time-tested Langstroth? Our article on Flow Hive vs Langstroth provides an exhaustive analysis. Here’s a summary.
How the Flow Hive Works
The Flow Hive uses specially designed frames with partially formed hexagonal cells. Bees complete the cells and fill them with honey. When the beekeeper turns a key, the cells split vertically, creating channels that allow honey to flow down and out through a tap. The frames are then reset, and bees repair the cells and refill them. The process is mesmerizing to watch and requires no uncapping, extracting, or filtering.
Pros of the Flow Hive
- Minimal disturbance: Bees are not crushed or stressed during harvesting
- No extraction equipment needed: Saves money and space
- Easy for beginners: Simple harvesting process
- Educational: Watching honey flow is a great teaching tool
Cons of the Flow Hive
- High cost: Flow frames and hive components are significantly more expensive than traditional equipment
- Comb management: Bees may not always draw comb perfectly on the plastic frames
- Still requires beekeeping knowledge: The Flow Hive doesn’t eliminate the need for inspections, pest control, and swarm management
- Not ideal for cold climates: Honey may crystallize in the frames and be difficult to extract
Pros of the Langstroth
- Proven design: Used worldwide for over 150 years
- Modular and scalable: Easy to expand or reduce hive size
- Standardized parts: Widely available and interchangeable
- Higher honey yields: Generally produces more honey per colony
- Better for bee health management: Easier to inspect brood, replace frames, and treat for mites
Cons of the Langstroth
- Heavy lifting: Full boxes can weigh 50-90 pounds
- More equipment needed: Extractor, uncapping tools, etc.
- More disturbance during harvesting: Bees are inevitably disturbed during the extraction process
| Feature | Langstroth | Flow Hive |
|---|---|---|
| Initial Cost (1 hive) | $150-$300 | $500-$900 |
| Harvest Equipment | Extractor, uncapping knife | None needed |
| Honey Yield | High | Moderate |
| Disturbance | Higher | Lower |
| Comb Management | Flexible | Limited |
| Best For | Serious beekeepers, honey production | Hobbyists, convenience seekers |
Ultimately, the choice comes down to your goals. If you want maximum honey production and are willing to learn traditional methods, the Langstroth is the better choice. If you’re primarily interested in observing bees and harvesting small amounts of honey with minimal fuss, the Flow Hive might be perfect.
Beehives in Trees: Natural Colonies and Wild Honey Bees
Before humans built hives, honey bees lived in hollow trees, rock crevices, and other natural cavities. Even today, feral colonies thrive in forests, providing a genetic reservoir of hardy bees. Some beekeepers deliberately place bait hives or “bee trees” to attract swarms. Our article on types of beehives in trees explores this fascinating world in detail.
What Makes a Good Tree Cavity?
Wild bees prefer cavities that are about 40-60 liters in volume, with an entrance near the bottom and good insulation. The entrance is usually small, around 1-2 inches in diameter, to defend against predators. The cavity should be dry, with thick walls that provide thermal mass. Hardwood trees like oaks, maples, and beeches are preferred.
Bee Lining and Swarm Trapping
Bee lining is the ancient practice of locating wild bee colonies by observing the flight patterns of foraging bees. Beekeepers use a box with a honeycomb and watch the direction bees fly when they leave. By “lining” the bees back to their tree, they can locate the colony. Swarm traps — specially designed boxes baited with lemongrass oil and old comb — are placed in trees to catch swarms. This is a sustainable way to acquire bees with locally adapted genetics.
Bee Trees in the Landscape
Some landowners preserve “bee trees” on their property as habitat for pollinators. A hollow tree that hosts bees provides pollination services for gardens and orchards. If you have a bee tree, consider leaving it undisturbed — the bees have chosen it for good reasons. For more on wild bee habitats, see our guide on beehives in trees.
Essential Beekeeping Equipment and Tools
While bees do most of the work, you’ll need the right tools to manage them safely and effectively. Here’s a comprehensive list of beekeeping equipment, from the absolute essentials to nice-to-have extras.
Protective Gear
- Bee suit or jacket: A full suit with a veil offers maximum protection. A jacket with a veil is cooler in summer. Look for ventilated fabric.
- Gloves: Leather gloves are traditional, but nitrile gloves provide better dexterity and are easier to clean. Goat skin gloves are a good compromise.
- Veil: If you don’t wear a full suit, a separate veil is essential to protect your face.
Hive Tools and Accessories
- Smoker: A smoker produces cool smoke that calms bees by masking alarm pheromones. Use pine needles, wood chips, or cotton smoker fuel.
- Hive tool: This flat, pry-bar-like tool is used to separate boxes, lift frames, and scrape propolis. It’s the most-used tool in beekeeping.
- Bee brush: A soft brush for gently removing bees from frames during inspection. Use sparingly — bees don’t like being brushed.
- Frame grip: A handle that attaches to a frame for easier lifting, especially when frames are propolized.
Feeders
- Entrance feeder: A jar or tray placed at the hive entrance. Easy to refill but can encourage robbing.
- Frame feeder: A container that replaces a frame inside the hive. Less likely to encourage robbing.
- Top feeder: A box placed above the inner cover. Holds more syrup and is convenient for large feeding jobs.
Extraction Equipment
- Uncapping knife: A heated knife for removing wax caps from honey frames. Electric models make the job easier.
- Uncapping fork: A small fork for uncapping cells the knife misses.
- Honey extractor: A centrifuge that spins honey out of frames. Available in manual and electric models, from 2-frame to 60+ frame capacity.
- Strainer: A double sieve for filtering wax and debris from honey. Nylon mesh is easy to clean.
- Bottling bucket: A food-grade bucket with a honey gate for filling jars.
For a curated list of the best hive kits and tools, check our article on best beekeeping hives. And if you’re handy, you can build much of this equipment yourself — see how to make a beehive.

🍯 Stainless Steel Honey Extractor
Two-frame manual extractor with stainless steel drum and honey gate. Perfect for hobbyists and small-scale production.
See PriceHoney Bee Biology and the Social Structure of the Colony
To be a good beekeeper, you need to think like a bee. Understanding bee biology — their lifecycle, communication, and social organization — will help you make better management decisions. This section dives deep into the fascinating world of Apis mellifera, the Western honey bee.
The Three Castes
A honey bee colony consists of three distinct castes: one queen, thousands of workers, and a few hundred drones. Each caste has a specific role and physical characteristics that suit that role.
The Queen
The queen is the mother of every bee in the hive. She’s larger than workers, with a long, tapered abdomen and a shiny, hairless thorax. The queen’s primary role is reproduction — she can lay up to 2,000 eggs per day, which is more than her own body weight in eggs. She also produces a complex cocktail of pheromones that regulate colony behavior. The queen’s pheromones signal her presence, suppress worker reproduction, and maintain social cohesion. When the queen ages or dies, the colony quickly knows and begins raising a replacement.
The Workers
Workers are infertile females that perform all the essential tasks in the hive. They progress through a series of age-based roles, a phenomenon called “temporal polyethism.” Young workers (days 1-3) clean cells and feed larvae. Middle-aged workers (days 4-17) build comb, process nectar, receive nectar from foragers, and guard the entrance. Older workers (days 18-42) become foragers, venturing out to collect nectar, pollen, water, and propolis. Workers also regulate hive temperature, fanning their wings to cool the hive in summer and clustering to generate heat in winter.
The Drones
Drones are the only males in the hive. They’re larger than workers, with big compound eyes that help them spot virgin queens during mating flights. Drones have no stinger and cannot defend themselves. Their sole purpose is to mate with queens from other colonies. Drones gather in areas called “drone congregation areas” where they wait for virgin queens. After mating, the drone’s reproductive organs are ripped from his body, and he dies. Drones that don’t mate are evicted from the hive in autumn and left to starve.
The Lifecycle of a Bee
All bees undergo complete metamorphosis: egg, larva, pupa, adult. The queen lays a single egg in each cell. The egg hatches into a larva after three days. Workers feed the larva royal jelly for the first three days, then switch to a mixture of pollen and honey called “bee bread.” After about six days, the larva spins a cocoon and the cell is capped with wax. Inside, the larva transforms into an adult bee. Worker bees emerge after 21 days, drones after 24 days, and queens after 16 days.
The Waggle Dance
Karl von Frisch won the Nobel Prize in 1973 for decoding the waggle dance. Forager bees use this sophisticated communication system to share information about food sources. The angle of the dance relative to vertical indicates the direction of the food relative to the sun. The duration of the waggle phase indicates the distance. Bees can even account for the sun’s movement during the dance, adjusting the angle over time. The waggle dance allows a colony to efficiently exploit scattered flower resources, often sending thousands of foragers to a single productive patch.
Understanding bee biology will make you a better beekeeper. When you see bees performing a waggle dance, you know a strong nectar flow is underway. When you notice drones being evicted, you know winter is approaching. And when you hear the distinctive roar of a queenless hive, you know it’s time to intervene. For more on colony dynamics, see our article on how a beehive works.
Seasonal Beekeeping Calendar: What to Do When
Beekeeping is a year-round activity with distinct tasks for each season. The exact timing varies by climate, but the general rhythm remains the same. Here’s a comprehensive seasonal guide for temperate regions.
Spring: The Critical Season
Spring is the busiest and most important season for beekeepers. Colonies emerge from winter with depleted food stores and begin building up for the nectar flow. Your spring tasks include:
- Early spring (first warm days): Do a quick inspection to check food stores and queen presence. Feed sugar syrup or fondant if stores are low.
- Mid-spring: Reverse brood boxes, add honey supers, and monitor for swarm cells. This is when colonies are most likely to swarm.
- Late spring: Add more supers as the nectar flow peaks. Check for queen health and brood pattern.
Summer: The Nectar Flow
Summer is the season of abundance. Bees are foraging heavily, and honey production is at its peak. Your summer tasks include:
- Monitoring nectar flow: Add supers before bees run out of space. A crowded colony may swarm.
- Checking for pests: Varroa mite populations explode in summer. Monitor with sugar rolls or alcohol washes.
- Providing water: Ensure bees have access to a water source, especially in hot weather.
- Harvesting: By late summer, you can harvest surplus honey. Leave at least 60 pounds for the colony’s winter stores.
Autumn: Preparing for Winter
Autumn is the time to consolidate. The colony’s population shrinks, drones are evicted, and the focus shifts to winter survival. Your autumn tasks include:
- Treating for Varroa mites: This is the most critical treatment of the year. Use approved miticides like oxalic acid or formic acid.
- Feeding: If honey stores are insufficient, feed 2:1 sugar syrup to build winter reserves.
- Reducing entrances: Install entrance reducers to keep out mice and conserve heat.
- Winterizing: Add insulation, windbreaks, or wrap hives in cold climates.
Winter: Rest and Reflection
Winter is the quiet season, but it’s not without tasks. Bees cluster inside the hive, maintaining a core temperature of about 95°F even when outside temperatures drop well below freezing. Your winter tasks include:
- Monitoring food stores: Check hive weights. If light, provide emergency feed — candy boards, fondant, or dry sugar.
- Clearing entrances: Remove snow or ice blocking the entrance. Bees need fresh air even in winter.
- Planning: Review your records, order equipment, and plan for the coming spring.
For a more detailed seasonal breakdown, including regional variations, see our comprehensive starting guide.
Common Pests, Diseases, and Treatments in Beekeeping
Keeping bees healthy is a constant challenge. Diseases and pests can decimate a colony if left untreated. The most significant threats in North America are Varroa mites, American foulbrood, and wax moths. Here’s what you need to know.
Varroa Mites: The Biggest Threat
Varroa destructor is an external parasitic mite that feeds on the fat bodies of adult bees and developing brood. Originally from Asia, it spread to North America in the 1980s and has become the single most serious threat to honey bee health worldwide. Varroa mites weaken bees, transmit viruses, and contribute to colony collapse.
Monitoring: Regular monitoring is essential. Use the sugar roll test — shake a half-cup of bees in a jar with powdered sugar, then count the mites that fall through a mesh lid. Treat when mite levels exceed 3% (about 9 mites per 300 bees).
Treatment: Several treatment options exist, including oxalic acid vaporization, formic acid pads, thymol gels, and synthetic miticides. Rotate treatments to prevent resistance.
American Foulbrood (AFB)
American foulbrood is a bacterial disease caused by Paenibacillus larvae. It kills developing brood and is highly contagious. Infected larvae turn into a brown, gooey mass with a distinctive foul odor. AFB spores can survive for decades in equipment and honey. The standard treatment is unfortunately destruction — infected hives must be burned. Antibiotics like oxytetracycline can suppress symptoms but do not eliminate spores.
Wax Moths
Wax moth larvae eat beeswax, pollen, and debris. They’re a problem primarily in weak colonies with too much space and not enough bees to defend the comb. Strong colonies can usually manage wax moths on their own. To prevent wax moth damage, keep colonies strong, avoid adding supers too early, and store drawn comb in a cool, light-filled area with good airflow.
Small Hive Beetle
Small hive beetles are becoming an increasing problem in warm, humid regions. Beetle larvae feed on pollen, honey, and brood, contaminating everything with a slimy discharge. Use beetle traps and keep colonies strong. In severe infestations, treating the soil around the hive with beneficial nematodes can help.
Nosema
Nosema is a fungal gut disease that causes dysentery and weakens bees. It’s more common in cold climates where bees are confined for long periods. Treatment with fumagillin was once standard but has been largely discontinued. Good hygiene and proper ventilation help prevent nosema.
For more detailed disease management strategies, see our expanded guide on starting and maintaining healthy hives.
Harvesting Honey and Wax: From Hive to Jar
The harvest is the reward for months of careful management. Harvesting honey involves several steps, from knowing when to harvest to extracting, filtering, and bottling. Let’s explore the process in detail.
When to Harvest
Harvest honey when frames are at least 80% capped with wax. Capped honey has a moisture content below 18%, which prevents fermentation. Use a refractometer to verify moisture levels. In most regions, honey is harvested in late summer or early autumn, after the main nectar flow.
Removing Frames
Select frames that are fully capped and free of brood. Use a bee brush or a bee escape board to clear bees from the supers. Some beekeepers use fume boards with repellent — but bee escapes are gentler. Once the super is mostly bee-free, remove it and take it to your extraction area.
Uncapping
Use an uncapping knife (heated or unheated) to slice off the wax caps from both sides of each frame. Collect the wax cappings for later processing. An uncapping fork can clean up any low spots the knife misses.
Extracting
Place the uncapped frames in an extractor and spin. The centrifugal force pulls the honey out of the comb. For a 2-frame manual extractor, extract one side, flip the frames, and extract the other. Electric extractors can handle multiple frames at once.
Filtering and Bottling
Strain the extracted honey through a double sieve to remove wax particles and debris. Let it settle for 24-48 hours to allow air bubbles and fine particles to rise. Then bottle in clean, food-grade containers. Store honey in a warm, dry place — it will keep indefinitely if properly sealed.
Processing Wax
The wax cappings from uncapping can be melted and cleaned. Use a solar wax melter (free energy!) or a double boiler. Strain the melted wax through cheesecloth to remove debris. Use the wax for candles, lip balm, furniture polish, or trade it for foundation.

🫙 Honey Bottling Bucket
Food-grade 5-gallon bucket with honey gate and dual strainer. Makes bottling clean and easy.
Check on AmazonQueen Rearing and Colony Management
Raising your own queens is one of the most rewarding aspects of advanced beekeeping. It allows you to select for desirable traits — gentleness, productivity, disease resistance, and overwintering ability. While queen rearing requires specialized skills, even beginners can try simple methods like splits and walk-away splits.
Why Rear Queens?
- Genetic selection: Breed from your best colonies to improve your apiary’s overall quality
- Replacement: Replace old or failing queens before they fail
- Cost savings: Queens cost $30-50 each — raising your own saves money
- Local adaptation: Locally raised queens are better adapted to your climate and forage
Simple Queen Rearing: Walk-Away Splits
The simplest queen rearing method is the walk-away split. Take a strong colony and divide it into two or three parts, ensuring each part has eggs, young larvae, honey, and pollen. The queenless parts will raise emergency queen cells from young larvae. In about 16 days, new queens will emerge. This method requires no grafting or special equipment.
Advanced Methods: Grafting
Grafting involves transferring young larvae from a breeder queen into artificial queen cups. The cups are placed in a strong “cell builder” colony that feeds and raises the larvae into queen cells. After 10 days, the queen cells are moved to mating nucs. Grafting requires practice and a steady hand, but it allows precise control over the queen’s genetics.
Queen rearing is a deep topic with many variations. For more information, consult a comprehensive beekeeping text or take an advanced course from your local association.
Beekeeping for Pollination: Supporting Agriculture and Ecosystems
Honey bees are essential pollinators for many crops. Commercial beekeepers earn significant income by renting their hives to farmers for pollination services. In the United States, the almond industry alone requires over 2 million colonies each February. But even backyard beekeepers contribute to pollination of local gardens, orchards, and wild plants.
Crops That Depend on Honey Bee Pollination
Many fruits, vegetables, and nuts depend on honey bee pollination, including almonds, apples, avocados, blueberries, cherries, cucumbers, melons, pumpkins, and sunflowers. Some crops, like almonds, are completely dependent on honey bees — without them, no almonds would be produced.
Managing Hives for Pollination
When managing hives for pollination, timing is critical. Hives should be moved into the crop just as flowers begin to open. The colony should be strong, with plenty of brood and foragers. Some beekeepers use “bee attractants” like pheromone lures to encourage foraging on the target crop.
Protecting Pollinators
As a beekeeper, you can advocate for pollinator-friendly practices. Encourage farmers to avoid spraying pesticides during bloom, plant pollinator habitats, and support organic farming. In your own garden, plant a variety of flowers that bloom throughout the season to provide continuous forage for your bees.
Urban and Backyard Beekeeping: Bees in the City
Beekeeping isn’t just for rural areas — cities are surprisingly good habitats for bees. Urban areas often have diverse flower resources, less pesticide exposure, and warmer temperatures. Many cities, including New York, London, and Paris, have thriving urban beekeeping communities.
Challenges of Urban Beekeeping
- Space: Small yards or balconies limit hive numbers. Rooftop beekeeping is popular.
- Neighbors: Education and communication are key. Share honey with neighbors to build goodwill.
- Regulations: Many cities have specific beekeeping ordinances. Check before you start.
- Forage: Ensure bees have access to diverse flowers. Plant pollinator gardens and support community gardens.
Benefits of Urban Beekeeping
- Biodiversity: Bees pollinate city gardens, trees, and parks
- Education: Urban hives are great for teaching people about pollinators
- Community: Urban beekeeping groups are often active and welcoming
- Amazing honey: Urban honey often has a unique, complex flavor
If you’re considering urban beekeeping, check out our guide on starting beekeeping and look for a local beekeeping club in your city.
Troubleshooting Common Beekeeping Problems
Even experienced beekeepers encounter problems. Knowing how to diagnose and address common issues is essential. Here are the most frequent problems and their solutions.
Queenless Colony
Symptoms: No eggs or young larvae, agitated bees, increased drone population, workers laying eggs (multiple eggs per cell, scattered pattern).
Solution: Introduce a new queen or a frame of eggs from another colony. If workers are laying, the colony is harder to save — combine with a strong colony if necessary.
Swarming
Symptoms: Queen cells along the bottom of frames, crowded colony, reduced egg-laying.
Solution: Prevent swarming by providing space, reversing brood boxes, and splitting strong colonies. If you see swarm cells, you can make a split to simulate swarming without losing bees.
Robbing
Symptoms: Bees fighting at the entrance, wax debris on the landing board, bees trying to enter through cracks.
Solution: Reduce the entrance, cover any holes, and avoid feeding during nectar dearth. Robbing can destroy a weak colony quickly.
Absconding
Symptoms: Colony leaves the hive entirely, leaving empty frames. Often triggered by mites, disease, or disturbance.
Solution: Prevent by maintaining healthy colonies, providing good forage, and minimizing disturbances.
Chalkbrood
Symptoms: White or black mummified larvae on the landing board or in cells.
Solution: Usually self-limiting. Improve ventilation and avoid stressing the colony. Requeen from a more resistant strain.
For more detailed troubleshooting, see our comprehensive beekeeping guide.
Honey Bee Breeds and Genetics: Choosing the Right Bees
Not all honey bees are alike. Just as dog breeds range from placid golden retrievers to high-strung terriers, honey bee subspecies and hybrid lines vary enormously in temperament, productivity, disease resistance, and climate tolerance. Choosing the right genetic stock for your region and goals can make the difference between a rewarding first season and a frustrating one. This section walks through the major honey bee breeds available to hobbyists and commercial keepers alike, along with practical guidance on selecting and maintaining good genetics in your apiary.
Italian Bees (Apis mellifera ligustica)
Italian bees are the most popular breed in North America, and for good reason. They’re gentle, build up quickly in spring, and are prolific brood-rearers, which translates into strong populations for nectar flows. Their light golden-yellow coloring makes queens easy to spot during inspections — a real advantage for beginners still learning to find their queen among thousands of bees. Italians also produce beautiful white cappings on their honey, which many hobbyists find aesthetically pleasing.
The trade-off is that Italians are enthusiastic brood-rearers even when forage is scarce, which means they can consume stores quickly and may need supplemental feeding during dearths. They’re also somewhat more prone to robbing behavior than some other strains, and their populations can be slower to shut down brood rearing in autumn, leaving larger winter clusters that need more stores to sustain them.
Carniolan Bees (Apis mellifera carnica)
Originating from the mountains around Slovenia and the Alps, Carniolans are prized for their exceptionally gentle temperament and their ability to rapidly adjust colony size to match available forage. They ramp up brood production explosively when nectar is flowing and throttle back quickly when it stops, which makes them efficient with stores and well-suited to regions with short, intense nectar flows and long winters. Carniolans are dark, almost black, which can make spotting the queen more challenging for new beekeepers.
Because of their rapid buildup, Carniolan colonies are somewhat more prone to swarming if not managed proactively with adequate space. They also tend to be excellent overwinterers, forming tight, efficient clusters that conserve stores well in cold climates.
Russian Bees
Russian honey bees were imported to the United States in the late 1990s specifically for their resistance to Varroa mites and tracheal mites, traits developed over decades of co-evolution with Varroa in the Russian Far East. Russian bees exhibit natural hygienic behavior, detecting and removing mite-infested brood before the mites can reproduce further. They also tend to rear brood only when pollen is actually coming in, which conserves resources during dearths.
The downside is that Russian bees can be more variable in temperament from colony to colony, and their brood-rearing patterns can seem erratic to beekeepers accustomed to Italians — they may appear to have a spotty brood pattern that’s actually a deliberate response to fluctuating forage rather than a sign of disease.
Buckfast Bees
Developed by Brother Adam at Buckfast Abbey in England over decades of selective breeding, Buckfast bees are a hybrid line selected specifically for gentleness, productivity, disease resistance, and resistance to tracheal mites. They tend to be calm on the comb, less prone to following behavior (chasing beekeepers after an inspection), and produce good honey crops. Buckfast queens can be harder to source in some regions and command a premium price.
Africanized Honey Bees: A Note on Safety
In parts of the southern United States, Mexico, Central America, and South America, beekeepers must contend with Africanized honey bees (sometimes called “killer bees” in media coverage, though the nickname overstates the danger to any individual encounter). Africanized bees are a hybrid between European stock and the African subspecies Apis mellifera scutellata, introduced to Brazil in the 1950s and subsequently spread northward. They are not more venomous than European bees, but they defend their colonies far more aggressively, in greater numbers, and over a wider area, and they’re more prone to swarming and absconding.
If you keep bees in an Africanized zone, work with your local agricultural extension to source certified European queens, requeen aggressive colonies promptly, and take extra precautions with protective gear and hive placement away from foot traffic. Never attempt to manage a suspected Africanized colony without proper training and equipment.
Choosing Genetics for Your Apiary
For most beginners, a locally raised queen — regardless of specific breed lineage — is the best choice. Local queens come from colonies that have already survived your regional winters, pests, and forage patterns, giving them a head start in adaptation that imported stock can’t match. Buying nucs or queens from a nearby, reputable breeder supports regional genetic diversity and often costs less once you account for shipping stress on package bees. Many state and regional beekeeping associations maintain lists of local queen breeders, which is a great place to start your search.
| Breed | Temperament | Buildup Speed | Mite Resistance | Best For |
|---|---|---|---|---|
| Italian | Gentle | Fast | Low | Beginners, honey production |
| Carniolan | Very gentle | Very fast (matches forage) | Moderate | Cold climates, efficient foragers |
| Russian | Variable | Conservative | High | Low-treatment, mite-prone regions |
| Buckfast | Gentle | Moderate-fast | Moderate-high | All-around production |
| Africanized (feral) | Defensive | Fast | High | Not recommended for hobbyists |
Whatever breed you start with, remember that genetics are only part of the picture. Good management — adequate space, timely mite treatment, and proper nutrition — will influence colony success just as much as the bees’ pedigree. For more on selecting and raising your own queens once you’re ready to breed for local adaptation, revisit our section on queen rearing and colony management above.
Beekeeping Economics: Turning Honey Into Income
Many beekeepers start with a single backyard hive purely for the enjoyment of it, only to discover a few seasons later that they’re sitting on far more honey, wax, and pollen than their household can use. Selling surplus hive products can offset your equipment costs, fund the expansion of your apiary, or even grow into a legitimate side business or full-time enterprise. This section covers the practical and financial realities of monetizing your beekeeping hobby.
Understanding Your Startup and Ongoing Costs
Before thinking about revenue, it helps to have a clear picture of costs. A single hive setup, including protective gear, tools, and bees, typically runs $400–$700 in the first year. Each additional hive after that costs less, since gear like suits and extractors are shared across the apiary. Ongoing costs include sugar for feeding (roughly $20–$40 per hive per year), mite treatments ($15–$30 per hive per year), occasional queen replacement ($30–$50), and equipment replacement or repair. Serious sellers will also want to budget for labels, jars, a scale, and possibly liability insurance.
Honey Pricing and Local Market Dynamics
Raw, local honey typically retails for $8–$16 per pound at farmers markets and roadside stands, though prices vary significantly by region, honey varietal, and packaging. Specialty honeys — single-source varietals like tupelo, orange blossom, or buckwheat — command premium prices, sometimes double or triple that of generic wildflower honey. Comb honey, sold in the frame or cut into squares, also fetches a premium over extracted honey because of the labor and specialized equipment required to produce it without damage.
When setting your prices, research what other local beekeepers charge for comparable products, and don’t undercut the market just to move volume — doing so devalues everyone’s honey in your area and makes it harder for the whole local beekeeping community to sustain fair prices.
Legal Requirements for Selling Honey
Regulations for selling honey vary by state and country, but most jurisdictions treat honey as a low-risk food product with lighter regulatory requirements than perishable foods. In the U.S., many states have “cottage food” laws that allow small-scale producers to sell honey directly to consumers without a commercial kitchen license, provided labeling requirements are met. Labels typically must disclose net weight, a list of ingredients (which for pure honey is simply “honey”), and your business name and address. Some states require honey to be tested or registered, and city or county health departments may have additional rules for farmers market vendors. Always check with your state department of agriculture before selling commercially.
Beyond Honey: Diversifying Hive Product Revenue
- Beeswax products: Candles, lip balms, wood polish, and wraps command strong margins relative to their material cost.
- Pollination services: Renting hives to local orchardists or market gardeners can provide steady income independent of honey yields, though it requires reliable transportation and strong, mobile colonies.
- Nucs and packages: Once your apiary is established, selling nucleus colonies or queens to other beekeepers can be more profitable per hour of labor than honey production.
- Education and tours: Farm-based beekeepers increasingly offer hive tours, workshops, or “adopt-a-hive” programs that generate income while building community goodwill.
- Value-added products: Honey-based mead, infused honeys (with herbs, chili, or citrus), and honey-sweetened baked goods can extend your product line and margins.
Scaling Up: From Hobby to Sideline to Commercial
Most beekeepers who scale up do so gradually. A hobbyist with two or three hives can typically expand to 10–20 hives without major changes in workflow, mostly by adding weekend labor and storage capacity for equipment and honey. Beyond about 25–30 hives, many beekeepers invest in a proper extraction room, a truck or trailer for moving equipment, and possibly part-time help during harvest. Full-time commercial operations, running hundreds to thousands of colonies, typically diversify into pollination contracts as their primary revenue stream, with honey as a secondary product — pollination fees from almond growers alone can exceed what many small operations earn from honey sales in an entire year.
Whatever scale you’re aiming for, track your numbers from the start. A simple spreadsheet recording costs, yields, and sales per hive will tell you far more about whether beekeeping makes financial sense for you than any general industry statistic.
Climate-Specific Beekeeping: Adapting to Cold, Heat, and Humidity
Beekeeping techniques that work perfectly in a mild coastal climate may fail outright in a harsh continental winter or a humid subtropical summer. Understanding how to adapt your management to your specific climate is one of the most important — and most often overlooked — skills a beekeeper can develop. This section breaks down strategies for the three broad climate categories most beekeepers encounter.
Cold Climate Beekeeping
In regions with long, harsh winters — much of the northern United States, Canada, and northern Europe — winter survival is the single biggest challenge beekeepers face. Colonies don’t hibernate; they form a tight cluster around the queen, generating heat by vibrating their flight muscles and rotating positions so no bee stays on the cold outer edge for too long. This cluster can maintain a core temperature near 95°F even when outside air is well below freezing, but it requires substantial energy reserves.
Cold-climate beekeepers should ensure colonies enter winter with at least 60–80 pounds of honey stores (more in the harshest climates), reduce entrances to conserve heat and exclude mice, and consider wrapping hives in insulating material or building windbreaks. Upper entrances or moisture quilts are essential — condensation dripping onto the cluster is often more deadly than cold itself, since wet, chilled bees can die even when food is plentiful. Choosing locally adapted, winter-hardy genetics (Carniolans and Russian bees often perform well) gives colonies a significant head start.
Hot Climate Beekeeping
In the desert Southwest, parts of the Deep South, and other hot regions, the challenge flips: bees must dissipate heat rather than conserve it. Worker bees fan their wings vigorously at the entrance and collect water to spread inside the hive, using evaporative cooling to keep the brood nest from overheating — comb can melt and collapse above roughly 95–100°F if ventilation fails. Hot-climate beekeepers should ensure hives have adequate ventilation (screened bottom boards, ventilated covers, or small shims that create airflow gaps), provide a reliable nearby water source, and consider locating hives in partial afternoon shade to reduce direct sun exposure during the hottest hours.
Robbing pressure and pest loads, including small hive beetles, also tend to be more intense in hot climates, so strong, well-ventilated colonies with reduced entrances during dearths fare best.
Humid and Tropical Climate Beekeeping
In humid subtropical and tropical regions, beekeepers contend with near-constant brood rearing (since there’s rarely a true winter dearth), heavier pest and disease pressure due to warm, moist conditions favoring pathogens, and the near-universal presence of small hive beetles and, in many regions, Africanized genetics. Nectar flows can be more continuous but also more erratic, tied to rainfall patterns rather than a single clear seasonal bloom. Hive stands should be elevated well above ground level to reduce ant and moisture problems, and beekeepers often inspect more frequently — sometimes weekly — because colony conditions can change faster in warm climates than in temperate ones.
General Climate Adaptation Principles
- Talk to experienced local beekeepers before assuming any technique from a book or a beekeeper in a different climate zone will apply directly to your situation.
- Source queens and nucs from breeders in a similar climate whenever possible, since local adaptation often matters more than breed name alone.
- Adjust your seasonal calendar (see the seasonal beekeeping calendar above) to match your actual bloom and dearth periods rather than a generic template.
- Monitor hive weight and moisture, not just temperature, since both extremes of cold and damp, and heat and drought, stress colonies in different ways.
Beeswax, Propolis, Pollen & Royal Jelly: The Hive’s Other Treasures
Honey gets most of the attention, but a healthy hive produces a remarkable range of other valuable substances. Understanding and utilizing these hive products can add both income streams and personal satisfaction to your beekeeping practice.
Beeswax
Bees secrete wax from glands on the underside of their abdomen, chewing and shaping it into the hexagonal comb that forms the physical structure of the hive. A colony must consume roughly six to eight pounds of honey to produce a single pound of wax, which is why reusing drawn comb (rather than melting it down) saves bees enormous energy. Rendered, cleaned beeswax has dozens of uses: candles, cosmetics, wood and leather conditioners, food wraps, lubricants for tools and zippers, and as an ingredient in traditional medicines and skin balms. To render wax cleanly, melt cappings and old comb in a double boiler or solar wax melter, then strain through cheesecloth to remove propolis, cocoons, and debris — the cleaner the wax, the higher the price it commands.
Propolis
Propolis is a resinous mixture bees collect from tree buds and sap flows, then mix with their own secretions to create a sticky, antimicrobial sealant. Bees use it to fill gaps, smooth rough surfaces, and coat the interior of the hive, effectively sterilizing their living space. Propolis has a long history of use in traditional and alternative medicine for its purported antibacterial and anti-inflammatory properties, and it’s sold as a tincture, in capsule form, or as a raw scraping. Collecting propolis is straightforward: many beekeepers use a screen placed atop the frames, which bees fill with propolis; the screen is then chilled to make the brittle propolis easy to crack off and collect.
Bee Pollen
Foraging bees pack pollen into “baskets” on their hind legs and carry it back to the hive as a protein source for brood rearing. Beekeepers can collect surplus pollen using a pollen trap — a mesh screen at the entrance that scrapes some of the pollen pellets off returning foragers’ legs into a collection tray. Fresh bee pollen is sold as a health food supplement, though it should always be dried or frozen promptly, since it spoils quickly at room temperature. Pollen traps should only be used on strong colonies with ample stores, and only for limited periods, since removing too much pollen deprives the colony of its own protein source.
Royal Jelly
Royal jelly is a nutrient-dense secretion produced by young worker bees’ hypopharyngeal glands, fed to all larvae for their first few days and exclusively to queen larvae throughout their development. Its concentrated nutrition is what triggers a genetically identical larva to develop into a queen rather than a worker. Commercial royal jelly production requires specialized grafting techniques similar to queen rearing, harvesting the jelly from queen cells before they’re capped. It’s a labor-intensive niche product, sold as a supplement, and generally more feasible for dedicated specialty producers than casual hobbyists.
Bee Venom
A small niche of beekeepers collect bee venom for use in apitherapy and some cosmetic products, using specialized collection plates that give bees a mild electric stimulus to sting without dying. This is a highly specialized practice requiring particular equipment and is not recommended for beginners.
Mead Making: Turning Honey Into Wine
Mead — fermented honey wine — is often called humanity’s oldest alcoholic beverage, predating both beer and grape wine in the historical record. For beekeepers with surplus honey, particularly honey that’s crystallized, off-flavor for the table, or simply abundant, mead making is a natural extension of the craft. This section offers a beginner-friendly overview; dedicated meadmaking guides go into far greater depth on yeast selection and aging.
The Basic Process
At its simplest, mead is made by dissolving honey in water, adding yeast, and allowing fermentation to convert the honey’s sugars into alcohol and carbon dioxide. A standard “session mead” might use about 2–3 pounds of honey per gallon of water for a lighter, lower-alcohol drink, while a traditional “sack mead” can use 3–4 pounds per gallon or more for a sweeter, higher-alcohol result. Wine yeast (such as Lalvin D47 or 71B) is generally preferred over bread yeast, since wine yeasts tolerate higher alcohol levels and produce cleaner flavors.
Fermentation and Aging
After combining honey, water, and yeast (plus yeast nutrient, which honey lacks in sufficient quantity on its own), the must ferments in a sealed vessel with an airlock for anywhere from two weeks to several months, depending on the honey-to-water ratio and desired alcohol content. Primary fermentation is usually vigorous for the first week or two, then slows. Many mead makers rack the mead — siphoning it off the sediment into a clean vessel — once or twice during aging to clarify the finished product and avoid off-flavors from prolonged contact with dead yeast.
Young mead often tastes harsh or overly alcoholic; like wine, mead generally improves with bulk aging, sometimes for six months to several years, mellowing into a smoother, more complex drink.
Mead Variations
- Melomel: Mead fermented with fruit, such as blackberries, cherries, or peaches, adding both flavor and additional fermentable sugars.
- Metheglin: Mead flavored with herbs and spices, such as ginger, cinnamon, or chamomile.
- Cyser: Mead made with apple juice or cider in place of some or all of the water.
- Pyment: Mead made with grape juice, blending characteristics of mead and wine.
- Braggot: A hybrid of mead and beer, incorporating malted grain alongside honey.
Legal Considerations
In most countries, fermenting alcohol for personal, non-commercial use at home is legal within certain volume limits, but selling mead requires a winery or brewery license and compliance with alcohol regulations, which vary significantly by jurisdiction. If you’re interested in selling mead commercially, research your local and national alcohol production licensing requirements well before scaling up production, since the rules are considerably more involved than those for selling honey itself.
Even if you never sell a drop, brewing a batch of mead from your own honey is one of the most satisfying ways to close the loop on your beekeeping year — turning the fruits of your bees’ labor into something to share with friends around the table.
Bee-Friendly Gardening: Planning Forage for Your Colonies
A hive is only as strong as the forage available around it. Even the best-managed colony will struggle in a landscape of manicured lawns and ornamental plants that offer little nectar or pollen. Thoughtful, bee-friendly gardening — whether in your own yard or through advocacy in your broader community — can dramatically improve your colonies’ health, honey production, and overwintering success.
Understanding Bloom Succession
The single most important gardening principle for beekeepers is bloom succession: ensuring something is flowering from the very first warm days of spring through the last frosts of autumn. Gaps in bloom, known as “dearths,” force colonies to draw down their stores and can trigger robbing behavior between hives. A well-planned bee garden layers early spring bulbs and flowering trees, summer perennials and clover, and late-season asters and goldenrod to keep forage continuous.
Top Plants for Each Season
- Early spring: Crocus, willow, maple, redbud, and fruit tree blossoms provide crucial early pollen when colonies are building up brood after winter.
- Late spring: Clover, black locust, tulip poplar, and berry brambles often produce the year’s heaviest nectar flow in temperate regions.
- Summer: Basswood (linden), sunflowers, mint family herbs, squash and cucumber blossoms, and native wildflowers sustain colonies through the height of the season.
- Late summer and autumn: Goldenrod and aster are critical late-season sources in much of North America, often providing the final nectar push before winter and contributing significantly to winter stores.
Designing a Bee-Friendly Landscape
Favor single-flowered, open blooms over heavily hybridized double-flowered ornamentals, which often produce little nectar or pollen and can even be physically inaccessible to bees. Plant in generous drifts rather than single specimens — a mass planting of one species is more efficient for foragers than scattered individual plants of many species, since bees exhibit “flower constancy,” visiting one type of bloom per foraging trip. Native plants are usually a strong choice since they’re adapted to local pollinators and require less water and maintenance once established.
Avoiding Pesticide Harm
Perhaps the single most important thing a gardener can do for bees is avoid systemic pesticides, particularly neonicotinoids, which can be taken up into a plant’s nectar and pollen and harm foraging bees long after application. If pest control is necessary, apply treatments in the evening after bees have stopped foraging for the day, and choose the least persistent, least bee-toxic products available. Encourage neighbors and local municipalities to reduce unnecessary pesticide use on public land and street trees, since foragers routinely travel two miles or more from the hive and are affected by conditions well beyond your own property line.
Water Sources in the Garden
Bees need a reliable water source for hive cooling and diluting stored honey to feed larvae. A shallow dish filled with pebbles or marbles (so bees have a dry landing spot and don’t drown) placed near the hive reduces the temptation for bees to visit neighbors’ pools, birdbaths, or pet water bowls — a common source of neighborly friction in urban beekeeping.
Beekeeping Associations, Certification & Continuing Education
No single guide, however comprehensive, can replace the value of hands-on mentorship and a community of fellow beekeepers. Local, state, and national beekeeping associations are among the most valuable resources available to both new and experienced apiarists.
Local Beekeeping Clubs
Nearly every region with an active beekeeping community has a local club or association that meets monthly, hosts an annual “bee school” for beginners, and often maintains a mentorship program pairing newcomers with experienced members. These clubs are typically the best source of locally adapted queens and nucs, region-specific management advice, and honest, unvarnished troubleshooting help when something goes wrong in your hive. Many clubs also organize group equipment purchases, extractor loans, and swarm-catching networks that new beekeepers can join to acquire bees for free.
State and National Organizations
Most countries with significant beekeeping industries have national associations that advocate for beekeeper interests, fund research, and publish educational materials. In the United States, groups like the American Beekeeping Federation and the American Honey Producers Association represent commercial and hobbyist interests at a policy level, while state beekeeping associations often coordinate more regional education and certification programs. These organizations are valuable sources of research-backed information on pest management, regulatory changes, and industry trends.
Master Beekeeper and Certification Programs
Several universities and beekeeping associations offer structured certification pathways, often called Master Beekeeper programs, that combine coursework, practical exams, and community service requirements across multiple levels (such as apprentice, journeyman, and master). These programs aren’t required to keep bees, but they provide a structured way to deepen your knowledge, validate your expertise for teaching or selling nucs and queens, and connect with a broader network of serious beekeepers. Programs typically take several years to complete at the highest levels and often require passing both written and practical field exams.
Online Communities and Resources
Beyond in-person clubs, numerous online forums, social media groups, and video channels host active beekeeping communities where members troubleshoot problems in real time with photos and detailed descriptions. While online advice should always be weighed against locally specific conditions, these communities are valuable for quick sanity checks and exposure to a wider range of management philosophies than any single local club might offer.
Continuing Education for Experienced Keepers
Even after years of experience, most successful beekeepers continue attending conferences, workshops, and research updates, since the field evolves constantly — new mite treatments, updated disease science, and shifting climate patterns all require beekeepers to keep learning. Subscribing to a research-based beekeeping journal or attending an annual state beekeeping conference is a worthwhile investment for anyone managing more than a hive or two.
Record Keeping and Hive Management Systems
It’s easy to underestimate how quickly details blur together once you’re managing more than one or two hives. Which colony superseded its queen last month? Which hive had the heaviest mite count at the last check? Good record keeping turns vague impressions into actionable data, and it becomes indispensable as your apiary grows.
What to Record at Every Inspection
- Date and weather conditions: Temperature and recent rainfall affect both bee behavior and your interpretation of what you observe.
- Queen status: Was the queen seen, or was her presence confirmed by eggs and young larvae? Note her marking color and age if known.
- Brood pattern: Solid, spotty, or absent — and any signs of disease in the brood.
- Population and temperament: A rough sense of colony strength (frames covered with bees) and how defensive the colony was during the inspection.
- Stores: Estimated honey and pollen reserves, noting whether feeding is needed.
- Pest counts: Mite counts from sugar rolls or alcohol washes, and any signs of small hive beetle or wax moth activity.
- Actions taken: Treatments applied, supers added or removed, splits made, and any other interventions.
Paper vs. Digital Systems
Some beekeepers prefer simple weatherproof notebooks or laminated cards attached to each hive, filled out with a pencil during the inspection itself. Others use dedicated beekeeping apps or spreadsheet templates that let them track trends across an entire season or across multiple years, generating charts of mite pressure, honey yields, and queen performance over time. There’s no universally correct system — the best record-keeping method is the one you’ll actually use consistently, even on a busy inspection day.
Hive Identification
As your apiary grows beyond two or three hives, a simple numbering or naming system for each hive stand becomes essential. Many beekeepers paint a number directly on the hive body or attach a weatherproof tag. Consistent identification prevents confusion when comparing notes across a season and is particularly important if you’re selectively breeding from your strongest colonies, since you’ll need to trace lineage and performance across generations.
Using Records to Improve Decision-Making
Good records reveal patterns that a single inspection can’t show. A colony that’s consistently the first to build up in spring and the last to need mite treatment might be an excellent candidate for queen rearing. A hive that repeatedly struggles despite good management might have an underlying genetic weakness worth requeening. Tracking honey yields per hive over several seasons also helps you make informed decisions about which colonies, locations, or management practices are working best for your specific apiary.
Migratory Beekeeping and Commercial Pollination Logistics
While most hobbyist beekeepers keep their hives in one fixed location year-round, commercial beekeeping in North America is built around migratory operations that move thousands of colonies across the country to follow pollination contracts and nectar flows. Understanding this side of the industry offers useful context even for beekeepers who never plan to truck a single hive anywhere.
The Almond Pollination Cycle
Each February, California’s Central Valley hosts the largest managed pollination event on Earth: well over a million acres of almond orchards require an estimated two colonies per acre, drawing more than two-thirds of all managed honey bee colonies in the United States for a few critical weeks of bloom. Commercial beekeepers from as far away as Florida, Texas, and the Dakotas truck their hives to California each winter, timing their arrival to coincide with bloom, then move colonies onward to other pollination contracts or summer nectar flows in the months that follow.
Other Major Pollination Crops
Beyond almonds, honey bees are contracted to pollinate apples in Washington and the Northeast, blueberries in Maine and Michigan, cherries in the Pacific Northwest, and a wide range of other fruit, vegetable, and seed crops throughout the growing season. Some commercial beekeepers follow a circuit that keeps their colonies moving nearly year-round, chasing bloom from the earliest almond flowers through late-season fall flows before returning south for winter.
The Logistics and Challenges of Moving Hives
Moving colonies requires careful timing — hives are typically loaded and moved at night or in the early morning while foragers are inside, using specialized forklifts, flatbed trucks, and hive straps to secure stacks during transit. Ventilation is critical during transport, since a poorly ventilated load can overheat and kill an entire truckload of colonies within hours. Migratory beekeepers also face concentrated disease and pest pressure, since bringing together colonies from many different operations in one location (such as the almond orchards) increases opportunities for disease transmission between apiaries.
Economic Realities of Migratory Beekeeping
Pollination contract fees have risen substantially over the past two decades as almond acreage has expanded and colony losses have made healthy hives more valuable; almond pollination fees alone can represent a majority of some commercial operations’ annual revenue, often exceeding what the same operation earns from honey sales. This economic reality has reshaped much of the American beekeeping industry around pollination services rather than honey production as the primary business model, a significant shift from a century ago when honey was the dominant revenue source for most commercial apiaries.
Common Myths and Misconceptions About Beekeeping
Beekeeping attracts a fair amount of folklore, outdated advice, and outright myths, some of which can actually harm your bees if followed uncritically. Separating fact from fiction will make you a more effective and confident beekeeper.
Myth: All Bees Sting, and Stinging Always Kills the Bee
Only female bees (workers and queens) have stingers; drones have no stinger at all and cannot sting. Additionally, only worker bees die after stinging, because their barbed stinger lodges in mammalian skin and tears free from the bee’s abdomen. Queens have smooth, unbarbed stingers and can sting repeatedly without dying, though they rarely sting humans and reserve their stinger primarily for rival queens.
Myth: Local Honey Cures Seasonal Allergies
This popular belief holds that eating local honey exposes you to small amounts of local pollen, building immunity over time. However, the pollen that triggers most seasonal allergies is wind-borne (from grasses, trees, and ragweed), while bees primarily collect insect-pollinated flower pollen, which rarely overlaps significantly with common allergens. While local honey is a wonderful product worth supporting for many reasons, robust scientific evidence for its allergy-curing properties remains limited.
Myth: Africanized Bees Are Simply More Venomous
As discussed in our section on honey bee breeds and genetics, Africanized bees are not more venomous per sting than European honey bees. The danger comes from their heightened defensiveness, tendency to attack in far greater numbers, and willingness to pursue perceived threats over longer distances — meaning victims may receive many more stings in an encounter, not that each individual sting is worse.
Myth: You Need to Wear Full Protective Gear at All Times
Many experienced beekeepers work calm, well-tempered colonies with minimal gear — sometimes just a veil — particularly during gentle weather and nectar flows when bees are least defensive. That said, this comes with experience and colony-specific knowledge; beginners should always use full protective gear until they’ve developed a good feel for their particular bees’ temperament and their own comfort level with stings.
Myth: Honey Never Spoils, So Storage Doesn’t Matter
While properly sealed, low-moisture honey can remain edible for an extraordinarily long time, honey that absorbs moisture from humid air can ferment, and honey stored in direct sunlight or high heat degrades in flavor, color, and beneficial enzyme content over time. Proper storage — sealed containers in a cool, dark place — still matters for maintaining quality.
Myth: More Hives Automatically Means More Honey Per Hive
Overcrowding an area with too many hives relative to available forage actually reduces per-hive honey yields, since colonies compete for the same limited nectar and pollen resources. Research on hive density and forage availability increasingly informs recommendations on how many colonies a given landscape can reasonably support, and responsible beekeepers consider this before adding more hives to an already saturated area.
Myth: A Queenless Hive Is Always a Lost Cause
While a queenless colony is certainly in crisis, many can be saved if caught early enough, either by introducing a new mated queen, providing a frame of eggs so the colony can raise its own emergency queen, or combining the queenless colony with a strong queenright one. The key, as covered in our troubleshooting section, is prompt diagnosis and intervention before laying workers become established, which makes requeening substantially more difficult.
Glossary of Beekeeping Terms
Beekeeping has its own rich vocabulary, and understanding these terms will help you follow discussions with other beekeepers, read beekeeping literature, and communicate clearly about your own colonies. Here’s a reference glossary of commonly used terms throughout this guide and in the wider beekeeping community.
| Term | Definition |
|---|---|
| Apiary | A location where beehives are kept; also called a “bee yard.” |
| Bee space | The precise gap (roughly 3/8 inch) that bees leave between combs, discovered by Langstroth and foundational to movable-frame hive design. |
| Brood | Developing bees at any stage: eggs, larvae, and pupae. |
| Capped brood | Brood cells sealed with a wax cap while the larva pupates inside. |
| Dearth | A period with little or no nectar or pollen available to forage. |
| Drawn comb | Comb that bees have already built out from foundation or a bare frame. |
| Foundation | A thin sheet of wax or plastic embossed with a hexagonal pattern to guide comb building. |
| Nuc (nucleus colony) | A small starter colony, typically on five frames, with a laying queen, brood, and stores. |
| Package | A screened box of loose bees (usually about 3 pounds) with a separately caged queen, sold without comb. |
| Pheromone | A chemical signal bees use to communicate, regulate behavior, and maintain colony cohesion. |
| Propolis | A resinous, antimicrobial substance bees collect from plants and use to seal gaps in the hive. |
| Queen excluder | A grid that allows workers through but blocks the larger queen, used to keep brood out of honey supers. |
| Requeen | To replace an existing queen with a new one, usually to improve genetics or temperament. |
| Robbing | Bees from one colony stealing honey stores from another, often triggered by dearth or a weak, poorly defended hive. |
| Sugar roll / alcohol wash | Diagnostic tests that dislodge Varroa mites from a bee sample for counting. |
| Super | A hive box used for storing surplus honey, positioned above the brood boxes. |
| Supersedure | The natural replacement of an aging or failing queen by the colony itself, without swarming. |
| Swarm | A group of bees, including the old queen, that leaves the hive to found a new colony, usually in response to overcrowding. |
| Varroa destructor | The parasitic mite considered the single greatest threat to managed honey bee health worldwide. |
| Waggle dance | The figure-eight dance foragers use to communicate the direction and distance of a food source. |
Keep this glossary handy as you continue exploring beekeeping literature, local club discussions, and the deeper sections of this guide.
Frequently Asked Questions About Beekeeping
How much does it cost to start beekeeping?
Expect to spend $400–$700 for a complete starter setup, including a hive, protective gear, tools, and bees. You can reduce costs by building your own hive — see our DIY guide. Beekeeping also has ongoing costs: sugar for feeding, mite treatments, and replacement equipment.
How much honey can one hive produce?
A healthy hive can produce 30–60 pounds of surplus honey per year, though yields vary by location, weather, and management. In a good year with strong nectar flow, some hives produce over 100 pounds. Remember to leave at least 60 pounds for the bees’ winter stores.
Do I need a license to keep bees?
Most areas don’t require a license, but many require hive registration. Check with your local agricultural extension or state department of agriculture. Some cities have specific ordinances about hive placement and numbers.
How often should I inspect my hive?
During the active season (spring through fall), inspect every 7–10 days. This allows you to catch problems early without over-disturbing the colony. In winter, avoid opening the hive — check from the outside only.
Can I keep bees in a small backyard?
Yes! Many urban and suburban beekeepers maintain hives in small yards or on rooftops. Ensure the entrance faces away from pedestrian areas, provide a water source, and talk to your neighbors. For more, see our urban beekeeping guide.
What’s the difference between a package and a nuc?
A package is a screened box containing a queen and 2–3 pounds of loose workers. A nuc (nucleus colony) is 5 frames of drawn comb with bees, brood, honey, and a queen. Nucs establish faster but cost more. Packages are more widely available and ship more easily.
What should I do if my bees swarm?
If you catch the swarm, you can hive it in a new box. If it escapes, don’t panic — swarming is natural. The remaining colony will raise a new queen and rebuild. Prevent future swarms by providing space and splitting strong colonies.
Are bees aggressive?
Most honey bees are gentle if you move slowly, use smoke, and avoid crushing bees. Some breeds (like Buckfast and Italians) are known for gentleness. If your bees are consistently aggressive, you may need to requeen with a gentler strain.
How do I know if my queen is healthy?
A healthy queen lays eggs in a solid brood pattern, with few empty cells. She should be visible during inspections (though she can be elusive). If you see eggs and young larvae, the queen is likely fine. If brood is spotty or absent, you may have a failing queen.
What’s the best hive for a beginner?
Most beekeepers recommend starting with a Langstroth hive. It’s standardized, well-documented, and easy to get support from other beekeepers. Top bar and Warre hives are also good for naturally minded beginners. See our best hives guide for specific recommendations.
How do I treat Varroa mites?
Monitor mite levels regularly using a sugar roll or alcohol wash. When levels exceed threshold (about 3%), treat with approved products like oxalic acid, formic acid, or thymol. Rotate treatments to prevent resistance. Always follow label instructions.
Can I paint a used beehive?
Yes! Clean the hive thoroughly, scrape off loose paint and propolis, and lightly sand the surface. Apply new paint in light colors. Never paint the interior. See our complete painting guide.
Conclusion: Your Beekeeping Journey Begins Now
Beekeeping is a craft that rewards patience, curiosity, and a willingness to learn from failure. No book or article can fully prepare you for the experience of opening a hive and feeling the vibration of thousands of bees working in harmony. But with the knowledge from this guide, you’re well on your way.
Remember that beekeeping is a journey, not a destination. Your first year will be full of mistakes and surprises. Your second year will be better. By year three, you’ll feel like an old pro. The key is to keep learning, stay humble, and never stop observing.
Here are your next steps:
- Join a local beekeeping club or take a bee school course
- Choose your hive type and location
- Order your equipment and bees for next spring
- Study our detailed guides, starting with how to start beekeeping
- Connect with a mentor who can guide you through your first season
We’ve covered a tremendous amount of ground in this guide. For more in-depth articles on specific topics, explore our resources on best hives, hive construction, hive types, Flow Hive comparisons, and more.

🐝 Start Your Beekeeping Adventure
Ready to begin? Browse top-rated beekeeping kits, hives, and supplies on Amazon. From starter kits to full production equipment, find everything you need.
Shop Beekeeping SuppliesThank you for reading this comprehensive guide. Here’s to sweet harvests and healthy bees! 🍯