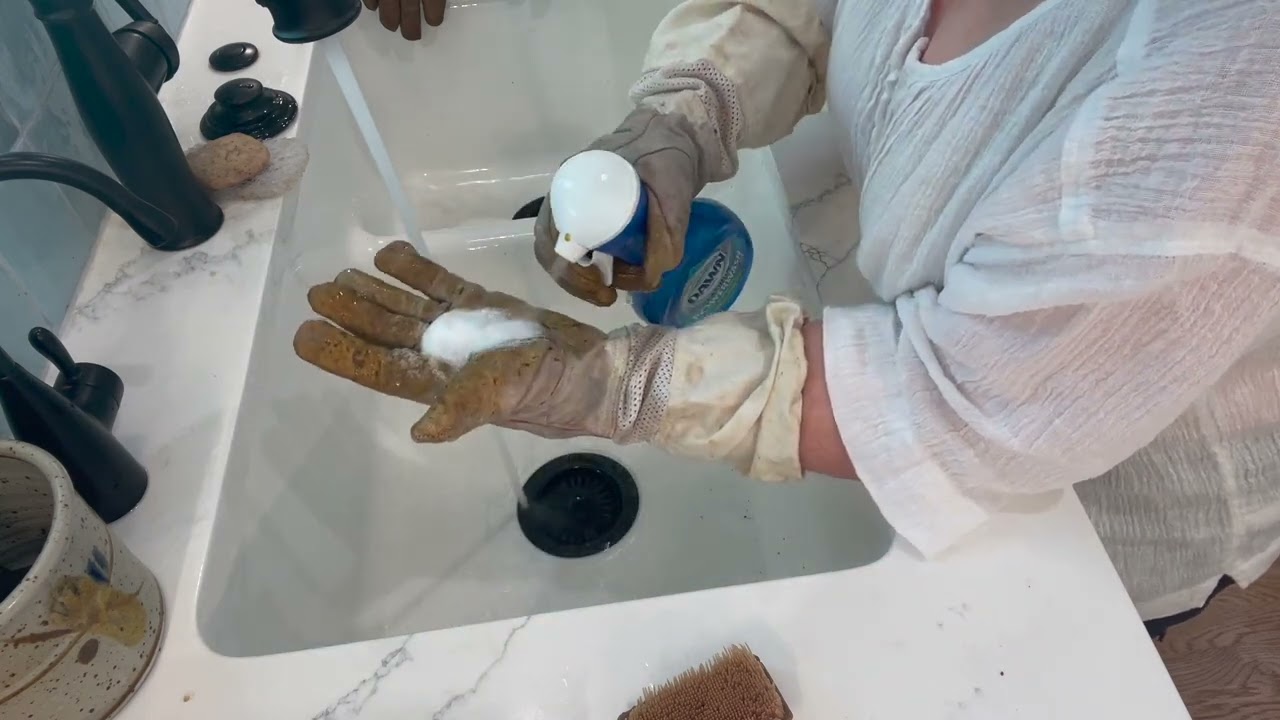
How to clean beekeeping gloves? In the intricate world of beekeeping, where every buzz and dance of the honeybee is a delicate choreography, your gloves become more than just protective gear; they are your trusty companions in the hive. As a beekeeper, the sticky residue of propolis and the traces of sweet honey on your gloves are badges of your adventures. But fear not, for in this guide, we’re diving into the art of cleaning beekeeping gloves, ensuring they remain as fresh and vibrant as your beekeeping journey.
Related: The Enigma of White: Unveiling the Beekeeper’s Attire
How to clean beekeeping gloves? below is a complete step-by-step guide
Step 1: Embrace the Buzzing Ritual
Cleaning your beekeeping gloves is not a chore—it’s a buzzing ritual that connects you to the essence of beekeeping. Start by giving your gloves a gentle shake to release any loose debris. Imagine the bees applauding your dedication to maintaining a clean and healthy hive.
Step 2: The Propolis Prelude
Ah, propolis—the bee glue that seals every crack and crevice in the hive. While it’s a marvel in hive construction, it can be a challenge on your gloves. Begin by scraping off excess propolis with a hive tool or a dull knife. Picture yourself as a beekeeper archaeologist, uncovering the hidden treasures beneath the layers.
Step 3: Suds and Bubbles Symphony
Now, let’s treat your gloves to a spa day. Fill a basin with warm, soapy water—gentle dish soap works wonders. Submerge your gloves and let them soak, allowing the suds to work their magic. This is not just a cleaning process; it’s a symphony of bubbles serenading your gloves back to freshness.
Step 4: The Soft Scrub Ballet
For stubborn spots or lingering stickiness, engage in a soft scrub ballet. Use a soft brush or an old toothbrush to gently scrub away any remaining residues. Envision yourself as a choreographer, orchestrating graceful movements to cleanse your gloves without compromising their integrity.
Step 5: Rinse and Rejoice
Once your gloves have undergone their spa treatment, it’s time to rinse away the suds. Use cool, running water to wash off any soap residue. As you witness the water carrying away the last remnants of your hive adventures, rejoice in the knowledge that your gloves are ready for the next beekeeping ballet.
Step 6: Airy Ballet Finale
Before your gloves take their place on the stage once more, ensure they dry completely. Lay them out in the open air, basking in the sunlight or a gentle breeze. Picture your gloves as prima ballerinas, gracefully stretching and drying in preparation for the grand finale of your beekeeping performances.
Tips for a Glove Encore:
- Regular Maintenance: Clean your beekeeping gloves after each hive inspection to maintain their freshness and effectiveness.
- Rotate Gloves: Consider having multiple pairs of gloves to rotate through. This not only extends the lifespan of your gloves but ensures you always have a clean pair ready for action.
- Storage Elegance: Store your gloves in a well-ventilated area. Avoid dampness and direct sunlight to preserve their quality.
- Glove Inspection: Periodically inspect your gloves for any signs of wear and tear. Mend small issues promptly to avoid larger problems down the line.
Conclusion: Glove Love Forever
Cleaning your beekeeping gloves is not just about hygiene; it’s a gesture of respect for the dance you share with your honeybees. As you go through the steps, imagine the applause of your buzzing companions, acknowledging your commitment to their well-being and the artistry of beekeeping. So, let the glove love continue, and may your beekeeping journey be forever vibrant and sticky-fingered! 🐝🧤✨
Search Term: How to clean beekeeping gloves

